- Testing Basics
- Home
- /
- Learning Hub
- /
- Selenium Grid Tutorial
- -
- October 26 2023
Selenium Grid Tutorial: Guide To Scalable Test Automation With Practical Examples
Unlock efficiency with Selenium Grid's parallel testing capabilities, executing tests across diverse browsers and platforms simultaneously.
OVERVIEW
The digital landscape has revolutionized the way of using web and mobile platforms, significantly influencing the users on how these platforms help make better decisions in several ways. As a result, many software products are trying to provide their users with top-notch digital experiences.
Testing is vital in ensuring that the application meets the development requirements for delivering high-quality applications. That means establishing high internal QA standards and investing in automation testing for faster release cycles and quick developer feedback.
There are a lot of frameworks to choose from while performing automation testing of your web application. However, Selenium is a popular test automation framework that automates web browsers and supports various programming languages.
What is Selenium?
Selenium, an open-source framework for automation testing, offers tools for functional testing on web pages, simulating user interactions, and automating browser activities.
Selenium is adaptable for developing automated tests across numerous platforms and browsers because it supports many programming languages, like Java, Python, JavaScript, Ruby, C#, etc.
Selenium comprises three key components:
- Selenium IDE (Integrated Development Environment): It is a browser extension tool for automated testing of web applications. It provides a user-friendly record-and-playback interface for creating automated test scripts.
- Selenium WebDriver: It is a group of open-source APIs used to automate online application testing. It enables developers and testers to programmatically interact with web elements and perform actions like clicking buttons, filling out forms, and navigating web pages.
- Selenium Grid: It is a distributed parallel testing tool. It enables parallel test execution across browsers, operating systems, and machines. It facilitates the efficient use of resources for large-scale testing.
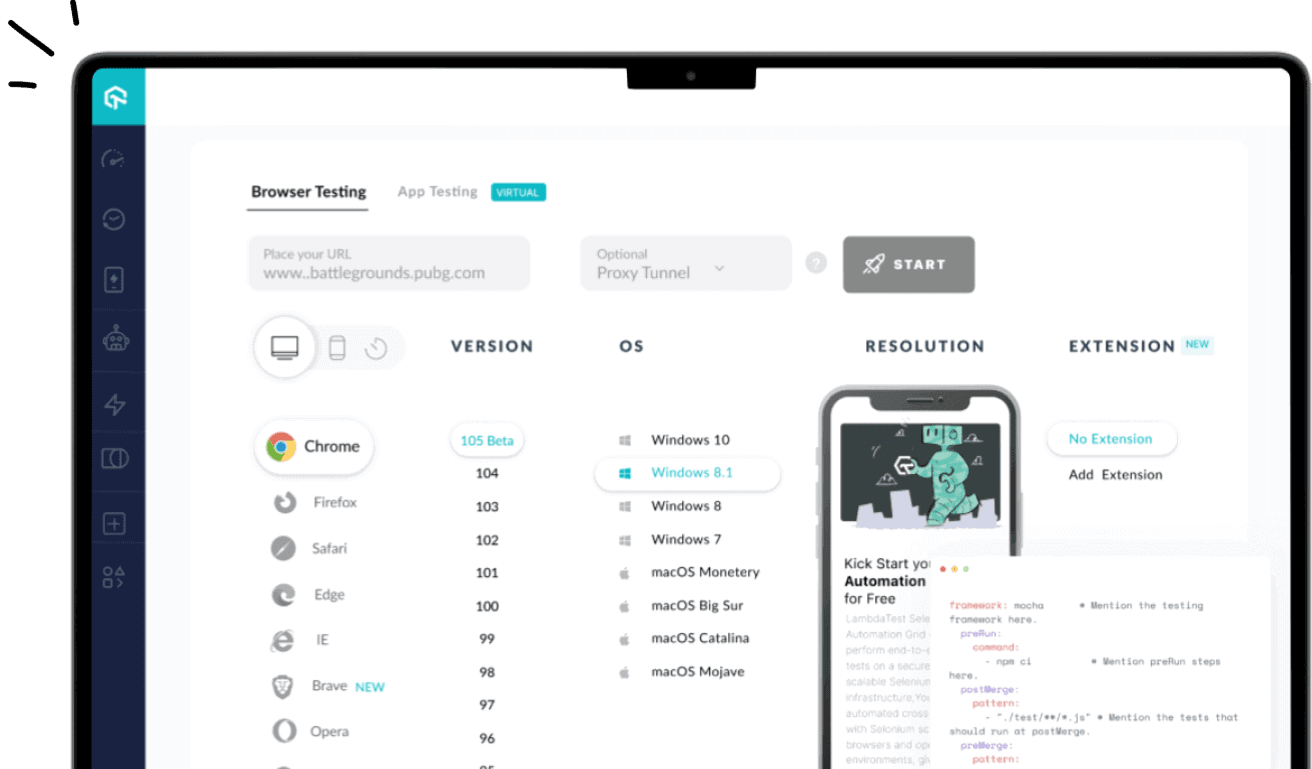
Note : Turn Testing Complexity Into Simplicity — Choose LambdaTest for a Selenium based cloud grid and run your tests over 3000 real browsers and devices! Try LambdaTest Now!
What is Selenium Grid?
A smart proxy server called Selenium Grid makes it simple to run tests simultaneously on several computers and manages various browser setups and versions centrally (instead of separately in individual tests). It is a component of the automation testing framework that allows parallel testing against various browsers and combinations of operating systems through a Client-Server model.
To know what changes have been made from Selenium Grid 3 to Selenium 4, refer to Selenium 3 vs Selenium 4.
Features of Selenium Grid
Listed are the features of Selenium Grid that you must know if you intend to get started.
- Multiple Configuration Support: Selenium supports several configurations and includes all the main operating systems and web browsers. These configurations, which include older OS and browser versions scattered over several nodes, allow the tester to run their tests.
- Language Support: Selenium Grid 4 has a wide range of language support, such as Java, C#, Ruby, Python, and JavaScript, allowing you to create distributed test cases in your chosen language without learning a new one.
- Parallelism: It allows testers to test cases concurrently at separate nodes. However, TestNG support is necessary for this.
- Cloud Execution: Selenium Grid takes the execution of tests to the cloud to help save local resources and use a dependable and stable infrastructure.
Learn about Selenium 4 New Features and Improvements from our detailed video:
Components of Selenium Grid
Various components of the Selenium Grid serve different purposes. In this section, we will look at each component and its usage.
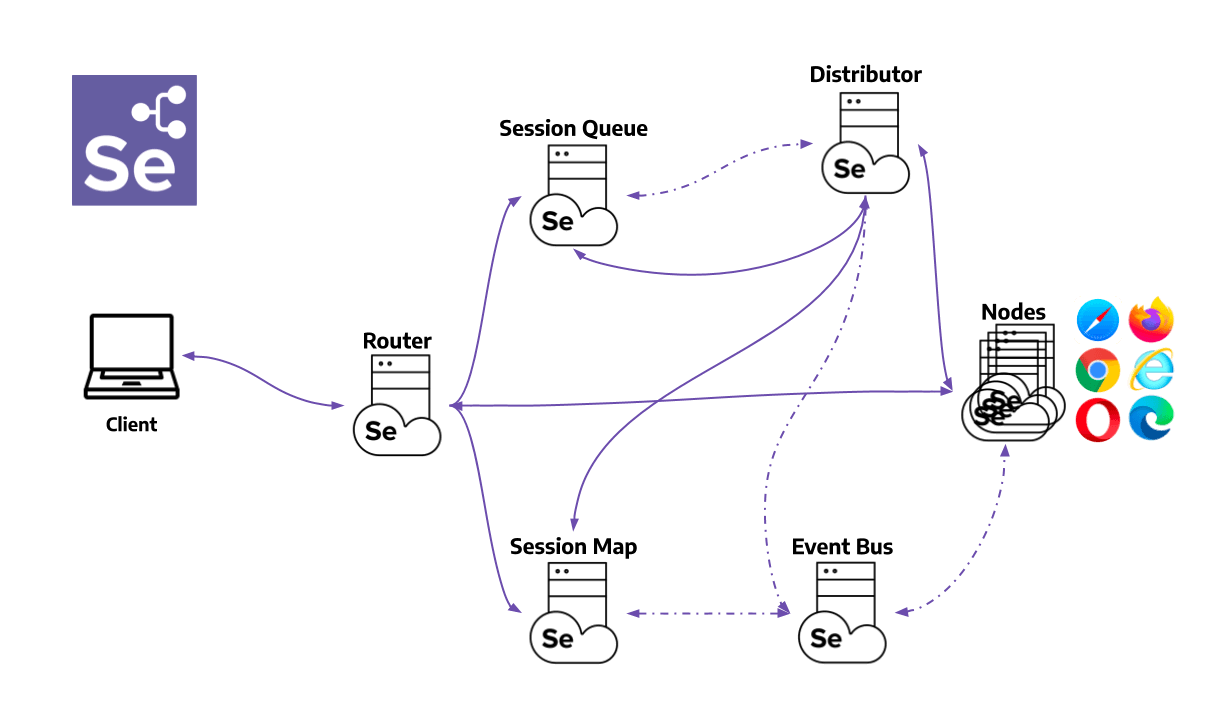
The key components of Selenium Grid are:
- Router: It serves as the initial point of contact for the Grid, receiving all incoming requests from external sources and then directing them to the appropriate component for processing.
- Distributor: The Distributor in Selenium Grid manages Node registrations and capabilities tracking. It verifies node existence upon registration events and updates the Grid Model accordingly. Additionally, it processes pending new session requests from the New Session Queue, assigning suitable nodes for session creation and maintaining session-node relations in the Session Map.
- Session Map: It acts as a repository, storing the connection between the Session ID and the specific Node where the session is in progress. It aids the Router in efficiently directing requests to the correct Node.
- New Session Queue: It is a component in the system that holds incoming session requests in a specific order, known as first-in-first-out (FIFO). It has customizable settings for managing request timeouts and intervals for retrying requests. This queue ensures organized processing of session requests and helps maintain efficient resource allocation within the system. A request is automatically rejected and removed from the queue if it exceeds its designated timeout period.
- Node: It is responsible for executing automated tests within a distributed network. Node are part of a grid of interconnected machines, each with distinct configurations, and they must be registered with the Distributor, providing their specific configurations. This registration enables the grid to assign test requests that match those configurations to the appropriate node for execution.
- Event Bus: It serves as a path for communication between the Node, Distributor, New Session Queue, and Session Map. The Grid avoids costly HTTP calls by conducting most of its internal communication through messages. The Event Bus should be launched initially when the Grid is first started in fully distributed mode.
Before proceeding with the execution of test scripts on Selenium Grid. Let’s go through the setup process to ensure everything is properly configured.
How to Download and Setup Selenium Grid?
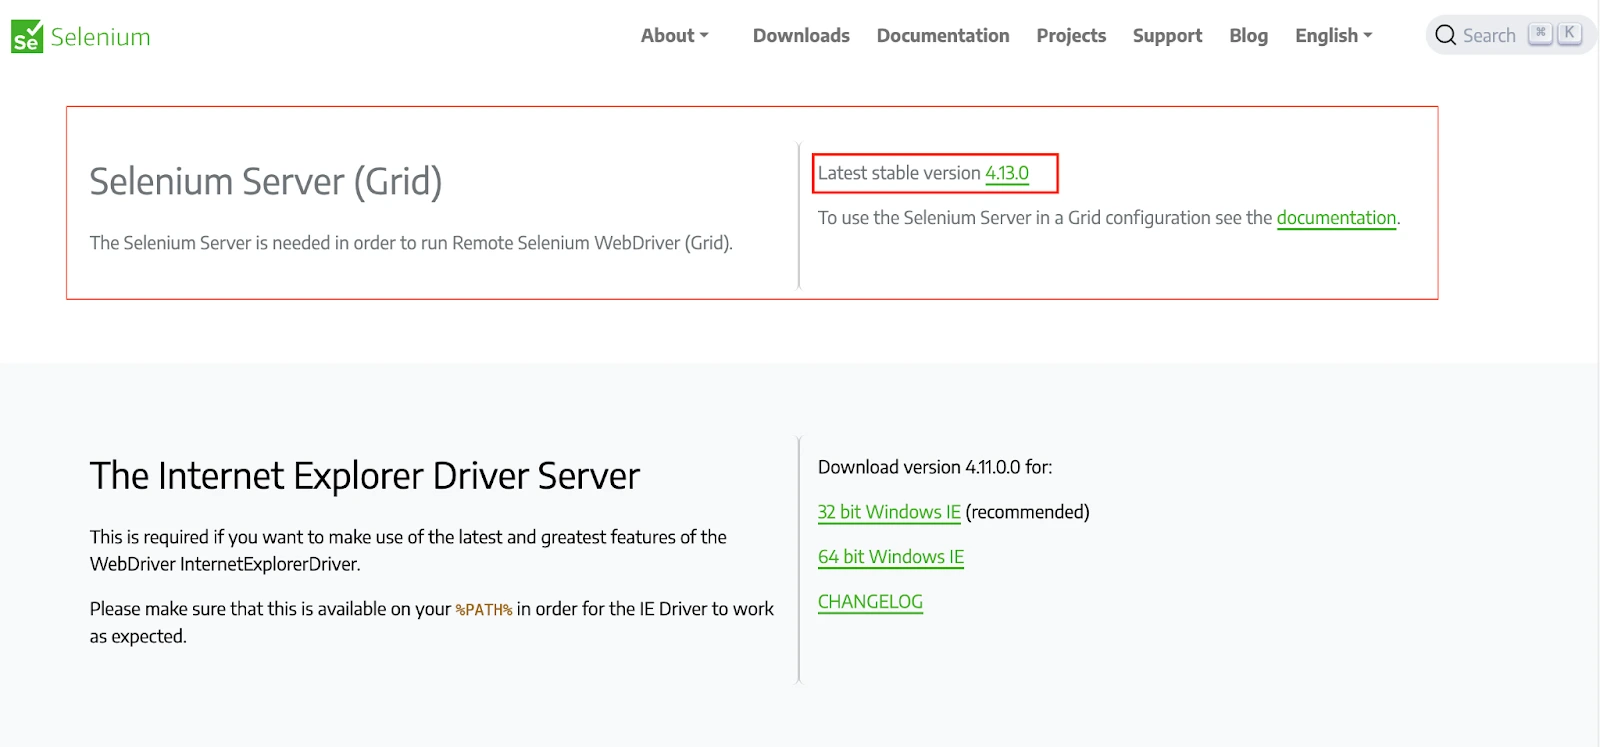
The latest version of Selenium Grid 4.13.0 was released on the 25th of September 2023. For demonstration, we will use Selenium Grid version 4.13.0, which is more stable than the other versions. It offers the advantage of the latest technologies to facilitate scaling up while letting users perform Selenium test automation.
Prerequisites
To set up Selenium Grid, we will need to ensure we have the following prerequisites:
- We must ensure that our system has Oracle JDK (Java Development Kit) or OpenJDK (Open Java Development Kit) installed.
- We must have browsers installed on our system.
- We must have Eclipse IDE or IntelliJ IDE for running test scripts. You may consider checking out our blog on Download Selenium and Set It Up On Multiple IDEs.
- Set up the TestNG framework in the IDE for running test scripts. Consider checking out the tutorial video on TestNG from the official YouTube channel of LambdaTest.
Download and extract the Selenium Server (Grid) JAR files to start with the Selenium Grid.
Selenium Grid can be set up in the following modes:
- Standalone
- Hub and Node
- Distributed
We will now see the working of Selenium Grid in each mode.
Standalone
Standalone is a single-node Grid where all of the Grid components are running on the same machine. This is the easiest way to get started with Selenium Grid but also the least scalable and flexible. When we run a Grid in Standalone mode, it provides a complete and operational Grid environment using just one command, all within a single process.
The command to start the Selenium Grid in standalone mode:
java -jar selenium-server-<version>.jar standalone
NOTE: replace <version> with the latest version of the Selenium Server (Grid) file. Selenium Manager will configure the drivers automatically if you add --selenium-manager true.
Hub and Node
The Hub and Node roles in Selenium Grid are essential for combining machines in a single Grid, including varying operating systems and browser versions. They establish a centralized entry point for running WebDriver tests across different environments.
Hub
The first step of a Selenium Grid setup would be to create a hub. Open a command prompt or terminal and navigate to the directory where the Selenium Standalone Server jar file is saved.
Run the below command to start the hub.
java -jar selenium-server-<version>.jar hub
NOTE: replace <version> with the latest version of the Selenium Server (Grid) file.
Node
Open a command prompt or terminal in the node machine and navigate to the directory where we have created our project.
java -jar selenium-server-<version>.jar node
NOTE: replace <version> with the latest version of the Selenium Server (Grid) file.
We may face an error to add “--selenium-manager true”, which is used for the automatic setup of the driver for Selenium. Selenium Manager is a command-line utility written in Rust that offers automated driver and browser administration for Selenium. We don't need to download it, add anything to the code, or take any other action to use it because Selenium bindings already use it by default.
Run the below command to start the node.
java -jar selenium-server-<version>.jar node --selenium-manager true
NOTE: replace <version> with the latest version of the Selenium Server (Grid) file.
We must specify the port to start the node if we want to run more than one node on a single machine. Suppose we have two nodes; we will use ports 5555 and 7777 to start both nodes.

NOTE: replace <version> with the latest version of the Selenium Server (Grid) file. XXXX represents the port number.
Node 1:
java -jar selenium-server-<version>.jar node --port 5555Node 2:
java -jar selenium-server-<version>.jar node --port 7777Distributed
In a Distributed Grid setup, each component is initiated independently, preferably on distinct machines for optimized performance and resource utilization.
1. Event Bus: It facilitates communication among various components within the Grid components. The default ports of Event Bus are 4442, 4443, and 5557.
java -jar selenium-server-<version>.jar event-bus --publish-events tcp://<event-bus-ip>:4442 --subscribe-events tcp://<event-bus-ip>:4443 --port 55572. New Session Queue: It places new session requests into a queue, which the Distributor will later check and process. The default port is 5559.
java -jar selenium-server-<version>.jar sessionqueue --port 5559
NOTE: replace <version> with the latest version of the Selenium Server (Grid) file. Also don’t forget to mention the port number represented by XXXX.
3. Session Map: It links Session IDs to the specific Node where the session is active. The default port no. is 5556. The command to start the Session Map is:-
tcp://<event-bus-ip>:4442 --subscribe-events tcp://<event-bus-ip>:4443 --port 5556java -jar selenium-server-<version>.jar sessions --publish-events 
NOTE: replace <event-bus-ip> with the IP address of the event bus. Also don’t forget to mention the port number represented by XXXX.
4. Distributor: This step involves identifying the suitable node for test execution. The default port no. is 5553. The command to start the distributor is:-
java -jar selenium-server-<version>.jar distributor --publish-events tcp://<event-bus-ip>:4442 --subscribe-events tcp://<event-bus-ip>:4443 --sessions http://<sessions-ip>:5556 --sessionqueue http://<new-session-queue-ip>:5559 --port 5553 --bind-bus false
NOTE: replace <event-bus-ip> with the IP address of the event bus, <sessions-ip> with the IP address of the session IP address, and <new-session-queue-ip> with the IP address of the session queue. Also don’t forget to mention the port number, represented by XXXX.
5. Router: It actively monitors incoming new session requests. The default port no. is 4444. The command to start the router is:-
java -jar selenium-server-<version>.jar router --sessions http://<sessions-ip>:5556 --distributor http://<distributor-ip>:5553 --sessionqueue http://<new-session-queue-ip>:5559 --port 4444
NOTE: replace <distributor-ip>with the IP address of the session queue. Also don’t forget to mention the port number, represented by XXXX.
6. Node: The test machine is where the actual execution of the test occurs. The default port no. is 5555. The command to start the node is:-
java -jar selenium-server-<version>.jar node --publish-events tcp://<event-bus-ip>:4442 --subscribe-events tcp://<event-bus-ip>:4443
Now we are aware of different modes of Selenium Grid. Let’s explore how to use each command by running test scripts.
Using Selenium Grid to Run Test Scripts
In this part, we will see different modes to run the test on Selenium Grid in detail.
The test case for explaining the usage is:-
- Navigate to the URL: LambdaTest E-commerce
- Locate the Search Bar.
- Enter the key iphone in the Search Bar.
We will see the implementation to run the test on Selenium Grid.
Demo.java file
package project;

import java.net.MalformedURLException;
import java.net.URL;
import java.time.Duration;
import org.openqa.selenium.By;
import org.openqa.selenium.Capabilities;
import org.openqa.selenium.WebDriver;
import org.openqa.selenium.chrome.ChromeOptions;
import org.openqa.selenium.remote.RemoteWebDriver;
import org.testng.annotations.AfterMethod;
import org.testng.annotations.BeforeMethod;
import org.testng.annotations.Test;

public class Demo {
	protected static ThreadLocal<RemoteWebDriver> driver = new ThreadLocal<RemoteWebDriver>();
	public static String remote_url = "http://localhost:4444/";
	public Capabilities capabilities;

	@BeforeMethod
	public void setDriver() throws MalformedURLException {
		// Setting the Browser Capabilities
		capabilities = new ChromeOptions();

		driver.set(new RemoteWebDriver(new URL(remote_url), capabilities));
		// Directing to the Testing Website
		driver.get().get("https://ecommerce-playground.lambdatest.io/");
		// Maximizing the Window
		driver.get().manage().window().maximize();
		driver.get().manage().timeouts().pageLoadTimeout(Duration.ofSeconds(10));
		}

	public WebDriver getDriver() {
		return driver.get();
		}
	@Test
	public void validCredentials() {
		getDriver().findElement(By.name("search")).sendKeys("iphone");
		}


	@AfterMethod
	// To quit the browser
	public void closeBrowser() {
		driver.get().quit();
		driver.remove();
		}
	}
pom.xml file
<project xmlns="http://maven.apache.org/POM/4.0.0" xmlns:xsi="http://www.w3.org/2001/XMLSchema-instance"
  xsi:schemaLocation="http://maven.apache.org/POM/4.0.0 http://maven.apache.org/xsd/maven-4.0.0.xsd">
  <modelVersion>4.0.0</modelVersion>

  <groupId>Lambdatest</groupId>
  <artifactId>Project</artifactId>
  <version>0.0.1-SNAPSHOT</version>
  <packaging>jar</packaging>
  <name>Project</name>
  <url>http://maven.apache.org</url>

  <properties>
    <project.build.sourceEncoding>UTF-8</project.build.sourceEncoding>
  </properties>

  <dependencies>
    <dependency>
      <groupId>junit</groupId>
      <artifactId>junit</artifactId>
      <version>3.8.1</version>
      <scope>test</scope>
    </dependency>

    <dependency>
    <groupId>org.seleniumhq.selenium</groupId>
    <artifactId>selenium-manager</artifactId>
    <version>4.13.0</version>
    </dependency>

<!-- https://mvnrepository.com/artifact/org.seleniumhq.selenium/selenium-chrome-driver -->
	<dependency>
    <groupId>org.seleniumhq.selenium</groupId>
    <artifactId>selenium-chrome-driver</artifactId>
    <version>4.13.0</version>
	</dependency>

	<dependency>
    <groupId>org.seleniumhq.selenium</groupId>
    <artifactId>selenium-remote-driver</artifactId>
    <version>4.13.0</version>
	</dependency>


<!-- https://mvnrepository.com/artifact/org.testng/testng -->
	<dependency>
    <groupId>org.testng</groupId>
    <artifactId>testng</artifactId>
    <version>7.8.0</version>
    <scope>test</scope>
	</dependency>
  </dependencies>
</project>
testng.xml file
<?xml version="1.0" encoding="UTF-8"?>
<!DOCTYPE suite SYSTEM "https://testng.org/testng-1.0.dtd">
<suite name="Suite">

   <test thread-count="5" name="Chrome Test">
    <parameter name ="browser" value="chrome"/>
    <classes>
      <class name="project.Demo"/>
    </classes>
  </test>  <!-- Test -->
</suite> <!-- Suite -->
Code Walkthrough
we create a package with the name project.
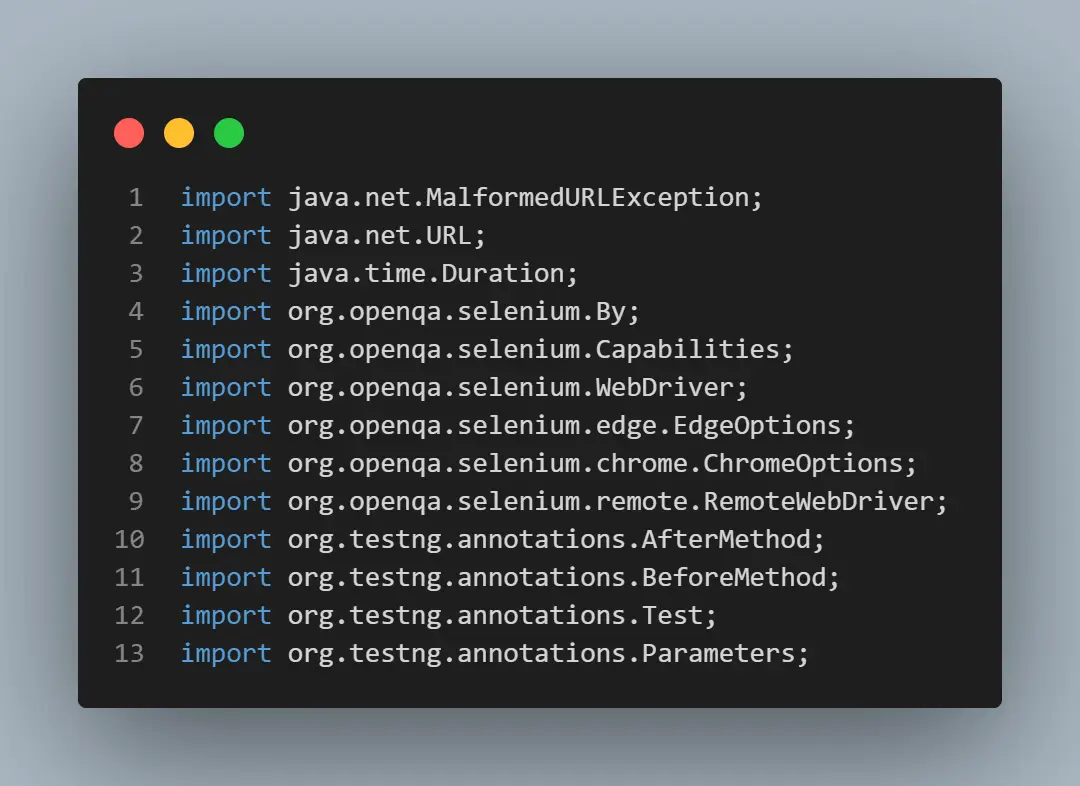
We will import all the necessary libraries, such as WebDriver, WebDriverWait, etc., to perform parallel testing using Selenium Grid.
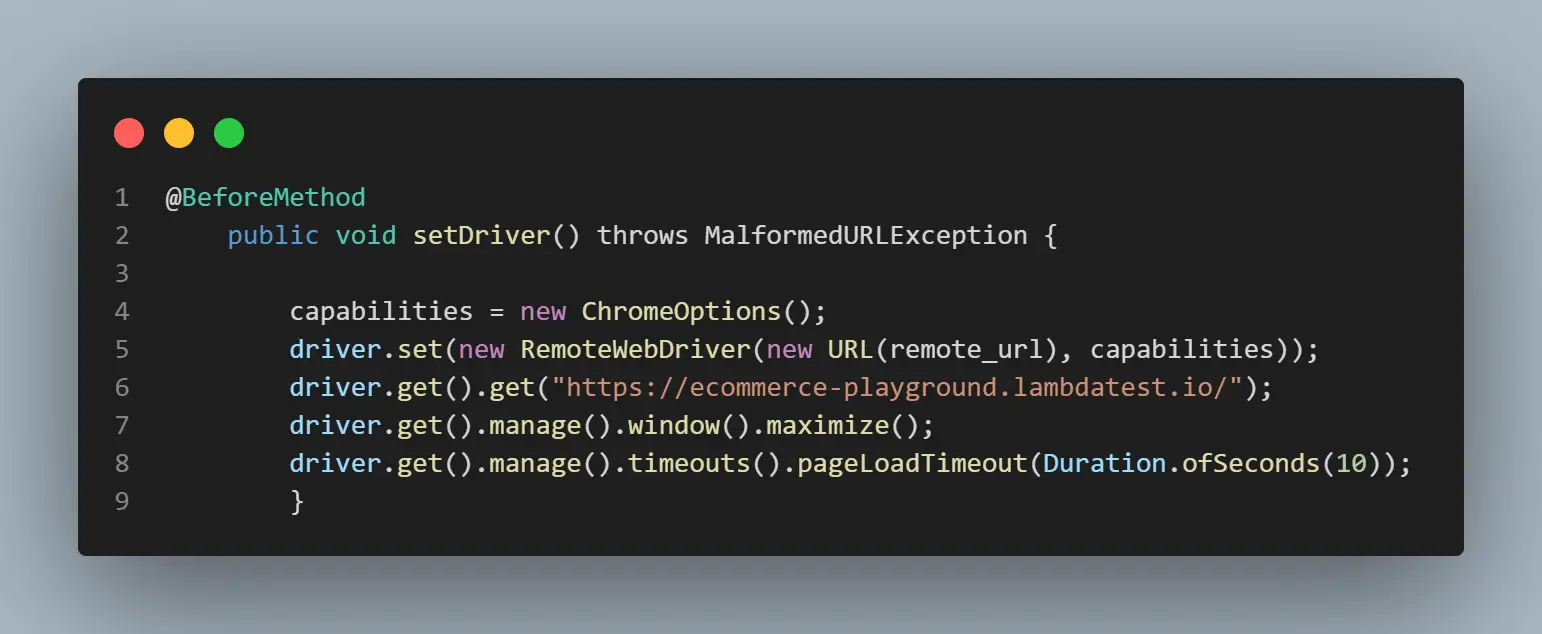
The code under @BeforeMethod annotation sets the browser capabilities for Chrome Browser. A RemoteWebDriver instance is established and executed on Selenium Grid, with the Hub Address set to http://localhost:4444. The driver navigates to the Testing site, maximizes the window, and manages the page load timeout.
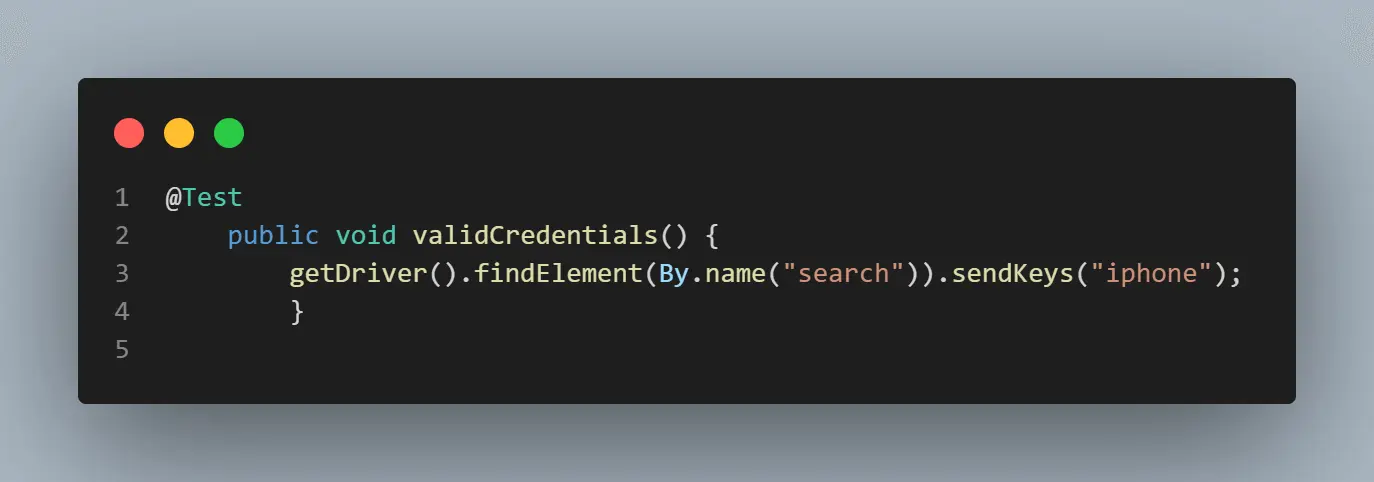
The test case is executed under @Test annotation. Using the CSS element, we will locate the search bar and send the key iphone.
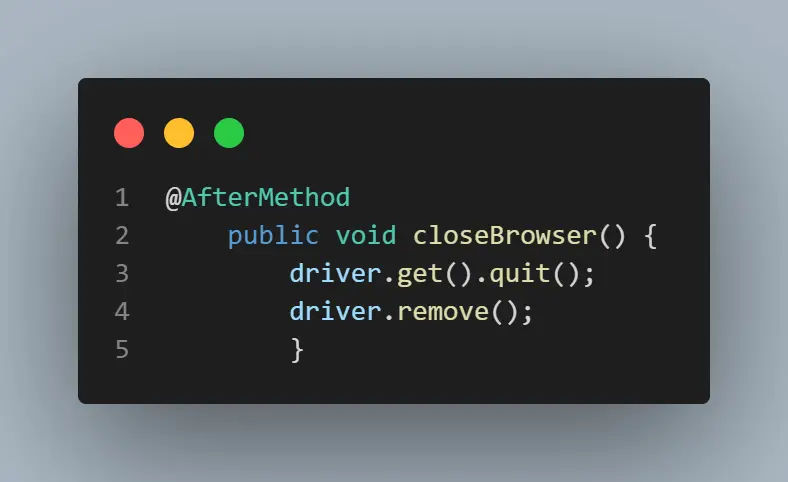
The code under the @AfterMethod annotation is used to quit the browser.
We will perform the test with the same code on distinct Grid configurations, encompassing Standalone Selenium Grid, Classical(Hub and Node) Selenium Grid, and Fully Distributed Selenium Grid.
Standalone Selenium Grid
When operating in Standalone mode, the Selenium server handles all tasks within a single process.
To initiate it, simply execute the following command in the terminal:
java -jar selenium-server-4.13.0.jar standalone --selenium-manager trueSelenium Grid will automatically identify the web browsers present on the system. Run the above command to start the standalone Grid.
Console Output:

The server is actively listening at http://localhost:4444/, matching the address specified in the configuration of the Remote WebDriver. The Chrome WebDriver is successfully registered within the Grid when the test code is executed.
Run the test code to check whether the test case passes or fails.
Output:

Also, get the Session ID on the command line terminal and confirm whether the session is created by visiting http://localhost:4444/status.
Console Output:

We can see the session in the above output, and it is the same as created on http://localhost:4444/status.
"sessionId": "e62abeb4ff22c5a162a95ec896df7962",
              "start": "2023-09-29T03:56:01.197573200Z",

              "stereotype": {
                "browserName": "chrome",
                "goog:chromeOptions": {
                  "args": [
                    "--remote-allow-origins=*"
                  ]
                },
                "platformName": "Windows 10"
              },
              "uri": "http://192.168.43.189:4444"
            },
            "stereotype": {
              "browserName": "chrome",
              "goog:chromeOptions": {
                "args": [
                  "--remote-allow-origins=*"
                ]
              },
              "platformName": "Windows 10"
            }
          }
Hub and Node Selenium Grid
Selenium test automation uses the Grid and comprises two key components, namely the Hub and multiple Nodes. If the Hub and Nodes are hosted on the same machine, we can initiate them using the provided commands:
Run the following command to start the Hub:
java -jar selenium-server-4.13.0.jar hub
Console Output:

Run the following command to start the Node.
java -jar selenium-server-4.13.0.jar node --selenium-manager true
Once the Hub is initiated, it establishes XPUB and XSUB sockets that bind to tcp://0.0.0.0:4442 and tcp://0.0.0.0:4443 respectively.
Console Output:

After initiating the node with the provided command, it connects to the same address (tcp://0.0.0.0:4442 and tcp://0.0.0.0:4443). The option '--selenium-manager true' automatically identifies the Selenium WebDrivers available in the system. Upon instantiating the Chrome WebDriver instance, it promptly registers itself on the Grid.
Console Output:

Now, again, if we run the test code, we will see the session with the Session ID was created.
Console Output:

We can again see the session in the above output, and it is the same as created on http://localhost:4444/status.
"sessionId": "b087597624261818493b12f6b2f12945",
              "start": "2023-09-29T04:18:31.669923700Z",

              "stereotype": {
                "browserName": "chrome",
                "goog:chromeOptions": {
                  "args": [
                    "--remote-allow-origins=*"
                  ]
                },
                "platformName": "Windows 10"
              },
              "uri": "http://192.168.43.189:4444"
            },
            "stereotype": {
              "browserName": "chrome",
              "goog:chromeOptions": {
                "args": [
                  "--remote-allow-origins=*"
                ]
              },
              "platformName": "Windows 10"
            }
          }
Distributed Selenium Grid
Step 1: Start the Event Bus
The command to start the Event Bus is:-
java -jar selenium-server-4.13.0.jar event-bus --port 5557e
Console Output:

Step 2: Start the Session Queue
The command to start the Session Queue is:-
java -jar selenium-server-4.13.0.jar sessionqueue --port 5559
Console Output:

Step 3: Start the Sessions Map:
The command to start the sessions map is:-
java -jar selenium-server-4.13.0.jar sessions
Console Output:

Step 4: Start the Distributor
The command to start the Distributor is:-
java -jar selenium-server-4.13.0.jar distributor --publish-events tcp://<event-bus-ip>:4442 --subscribe-events tcp://<event-bus-ip>:4443 --sessions http://<sessions-ip>:5556 --sessionqueue http://<new-session-queue-ip>:5559 --port 5553 --bind-bus false
Note: Specify the <event-bus-ip> , <sessions-ip>, <new-session-queue-ip> from the above commands.
Console Output:

Step 5: Start the Router
The command to start the Router is:-
java -jar selenium-server-4.13.0.jar router --sessions http://<sessions-ip>:5556 --distributor http://<distributor-ip>:5553 --sessionqueue http://<new-session-queue-ip>:5559 --port 4444
Note: Specify the <sessions-ip>, <distributor-ip>, <new-session-queue-ip> from the above commands.
Console Output:

Step 6: Start the Node
The command to start the Node is:-
java -jar selenium-server-4.13.0.jar node --publish-events tcp://<event-bus-ip>:4442 --subscribe-events tcp://<event-bus-ip>:4443
Note: Specify the <event-bus-ip> from the above commands.
Console Output:

Now, run the test scripts, and we will see the session with the Session ID was created.

Now, that we have understood how to run test scripts in Selenium Grid, let’s go through how to use Selenium Grid for parallel execution.
How to Use Selenium Grid for Parallel Execution?
We will run an automation script demonstrating the Selenium testing Grid for parallel execution. This script would run parallel on Chrome and Microsoft Edge, registered on different ports, and attached to a single hub. We can do parallel testing on multiple browsers, such as Chrome and Microsoft Edge.
There are two steps to set up Selenium Grid for parallel automation testing.
Step 1: Creating a hub.
Step 2: Defining the nodes and connecting to that hub.
Note: Ensure the hub and node run on a local host before parallel automation testing, as seen in the above section.
We are using Eclipse IDE for testing. We will first create a test code to establish a connection to the Selenium RemoteWebDriver to start a Remote WebDriver client. We achieve this by referring the URL to the location of the server hosting our tests. We specify the desired capabilities to alter our settings.
The example of creating a remote WebDriver object below points to the remote web server where our tests run on Chrome and Edge. To pass the browser names to the tests, we use the @Parameters Annotation.
DemoClass.java file
package project

import java.net.MalformedURLException;
import java.net.URL;
import java.time.Duration;
import org.openqa.selenium.By;
import org.openqa.selenium.Capabilities;
import org.openqa.selenium.WebDriver;
import org.openqa.selenium.edge.EdgeOptions;
import org.openqa.selenium.chrome.ChromeOptions;
import org.openqa.selenium.remote.RemoteWebDriver;
import org.testng.annotations.AfterMethod;
import org.testng.annotations.BeforeMethod;
import org.testng.annotations.Test;
import org.testng.annotations.Parameters;

public class DemoClass {
protected static ThreadLocal<RemoteWebDriver> driver = new ThreadLocal<RemoteWebDriver>();
public static String remote_url = "http://localhost:4444/";
public Capabilities capabilities;

@Parameters({"browser"})
@BeforeMethod
public void setDriver(String browser) throws MalformedURLException {
// Setting the Browser Capabilities
System.out.println("Test is running on "+browser);
if (browser.equals("chrome")) {
capabilities = new ChromeOptions();
}
else if (browser.equals("edge")) {
capabilities = new EdgeOptions();
}
driver.set(new RemoteWebDriver(new URL(remote_url), capabilities));
// Directing to the Testing Website
driver.get().get("https://ecommerce-playground.lambdatest.io/");
// Maximizing the Window
driver.get().manage().window().maximize();
driver.get().manage().timeouts().pageLoadTimeout(Duration.ofSeconds(10));
}

public WebDriver getDriver() {
return driver.get();
}
@Test
public void validCredentials() {
getDriver().findElement(By.name("search")).sendKeys("iphone");
}


@AfterMethod
// To quit the browser
public void closeBrowser() {
driver.get().quit();
driver.remove();
}
}
The above java class file is configured with the XML file includes the values of parameters passed in the java file and also helps create a suite of different classes that would run in a parallel manner.
testng.xml file
<?xml version="1.0" encoding="UTF-8"?>
<!DOCTYPE suite SYSTEM "https://testng.org/testng-1.0.dtd">
<suite name="Suite">
<test thread-count="5" name="Chrome Test">
<parameter name ="browser" value="chrome"/>
<classes>
<class name="project.DemoClass"/>
</classes>
</test> <!-- Test -->
<test thread-count="5" name="Edge Test">
<parameter name ="browser" value="edge"/>
<classes>
<class name="project.DemoClass"/>
</classes>
</test> <!-- Test -->
</suite> <!-- Suite -->
Run the testng.xml file by right-clicking on it, and selecting Run AS > TestNG Suite.
Output Screen:
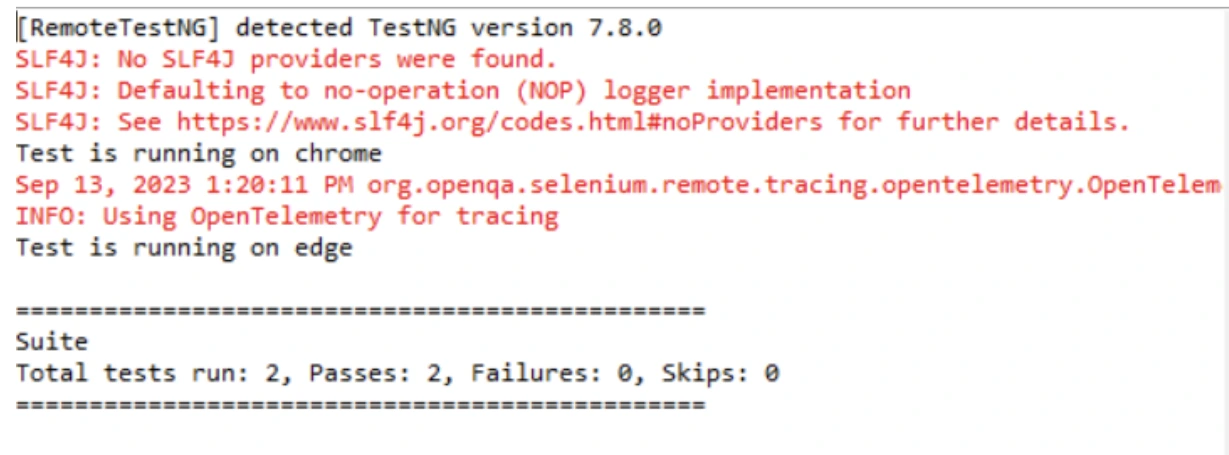
Code Walkthrough:
We will create a class DemoClass inside the package project and for thread safe execution, we will use ThreadLocalMap. Also, we will create a variable that will store url of the hub.

We will create a setDriver() to set the capabilities according to the browser navigate to the testing website and maximize the window.
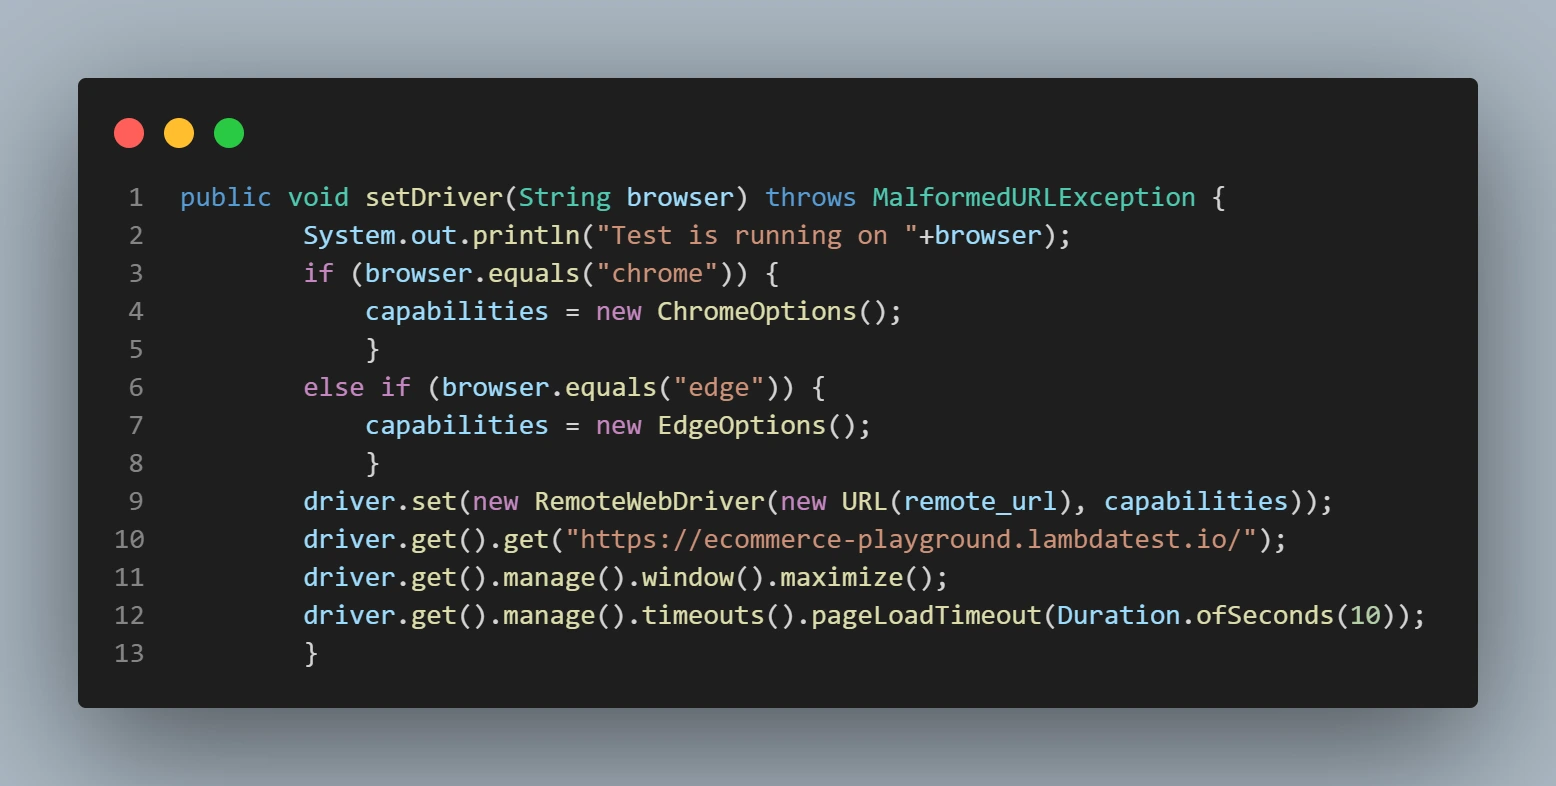
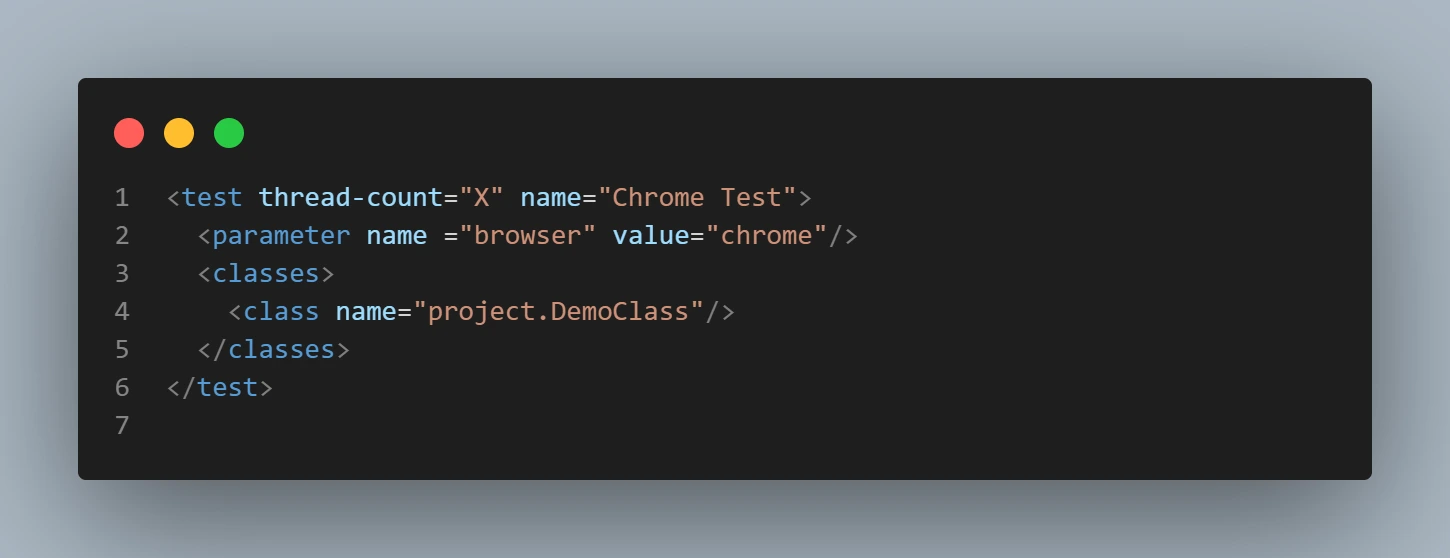
According to the capabilities of the system and the testing requirements, thread-count in the testng.xml file enables the handling of X numbers of parallel threads for the given tests.
Before proceeding to parallel execution on Cloud Grid. We will see why it is important to know the need for Cloud Grid for running multiple test scripts.
Why do we Need a Cloud Grid?
Suppose, we want to run multiple test scripts so they can be run on multiple browsers currently installed on the test machine. If we try running our test on the Chrome 72 version and only have the Chrome 74 version installed on our test machine, then our test script will show an error. This same scenario occurs when we opt for a different operating system compared to the operating system of our test machines.
In addition, investing in new Mac and Windows environments is quite expensive every time a new OS is launched. So, we may want to perform automated cross-browser testing on different browsers, browser versions, and operating systems. In that case, we mainly use Cloud Grid.
A cloud grid gives users access to various real and virtual machines, each with its own configuration, operating system, and web browser. This guarantees accurate testing in various situations, an essential component of reliable software development. Additionally, Cloud providers typically offer high availability and redundancy, reducing the likelihood of downtime during testing.
We recommend looking for a tool that offers Selenium Grid setup on-cloud, such as LambdaTest. It saves us from the hassle of maintaining our Selenium Grid setup, so we can focus on writing better automation code. LambdaTest also empowers us with the ability of Selenium Grid for parallel execution, all on the cloud.
Difference Between Selenium Grid and Cloud Grid
Let’s compare Selenium Grid vs. Cloud Grid to differentiate between their features.
| Features | Selenium Grid | Cloud Grid |
|---|---|---|
| Configuration | Requires Manual Setup | Offers Automated Scaling |
| Deployment | On-Premises | Cloud-Based |
| Scalability | Limited by Available Machines | Virtually Unlimited |
| Concurrency and Parallelism | Limited by available local machines | Offers extensive parallelism and concurrency options |
| Operating System Compatibility | Limited to the local network's OS availability | Supports a wide range of operating systems |
| Browser Variety | Limited to Local Resources | Offers Wide Browser Coverage |
| Resource Control | Limited to Local Network | Accessible Globally |
| Maintenance | Requires In-House Management | Managed by Cloud Provider |
| Geographic Reach | Local or Limited to Specific Data Centers | Global Availability |
| Redundancy and Failover | Reliant on local backup solutions and redundancy strategies | Often includes built-in redundancy and failover capabilities provided by the cloud service |
Running the Earlier Test Over Cloud Selenium Grid
LambdaTest, an AI-powered test orchestration and execution platform. It offers a cloud Selenium Grid to help us automate browser testing in parallel. We could also integrate our LambdaTest account with numerous CI/CD tools, project management tools, codeless automation tools, etc., for a faster go-to-market launch. Check out all of the LambdaTest integrations. Even perform live interactive real-time cross-browser and responsive testing of our web app/ website.
Follow these easy steps before running a Java test on LambdaTest:
- Create an account on LambdaTest.
- Click the dashboard button in the top right corner to access the dashboard, Follow this LambdaTest Dashboard.
- Get the login information by clicking the profile symbol in the top right corner, then choose the profile option. To the profile screen, it will reroute. Under Password & Security, we can retrieve and save our Username and Access Key for later use or use this Profile link.
We will only modify the DemoClass java file. Below is the Java code in the TestNG framework that would be more beneficial in this scenario.
DemoClass.java file
package project;

import java.net.MalformedURLException;
import java.net.URL;
import java.time.Duration;
import org.openqa.selenium.By;
import org.openqa.selenium.Capabilities;
import org.openqa.selenium.WebDriver;
import org.openqa.selenium.edge.EdgeOptions;
import org.openqa.selenium.chrome.ChromeOptions;
import org.openqa.selenium.remote.RemoteWebDriver;
import org.testng.annotations.AfterMethod;
import org.testng.annotations.BeforeMethod;
import org.testng.annotations.Test;
import org.testng.annotations.Parameters;

public class DemoClass {
public String username = "username";
public String accesskey = "accesskey";
public String gridURL = "@hub.lambdatest.com/wd/hub";

protected static ThreadLocal<RemoteWebDriver> driver = new ThreadLocal<RemoteWebDriver>();
public static String remote_url = "http://localhost:4444/";
public Capabilities capabilities;

@Parameters({"browser"})
@BeforeMethod
public void setDriver(String browser) throws MalformedURLException {
// Setting the Browser Capabilities
System.out.println("Test is running on "+browser);
if (browser.equals("chrome")) {
capabilities = new ChromeOptions();
}
else if (browser.equals("edge")) {
capabilities = new EdgeOptions();
}
driver.set(new RemoteWebDriver(new URL("https://" + username + ":" + accesskey + gridURL), capabilities));
// Directing to the Testing Website
driver.get().get("https://ecommerce-playground.lambdatest.io/");
// Maximizing the Window
driver.get().manage().window().maximize();
driver.get().manage().timeouts().pageLoadTimeout(Duration.ofSeconds(10));
}

public WebDriver getDriver() {
return driver.get();
}
@Test
public void validCredentials() {
getDriver().findElement(By.name("search")).sendKeys("iphone");
}


@AfterMethod
// To quit the browser
public void closeBrowser() {
driver.get().quit();
//driver.remove();
}
}
The testng,xml file will also be the same as we have done on the local server. So, we didn’t need to modify it will be as usual.
testng.xml file
<?xml version="1.0" encoding="UTF-8"?>
<!DOCTYPE suite SYSTEM "https://testng.org/testng-1.0.dtd">
<suite name="Suite">
<test thread-count="5" name="Chrome Test">
<parameter name ="browser" value="chrome"/>
<classes>
<class name="project.DemoClass"/>
</classes>
</test> <!-- Test -->
<test thread-count="5" name="Edge Test">
<parameter name ="browser" value="edge"/>
<classes>
<class name="project.DemoClass"/>
</classes>
</test> <!-- Test -->
</suite> <!-- Suite -->
Again, run the testng.xml file by right-clicking on it and selecting Run AS-> TestNG Suite.
Our test case specifics can be seen under Automation > Builds. To learn more about the implementation, click on the First test.
Output Screen:
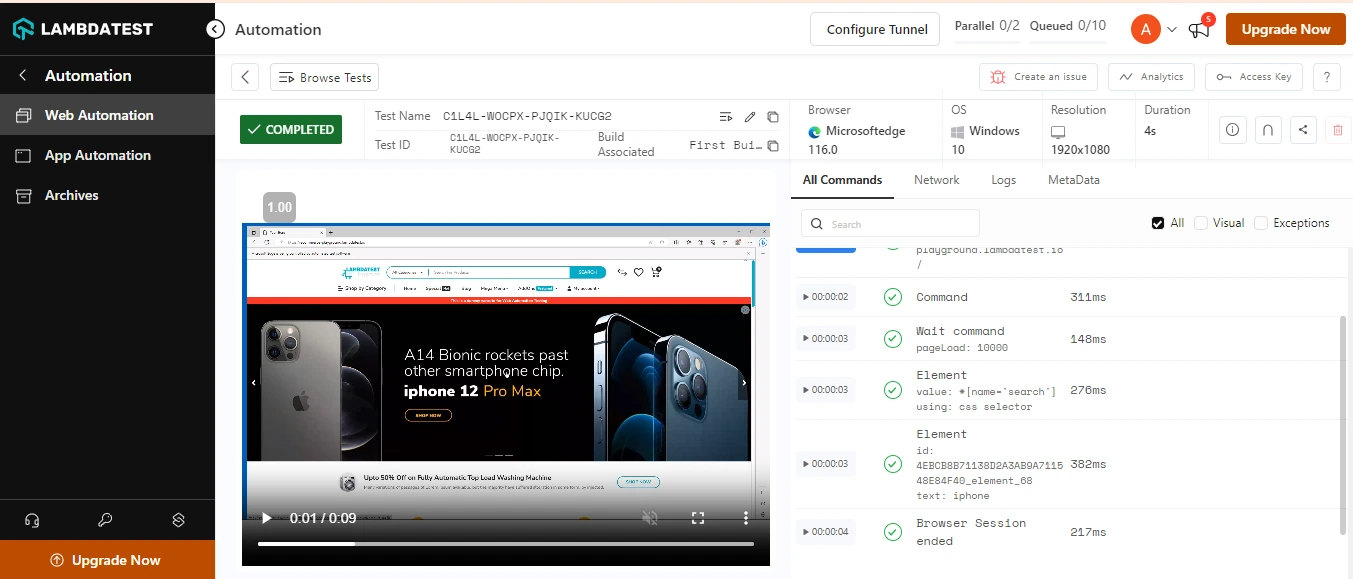
Code Walkthrough:
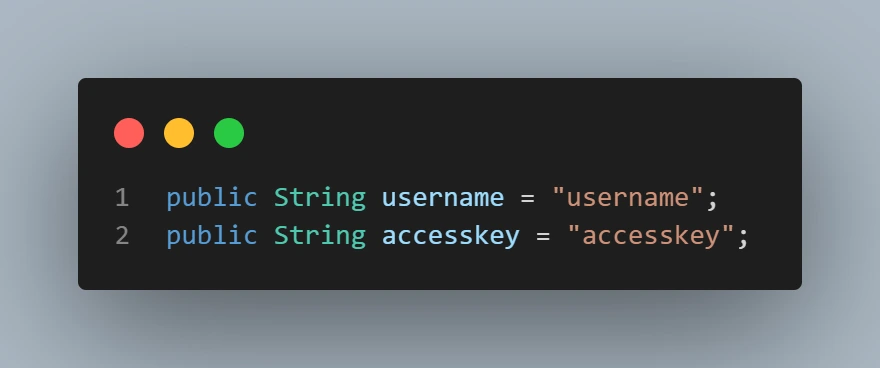
We need to provide the username and access key to run parallel testing over the Lambdatest Cloud Selenium Gird, A username and access key in the above code is given on the User Lambdatest Dashboard. Copy the username and access key and paste it in your code.
Provide the remote URL for performing the parallel execution over the Lambdatest Cloud Selenium Grid in the DemoClass.

Now, we have successfully executed automation testing with Selenium Grid for parallel execution on different browsers along with different operating systems without any hassle of creating a hub and launching the nodes on different ports. While the test runs on a Selenium test Grid, we can see the live video streaming of our tests and various other details, such as commands, which include screenshots of each command passed by our script and the logs and exceptions raised.
We can also create our team and run our automated cross-browser compatibility testing scripts as a team. These test results would be visible to each member added to a team. In addition, through our single-click integration, our teammates can log any bug found during their cross-browser testing session directly to various project management platforms like Jira, Trello, Asana, Mantis, GitHub, etc. In addition, LambdaTest also integrates with CI/CD platforms that are complementary to our automation testing tools like CircleCI, Jenkins, TravisCI, etc. Check out all of the LambdaTest integrations.
Note : Turn Testing Complexity Into Simplicity — Choose LambdaTest for a Selenium based cloud grid and run your tests over 3000 real browsers and devices! Try LambdaTest Now!
Advantages of Selenium Grid
Selenium Grid transforms automated testing and provides many benefits that significantly improve the testing procedure. Here, we will see some of the advantages of Selenium Grid in this section.
- Parallel Test Execution Efficiency: Selenium Grid enables tests to run simultaneously across several systems, browsers, and environments. For example, consider that we are evaluating the login process for a financial website. So, if we use Selenium Grid, it tests the cases parallelly across different browsers instead of running one after another on different browsers, thus saving time and providing fast feedback.
- Multi-Operating System And Browser Support: The Selenium test framework works with several popular web browsers and OSes, including Windows, macOS, and Linux. Selenium is platform-independent, so moving a functional Selenium test automation script from one platform to another is easy. The Selenium WebDriver routes should ideally be modified for the target operating system as moving to another platform.
- Comprehensive Testing for Browser Compatibility: Selenium Grid allows testers to run tests simultaneously on Chrome, Firefox, Safari, and other browsers. As a result, functionality is consistent across various browser environments. Selenium Grid assists in the early identification and resolution of browser-specific issues by doing concurrent testing across several browsers.
- Integrations of CI/CD Pipelines: Continuous Integration and Continuous Delivery (CI/CD) processes can easily incorporate Selenium Grid. As a result, automated testing becomes an essential component of the software development lifecycle, ensuring consistent software testing across code modifications.
Limitations of Selenium Grid
Selenium is a powerful automation tool; despite this, it has some disadvantages in complexity and security. Here, we will see some of the disadvantages of Selenium Grid in this section.
- Complex Configuration and Setup: Configuring the network settings and maintaining proper communication between nodes and the hub can be challenging, especially for individuals with little to no background in networking. Ensuring compatibility between Selenium Grid, WebDriver, and browser versions can take much time and effort.
- Resource Intensive: Selenium Grid might be resource-intensive to run on several nodes. To ensure smooth functioning, it needs enough CPU, memory, and network resources, which could raise the cost of the infrastructure.
Concurrently running tests on several nodes may significantly strain the network's capacity when nodes vary across various physical locations. This can cause network congestion and slower test run durations.
- Compatibility and Stability Issues: Coordinating the WebDriver executables, Selenium Server, and compatible browser versions can be complex. Unexpected behavior, test failures, or even system crashes might result from mismatches.
Selenium Grid may experience stability issues under high demand, particularly when running many tests simultaneously. The stability issues may cause Node crashes or periodic failures.
- Security Issues: Selenium Grid demands strong security measures in settings involving sensitive data. To protect sensitive information, secure communication protocols, encryption, and access controls must be implemented.
Also, giving testers remote access to nodes could cause security problems. Proper access controls and secure communication routes must be developed to avoid unwanted access.
- Maintenance Costs: Maintaining a Selenium Grid configuration needs regular node status monitoring, health checks, and performance enhancement. Many nodes must be managed, which requires devoted resources and ongoing maintenance. Putting high availability failover measures into place for the Hub can be challenging. Careful design and configuration are necessary to ensure that a backup Hub smoothly replaces the primary Hub in the case of a failure.
Proper version tracking and prompt upgrades are necessary to guarantee compatibility between various browser and WebDriver versions across nodes. Failure to do so can cause compatibility problems and erratic test executions.
Conclusion
Selenium Grid is used for parallel execution and is a potential way to minimize test execution time and maximize resource use significantly. Teams can generate faster feedback loops and improve their testing process by spreading tests across numerous nodes.
Selenium Grid can ensure that web applications perform seamlessly across diverse platforms, leading to a superior user experience. It is an essential resource for any software development team committed to producing top-notch, bug-free apps, whether it's for cross-browser compatibility testing or large regression suites.
On this page
- Overview
- What is Selenium?
- What is Selenium Grid?
- Features of Selenium Grid
- Components of Selenium Grid
- How to Download and Setup Selenium Grid?
- Using Selenium Grid to Run Test Scripts
- How to Use Selenium Grid for Parallel Execution
- Why do we Need a Cloud Grid?
- Difference Between Selenium Grid and Cloud Grid
- Running the Earlier Test Over Cloud Selenium Grid
- Advantages of Selenium Grid
- Limitations of Selenium Grid
- Frequently Asked Questions
Frequently asked questions
- General
Author's Profile

Ayush Mishra
Ayush Mishra is a passionate tech enthusiast with a fervent curiosity for emerging technologies. His expertise lies in areas such as front end web development and machine learning. With a penchant for problem-solving, He relish delving into complex tech challenges and committed to pushing the boundaries of innovation.
Reviewer's Profile

Mohammed Afzal
Afzal, a growth strategist, brings over six years of comprehensive expertise in software development, teaching, content creation, and leadership to LambdaTest. With a commendable 4+ year stint at Coding Ninjas, where he was an integral member from the early bootstrap phase, Afzal played a pivotal role in launching and overseeing the Blog Platform. His leadership steered a content team that delivered blogs across a diverse range of topics, including Data Structures, Algorithm Design, SQL, Database Management, Full Stack Web Development, AI, Machine Learning, etc. Having served as a Software Developer for an early-stage startup and an Instructor at UpGrad early in his career, Afzal has honed his skills across various facets of the tech industry.
Did you find this page helpful?
More Hubs
Try LambdaTest Now !!
Get 100 minutes of automation test minutes FREE!!

 Christmas Deal is on: Save 25% off on select annual plans for 1st year.
