How To Run Jasmine Integration Tests [Jasmine JS Tutorial]
- Learning Hub
- How To Run Jasmine Integration Tests [Jasmine JS Tutorial]
CHAPTERS
- Overview
- What is Jasmine JS Testing Framework?
- Advantages of Jasmine JS Testing Framework
- What is Integration Testing?
- Getting Started with Integration Testing using Jasmine JS
- How to run Integration Tests with Jasmine JS?
- Automated Integration Testing with Jasmine JS and Cloud Selenium Grid
- What is a Page Object Model?
- Creating and Running Test Scripts using Page Object Model
- Frequently Asked Questions (FAQs)
OVERVIEW
In our modern world today, almost everything, like shopping, meetings, and payments, is done online. To make online activities such as shopping or online meetings possible, users have access to software applications that enable them to solve these real-world problems.
To meet users' demand for these software applications, software engineers or developers must release software frequently and within short time frames.
In the digital world, the key to releasing high-quality software quickly is through the use of automation testing. With the fast-paced nature of software development and the increasing emphasis on accelerated time-to-market, automation testing has become an essential tool for a better digital experience.
In automation testing, there are different types of tests, such as unit tests, integration tests, functional tests, and end-to-end tests. These tests represent different levels of software testing, such as unit testing and integration testing.
Unit testing involves testing individual components of an application, while integration testing involves testing interface links between these components. Since JavaScript is the most popular programming language, it offers a range of automation testing frameworks, such as Jasmine, that can run unit and integration tests.
In this Jasmine JS tutorial, you will learn about the Jasmine JS testing framework and integration testing. In subsequent sections, you will learn how to run integration tests at scale on an online Selenium Grid and how to run the tests in parallel.
What is Jasmine JS Testing Framework?
Jasmine JS is one of the most popular JavaScript-based testing frameworks. It is a Behavior-Driven Development (BDD) framework that provides a structure for developers to write tests for their code. With Jasmine, developers can write tests describing their code's expected behavior and run those tests to verify that the code works as expected.
Jasmine tests are written in JavaScript and are typically run in a web browser or command line using a JavaScript runtime environment, such as Node.js. Jasmine has a simple syntax that makes it easy for developers to write and maintain tests while performing JavaScript automation testing. It also includes functions for creating test doubles (mocks and spies) and for asynchronous testing code.
Here is an example that shows simple Jasmine syntax.
function add(x, y) {
    return x + y;
}

describe("add", function() {

    it("should return the sum of its arguments", function() {

      expect(add(2, 3)).toEqual(5);
    });
});
In this example, we have defined a function called add that takes two arguments and returns their sum. We have then defined a test for this function using the describe and it functions provided by Jasmine.
The describe function is used to group related tests, and it function is used to define a single test. Inside it block, we use the expect function to specify the expected output of the test.
In this case, we expect the add function to return 5 when called with the arguments 2 and 3.
Jasmine JS is a prevalent JavaScript testing framework, and the data obtained from the official Jasmine GitHub repository says it all.
- Stars: 15.5K
- Contributors: 218
- Forks: 2.3K
- Releases: 55+
- Used by: 2.7M users
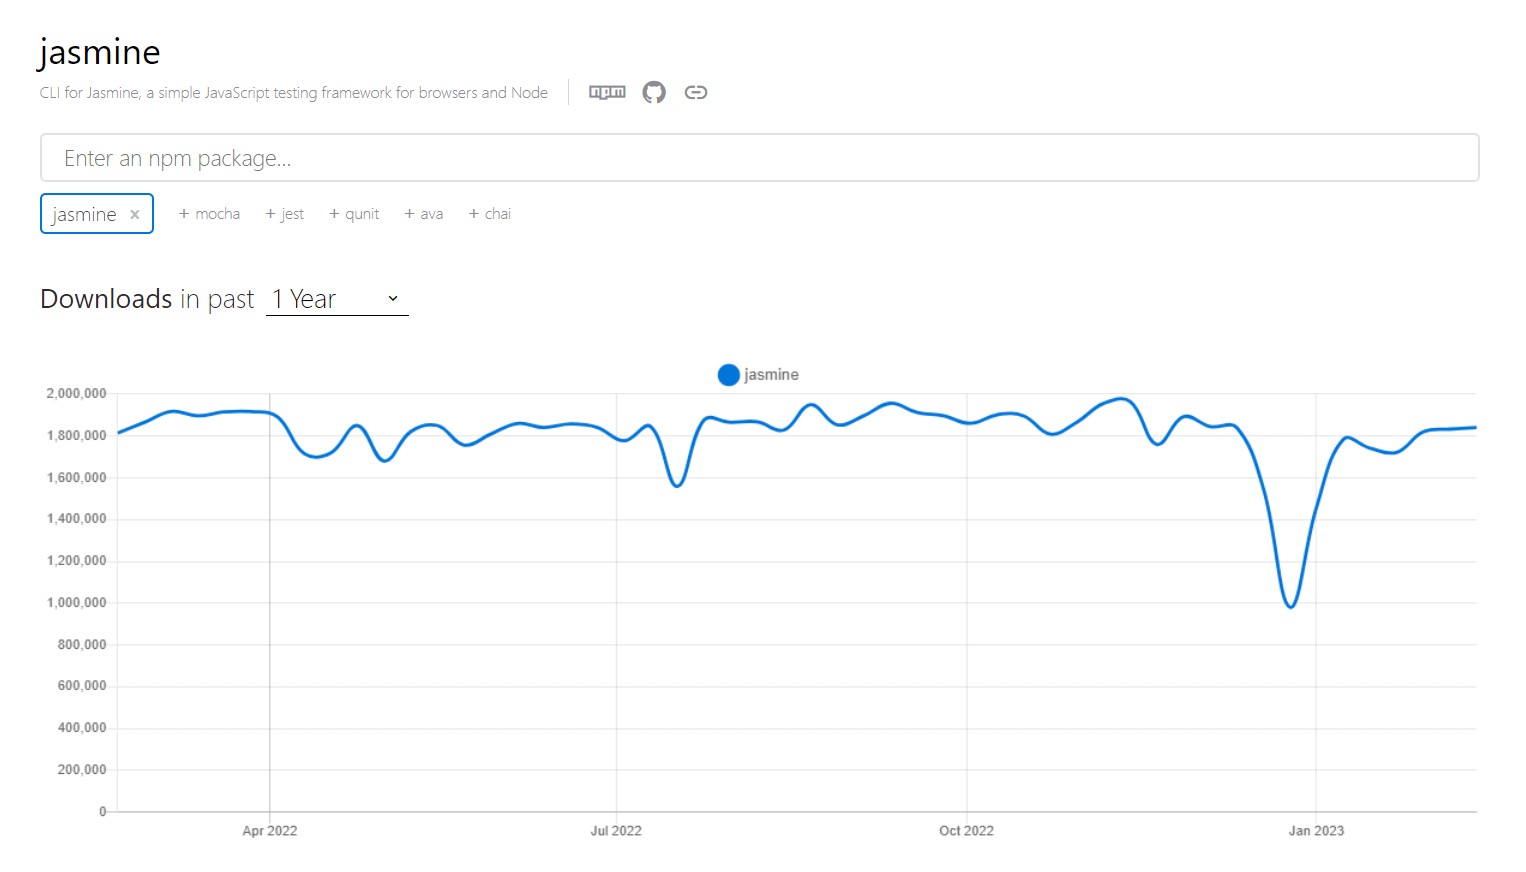
At the time of writing the blog on Jasmine JS, the Jasmine JS testing framework had 1,791,856 downloads on npmtrends.com.
Advantages of Jasmine JS Testing Framework
Here are some of the salient advantages of Jasmine JS test framework:
- Easy to use: Jasmine JS has a simple syntax and a clear structure, making it easy for developers to write and understand tests.
- Flexible: Jasmine JS provides a wide range of functions and features that can be customized to fit the needs of different projects and testing scenarios.
- Widely supported: Jasmine JS is a well-established testing framework with a large user base, which means it is well-supported by the community and has a wealth of resources and documentation available.
- Test doubles: Jasmine JS provides functions for creating test doubles (mocks and spies) to isolate and test components in isolation.
- Asynchronous testing: Jasmine JS has built-in support for asynchronous testing code, which is essential for testing modern web applications.
- Custom matchers: Jasmine JS allows developers to create custom matchers (assertions) to test specific aspects of their code more expressively.
- Testing focus: Jasmine JS is a behavior-driven development (BDD) framework, which means it is designed specifically for testing and encourages developers or non-technical personnel to focus on the behavior of their code.
- Integration with other tools: Jasmine JS can easily integrate with tools like Karma and Istanbul to create a complete testing environment for JavaScript applications.

What is Integration Testing?
Integration testing is a type of software testing where different units, modules, or components of a software application are tested to make sure they work as expected when interacting with each other.
It is a type of software testing that is included in the software testing pyramid.
Understanding Software Testing Pyramid
The Software Testing Pyramid is a framework that suggests structuring automated tests in a test suite. The pyramid shape represents the relative proportion of tests at each level. The pyramid's base represents the majority of tests, and the top represents the minority.
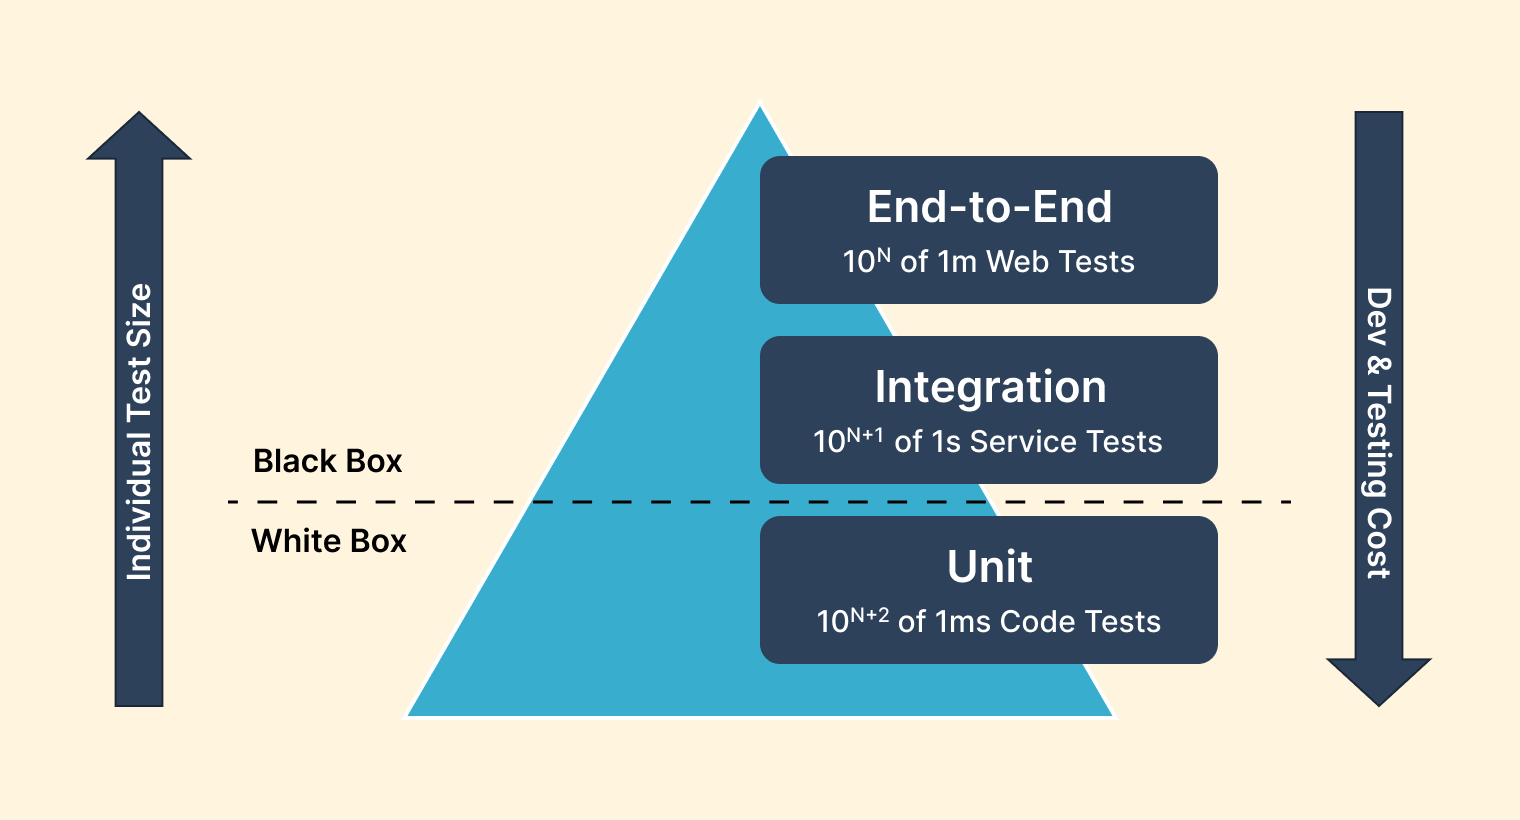
Also referred to as the test automation pyramid, the test pyramid helps developers and software testers employ adequate testing strategies to build better features and successfully introduce changes.
Integration Testing based on Software Testing Pyramid
Based on the software testing pyramid, integration testing is a type of testing that sits in the middle of the pyramid, between unit testing and end-to-end testing.
The main goal of integration testing is to ensure that the different components of the system work together as expected and that there are no issues when they are integrated. This can include testing the integration of different software modules and the integration of the system with external systems or services.
Integration tests are usually more complex and slower to run than unit tests, involving multiple components working together. However, they are still faster and cheaper to run than end-to-end tests, which test the entire system from end to end.
Also, integration tests are exhaustive because they are designed to catch issues that unit tests may not reveal. By testing the interactions between different components in a system, integration testing tests the system’s functionality broadly to ensure that it behaves as expected.
In integration testing, the components are tested as a group, in the system context, unlike unit testing, where the components are tested in isolation. This means that integration tests can catch issues that unit tests may not catch, such as integration bugs or compatibility issues.
Integration testing is essential to ensure that the system works as expected and that there are no issues when the different components are integrated. It is usually done after unit testing and before end-to-end testing, as it provides a good balance between the granularity of unit testing and the comprehensiveness of end-to-end testing.
There are six types of integration testing:
- Big Bang Method: Big bang method involves integrating all the software application components or modules and testing them simultaneously as a single unit.
- Bottom-up Method: Bottom-up method involves testing the low-level modules or components first, where the testing process continues until top-level modules or components are tested.
- Hybrid Testing Method: Hybrid testing method, also known as sandwich testing, involves testing top-level modules or components simultaneously with the lower-level modules or components as a system.
- Incremental Approach: Incremental approach in integrating two or more logically related modules or components and testing them.
- Stubs and Drivers: Stubs and drivers use dummy programs to facilitate integration testing, acting as substitutes for missing modules or components.
- Top-Down Approach: Top-down approach involves testing the higher-level modules or components first and moving to the low-level modules components.
In integration testing, various tools can help you create and execute exhaustive test cases automatically. Some of these integration tools include Citrus, Protractor, and Jasmine.
Accelerate JavaScript Automation with Jasmine. Try LambdaTest Now!
Getting Started with Integration Testing using Jasmine JS
In this blog section of this tutorial on integration testing with Jasmine JS, you will learn how to install the Jasmine JS testing framework and run an integration test. Jasmine is a node package and can be installed using any node-based package manager, such as npm and yarn.
To install and use the Jasmine JS for Selenium automation, you need
- IDE (e.g., Visual Studio Code).
- Node.js.
- Node Package Manager (NPM) installed.
For the demonstration, we will use VS Code as the text editor, but you can use the IDE you choose.
To install the Jasmine JS framework, follow the steps below.
Step 1: Run the command below on the terminal line to create a project folder called “JasmineIntegrationTesting”.
mkdir JasmineIntegrationTestingThen run the command below to make the “JasmineIntegrationTesting” folder the current directory.
cd JasmineIntegrationTestingStep 2: Run the command below on the command line to install Jasmine in your project.
Adding --save-dev to the command helps save the name and version of Jasmine in the dev-dependency object.
npm install --save-dev jasmine
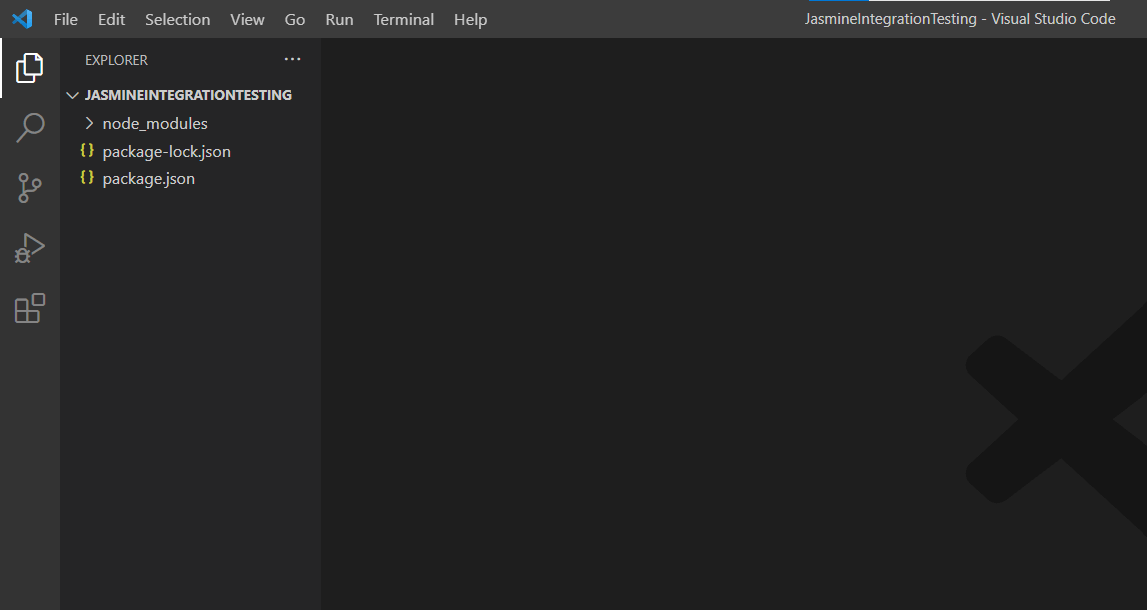
Once the installation is complete, open the “JasmineIntegrationTesting” folder on Visual Studio Code, and you will realize a node_modules package, package-lock.json, and package.json files have been added to the project folder JasmineIntegrationTesting, as shown below.
Step 3: Run the command below on the command line to initialize Jasmine in your project.
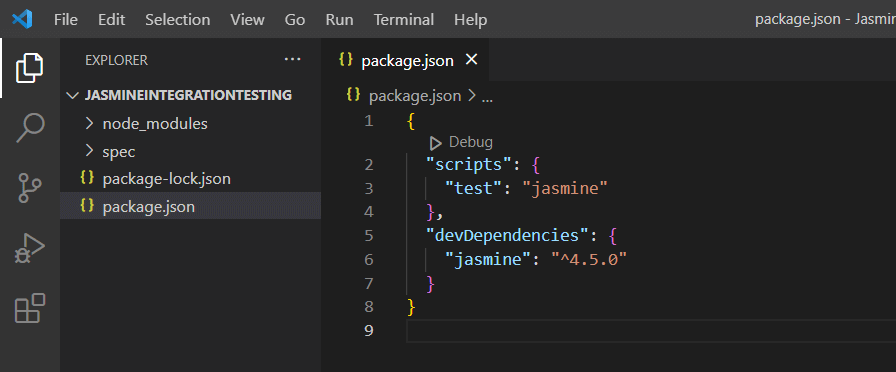
npx jasmine initStep 4: Configure the npm test script to run the Jasmine JS tests when the command npm test is executed. To do that, update the package.json file and add a script section, as shown below.
"scripts": {
    "test": "jasmine"
  }
The package.json file code should now look as shown below.
{
  "scripts": {
    "test": "jasmine"
  },
  "devDependencies": {
    "jasmine": "^4.5.0"
  }
}
How to run Integration Tests with Jasmine JS?
The most common integration tests using Jasmine JS are testing REST API service calls. In this case, we will run an integration test that sends a request to an API endpoint and checks the status code to ensure the request has succeeded.
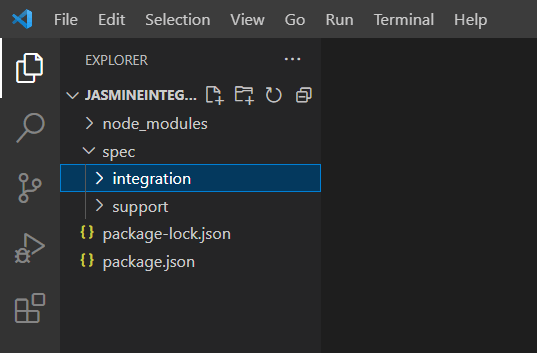
Step 1: Create a folder called integration in the spec folder, as shown below.
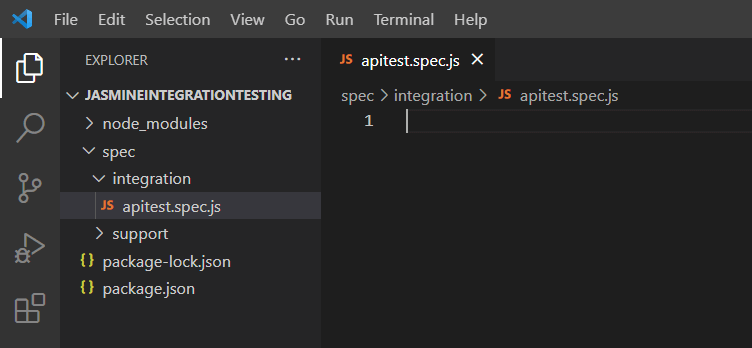
Step 2: Create a file called apitest.spec.js in the integration folder, as shown below.
Step 3: Add the following code to the apitest.spec.js file.
const frisby = require('frisby');

 describe("Car Manufacturers REST API", function() {

   const BASE_URL = "https://vpic.nhtsa.dot.gov/api/vehicles/getallmanufacturers?format=json";

   describe("GET success status code", function() {

     it("should return the success status code", function(done) {
       frisby
         .get(BASE_URL)
         .then(function(response) {
           expect(response.status).toBe(200);
         })
         .done(done);
     })

   });
 });
Step 4: Run the below command on the command line to install Frisby required in the test file.
npm i frisby
Step 5: To run the test, run the command below on the command line.
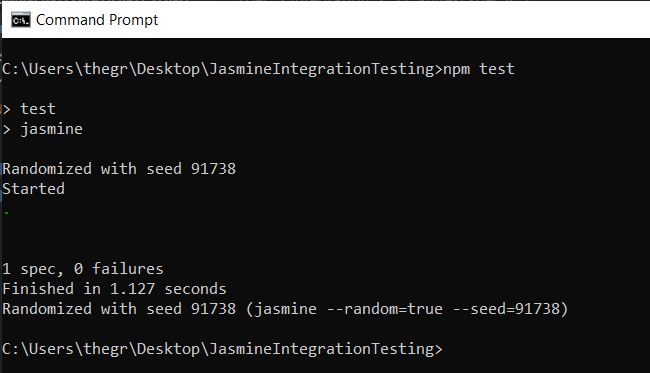
npm test
Once the command is done running, you should be able to see the results of the tests on the command line, as shown below.

2M+ Devs and QAs rely on LambdaTest
Deliver immersive digital experiences with Next-Generation Mobile Apps and Cross Browser Testing Cloud
Automated Integration Testing with Jasmine JS and Cloud Selenium Grid
Consider an online eCommerce store that sells electronics. When customers visit the eCommerce store, they must create an account or log in to shop on the online store.
Any errors in this logical flow could cause problems for the customer and lead to losses for the eCommerce store. To avoid these problems and failures, as a developer or tester, you can employ integration testing to help you find and fix such errors.
As customers access the e-commerce store through various browsers and operating systems, it is crucial to ensure that the logical flow of the e-commerce store functions correctly across all these platforms. Therefore, it's necessary to conduct tests to verify the compatibility of the store with different browsers and operating systems to provide a seamless digital experience to customers.
However, digital experience for the eCommerce store on all these browsers and operating systems can lead to spending a fortune on the infrastructure needed to run the tests.
To ensure the logical flow of the eCommerce store works as expected on all these browsers and operating systems, you can use LambdaTest continuous quality cloud testing platform that lets you perform automated integration testing with Jasmine JS and Selenium on a cloud Selenium Grid across 3,000+ different browsers and operating systems.
You can also subscribe to the LambdaTest YouTube Channel and stay updated with the latest tutorials around Selenium testing, Playwright, Appium, CI/CD, and more.
How to Run Integration Tests with Jasmine on Cloud Selenium Grid?
In this section, let us create and run an integration test that tests the logical flow between creating an account, searching for items, and adding them to a cart in an eCommerce store.
We will test the integration on multiple browser versions and operating system combinations. We can use three browser versions and operating system combinations in this case. These browser versions and operating system combinations are:
- Chrome 108.0 + Windows 10
- Safari 16.0 + macOS Ventura
- Firefox 106.0 + Windows 11
To define your desired browser and operating system combinations, you can use LambdaTest Capabilities Generator.
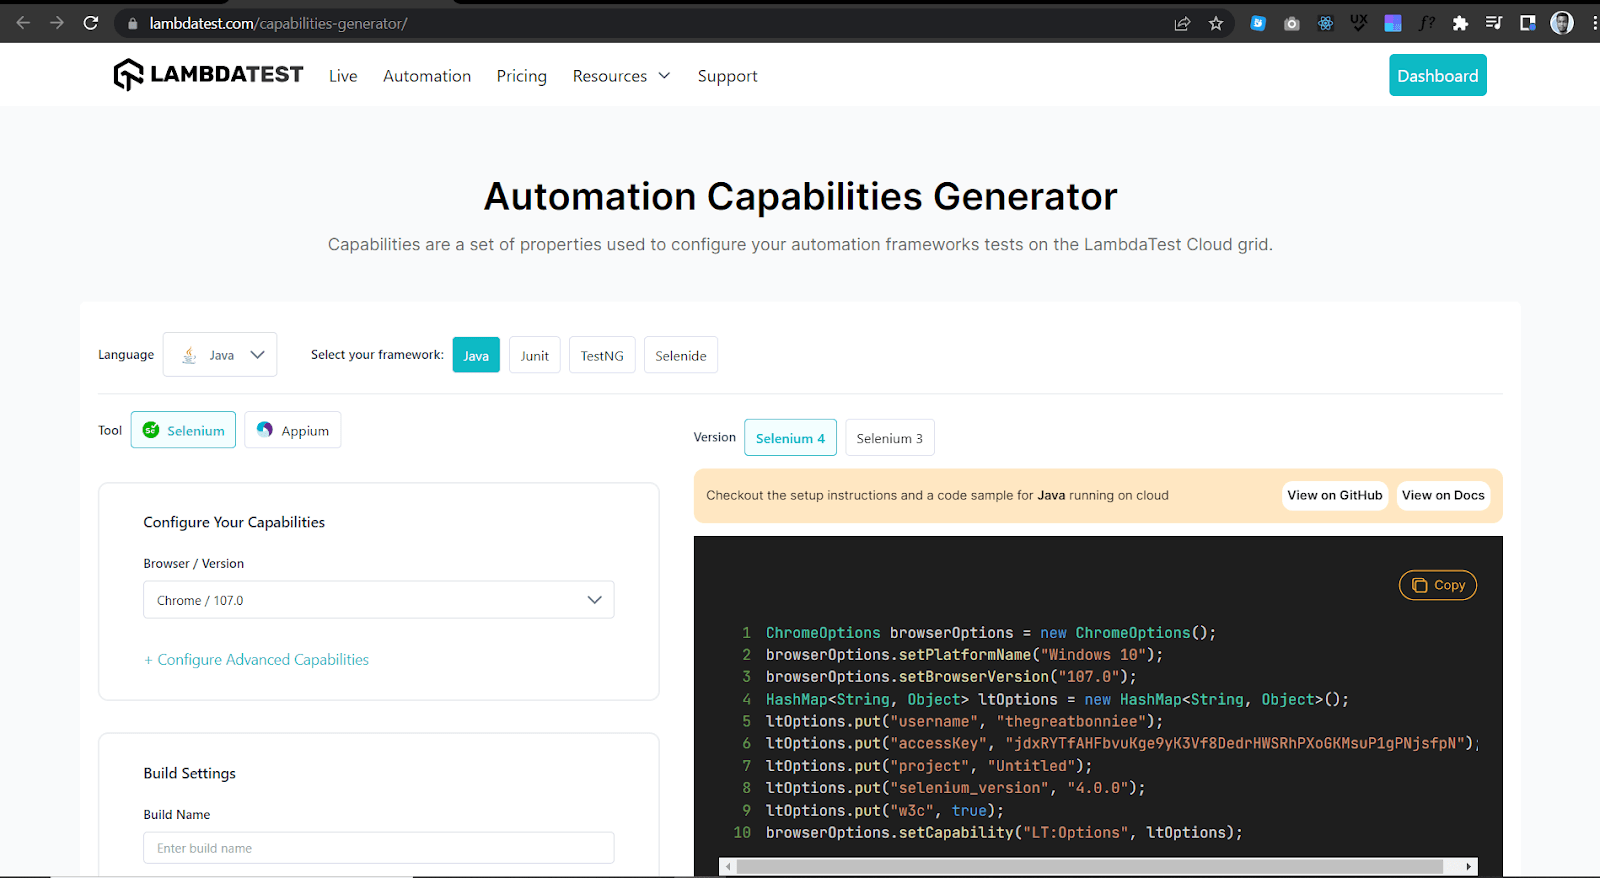
Generating browser and operating system combinations
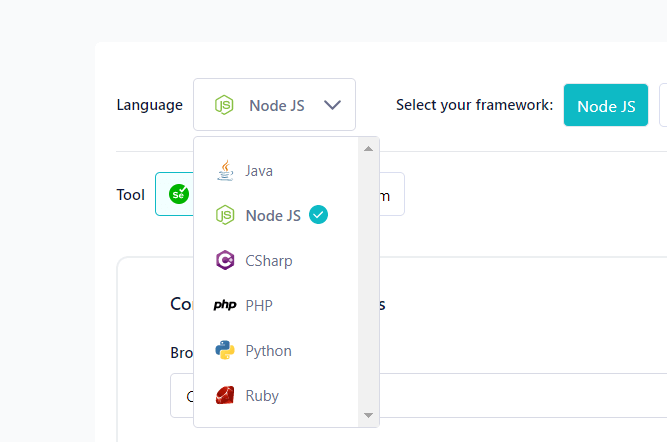
Step 1: On the Capabilities Generator Page, select the programming language you are using to run your tests. In this case, we use JavaScript and can select Node JS, a JavaScript framework.
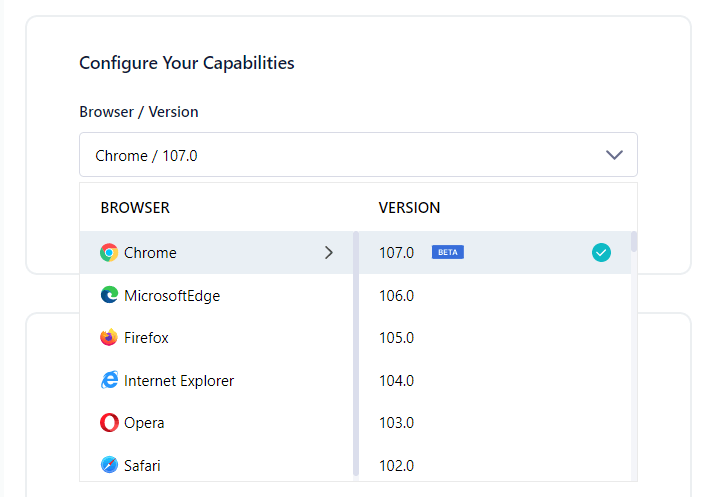
Step 2: Configure your capabilities by selecting a browser and browser version.
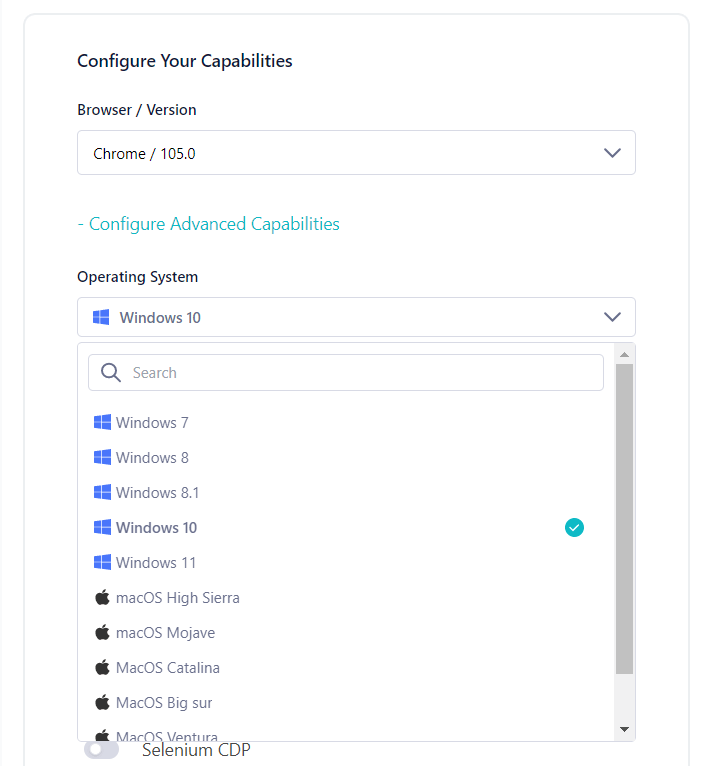
Step 3: Click Configure Advanced Capabilities and select the operating system.
You can now see the capabilities presented in a code format that you can copy and use in your test script.
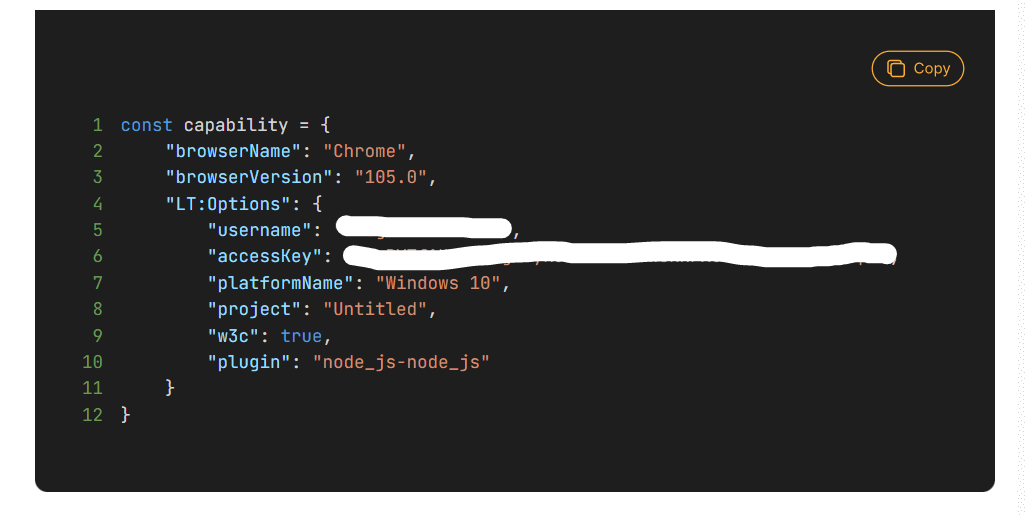
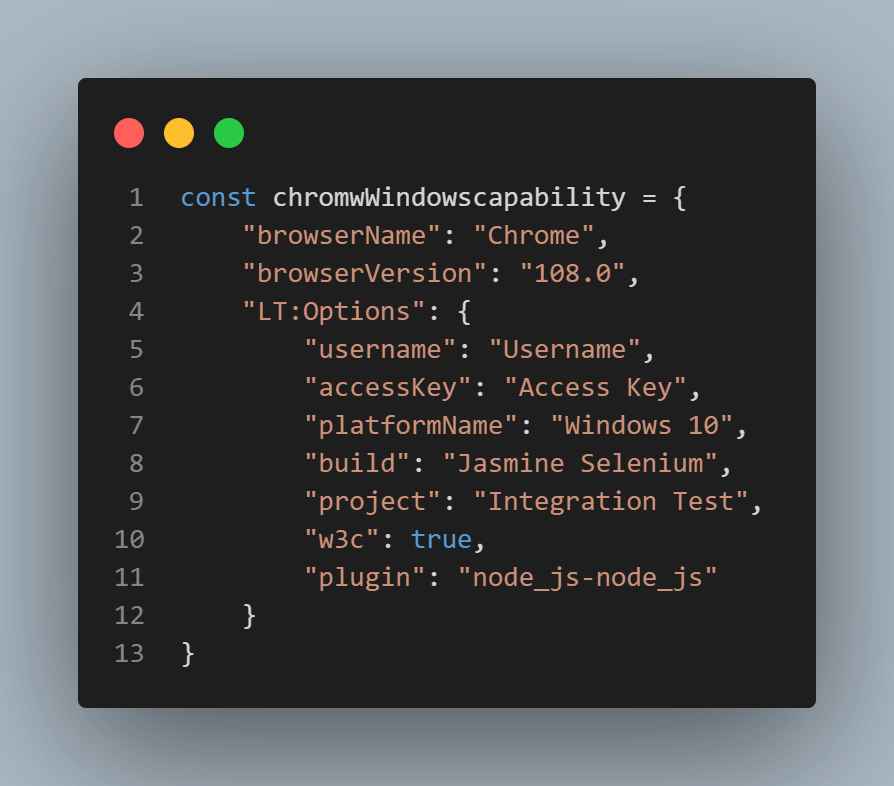
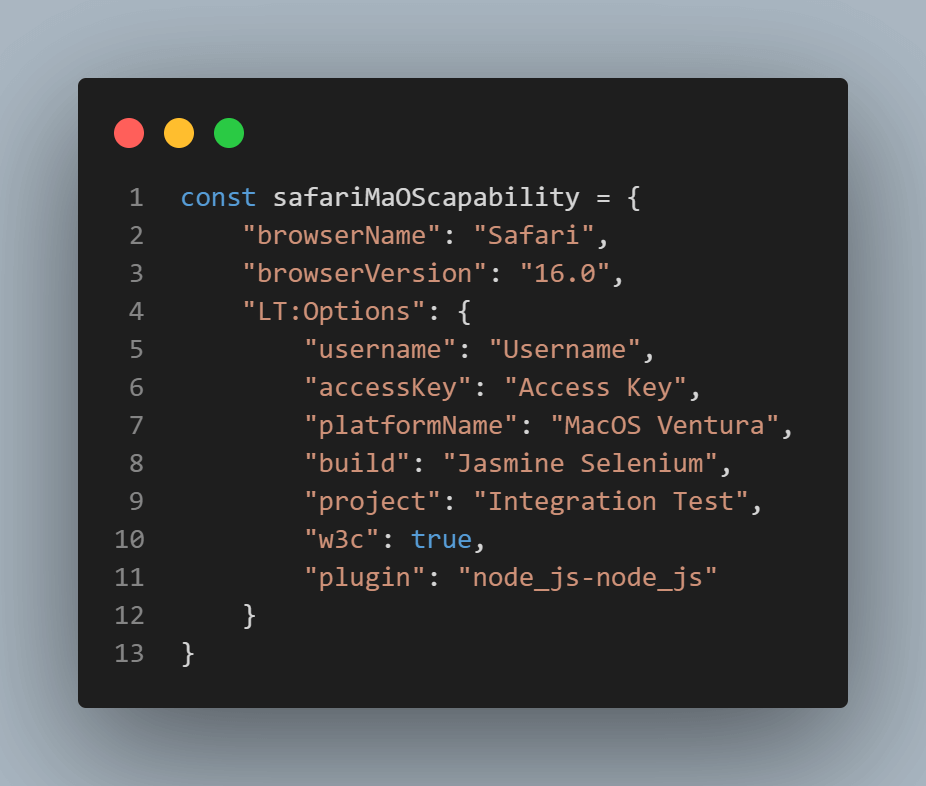
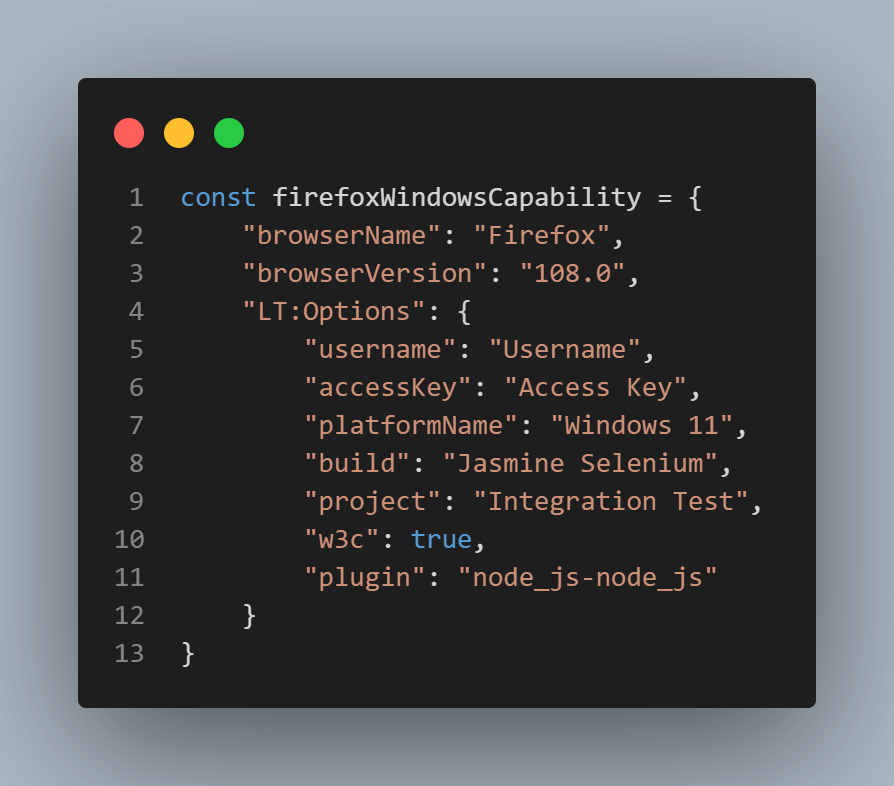
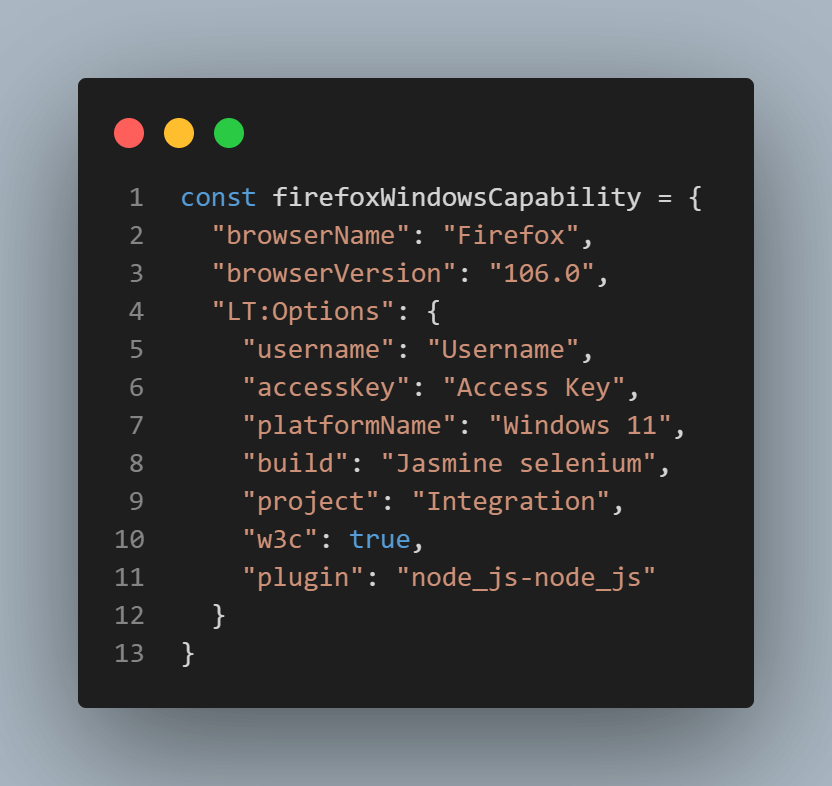
For our test case, below are capabilities for browser and operating system combinations we want to test an eCommerce website registration form on.
- Chrome 108.0 + Windows 10
- Safari 16.0 + macOS Ventura
- Firefox 106.0 + Windows 11
Before creating and running an integration test with Jasmine JS on the cloud Selenium Grid, let me talk about the Page Object Model.
What is a Page Object Model?
Page Object Model, also known as POM, is a design pattern used in software testing to create maintainable and readable automated test code. POM creates an object for each web page in an application, and then page objects interact with the web page to perform actions such as filling out input fields, clicking buttons, or checking some text.
In Page Object Model, each web page is represented by a class, and the class methods correspond to the actions that can be performed on the page. For example, a login page class may have methods for entering a username and password and clicking the login button.
By doing this, if the structure of the login page changes, only the login page class needs to be updated rather than updating all the test code that interacts with the login page.
The main benefit of using the Page Object Model is making the test code more readable and maintainable. Also, POM makes it easy to reuse code, especially if multiple tests need to interact with the same web page. The page object can be reused, reducing the amount of duplicated code and making the code more maintainable.
The Page Object Model is widely used in automated web testing frameworks such as Selenium, and the page objects can be created using a variety of programming languages such as JavaScript, Python, and Java.
Let us examine how the Page Object Model can run integration tests with Jasmine JS on a cloud Selenium Grid. In this case, we will run two tests. The first test will test the logical flow of a user creating an account in an online eCommerce store and adding an item to the cart.
The second test will test the logical flow of a user login into the online eCommerce store and adding an item to the cart. Below are the two test scenarios.
Test Scenario One:
Step 1: Navigate to the eCommerce registration page.
Step 2: Fill in all input fields correctly.
Step 3: Click the Submit button.
Step 4: Check whether an account-created success message shows.
Step 5: Navigate to item categories.
Step 6: Select the phone category.
Step 7: Select the HTC phone.
Step 8: Add the phone to the cart.
Step 9: Open the cart.
Step 10: Check if the phone is in the cart.
Test Scenario Two:
Step 1: Navigate to the eCommerce login page.
Step 2: Fill in all input fields correctly.
Step 3: Click the Submit button.
Step 4: Check whether an account-created success message shows.
Step 5: Navigate to item categories.
Step 6: Select the phone category.
Step 7: Select the HTC phone.
Step 8: Add the phone to the cart.
Step 9: Open the cart.
Step 10: Check if the phone is in the cart.
Creating and Running Test Scripts using Page Object Model
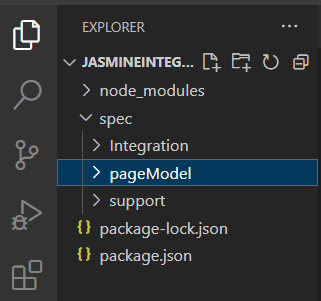
Step 1: In the JasmineIntegrationTestingspec project folder created in the Integration Testing section, create a folder called pageModel in the Spec folder, as shown below.
Step 2: Create a file called main.js in the pageModel folder.
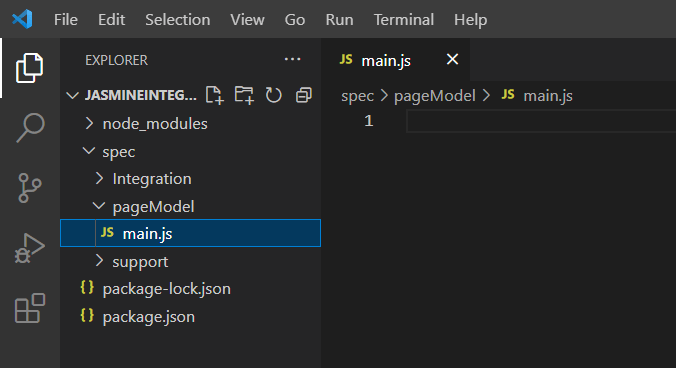
Step 3: In the PageModel folder, create three more files named loginPage.main.js, signupPage.main.js, and addToCart.main.js, as shown below.
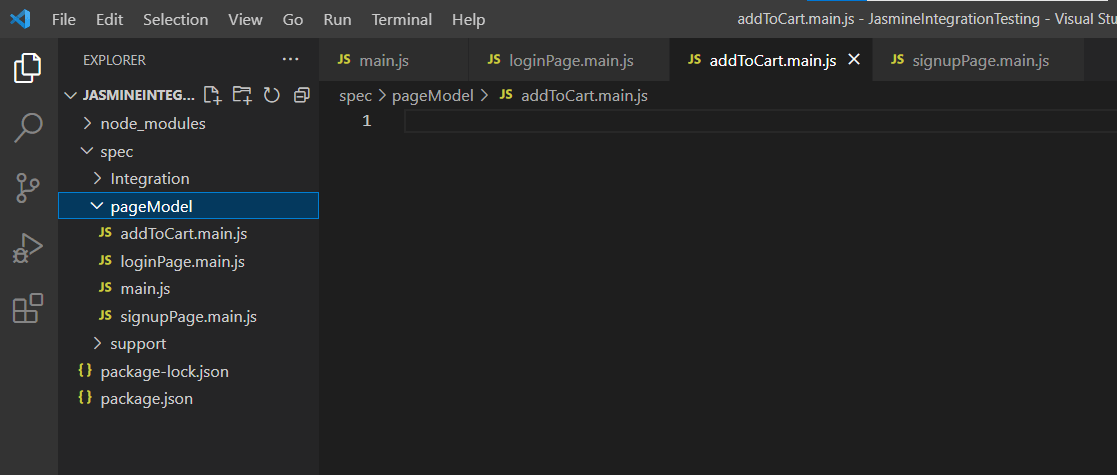
The naming convention “.main.js” of the files means that the main.js file is the parent file while the other files are child files. It simply means the child files will inherit some methods from the parent file.
Step 4: Install the latest version of the Selenium WebDriver in the project folder by running the command below on the command line.
npm install selenium-webdriverStep 5: In the main.js file, add the following code.
File: Main.js
selenium = require('selenium-webdriver');
const {Builder, By, Key, until} = require('selenium-webdriver');

const username= process.env.LT_USERNAME || "Username"
const accessKey=  process.env.LT_ACCESS_KEY || "Access Key"
var remoteHub = 'https://' + username + ':' + accessKey + '@hub.lambdatest.com/wd/hub';

const chromeWindowsCapability = {
    "base": "WebDriver",
    "browserName": "Chrome",
    "browserVersion": "108.0",
    "LT:Options": {
        "username": "Username",
        "accessKey": "Access Key",
        "platformName": "Windows 10",
        "build": "Jasmine selenium",
        "project": "Integration",
        "w3c": true,
        "plugin": "node_js-jasmine",
        "idleTimeout":"270"
    }
};

const getElementById = async (driver, id, timeout = 8000) => {
    const el = await driver.wait(until.elementLocated(By.id(id)), timeout);
    return await driver.wait(until.elementIsVisible(el), timeout);
};

const getElementByXpath = async (driver, xpath, timeout = 8000) => {
    const el = await driver.wait(until.elementLocated(By.xpath(xpath)), timeout);
    return await driver.wait(until.elementIsVisible(el), timeout);
};

const seleniumDriver = new selenium.Builder().
usingServer(remoteHub).
withCapabilities(chromeWindowsCapability).
build();

class Main {

    constructor() {
        this.driver = seleniumDriver;
        this.byId = getElementById;
        this.byXpath = getElementByXpath;
    }
}

module.exports = Main;
Code Walkthrough:
Since we are using Selenium to run the tests, Selenium WebDriver, until, and By are imported using require function as shown below:

Variables username, accessKey, and remoteHub to be used in the test case are set

Test capabilities are configured by passing browser, browser version, and operating system information with LambdaTest Selenium Grid Capabilities through the capabilities object.
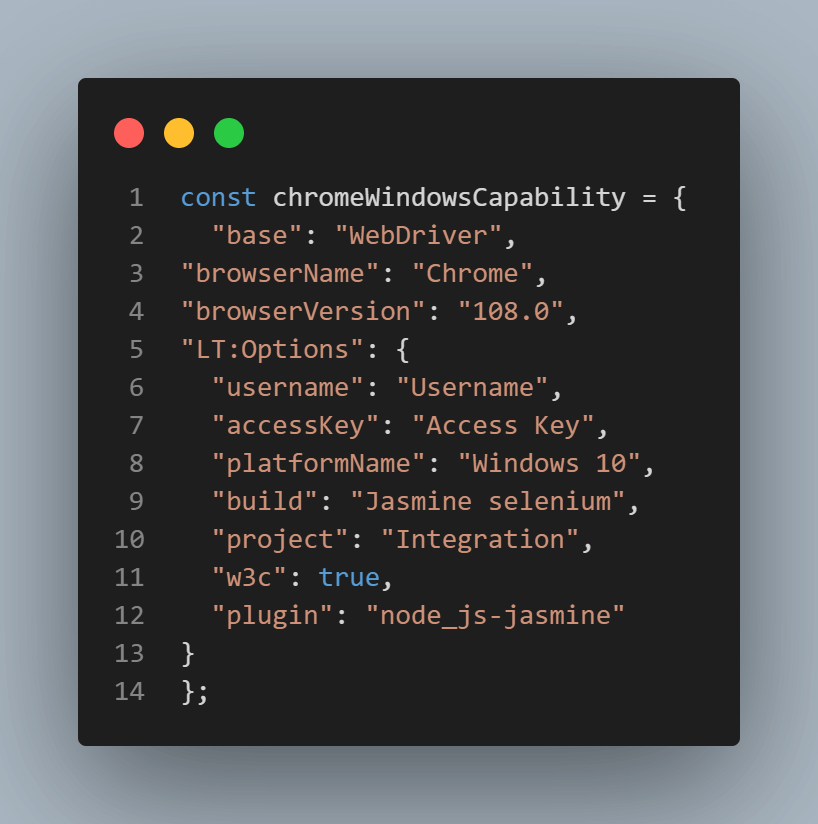
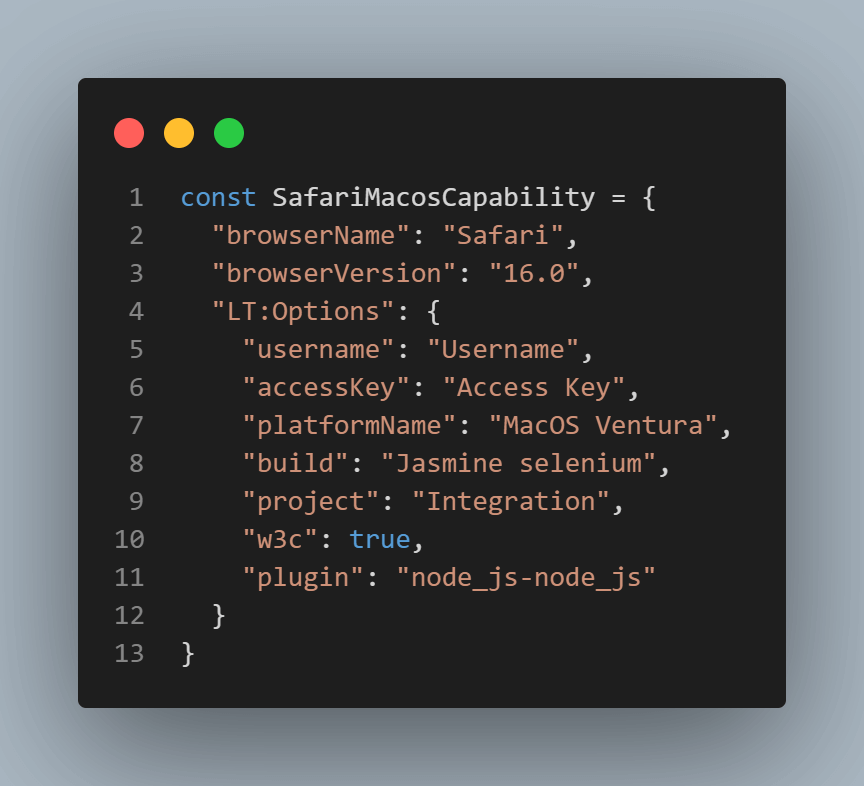
An async function called getElementById with parameters driver, id, and timeout set to 8000 milliseconds is declared.

Inside the async function, declare a variable called el, where the variable value instructs the Selenium Driver to wait until the element with the targeted id is located on the registration page of the eCommerce website. The elementLocated() method is used here.

Below is how an element is located by the ID locator.
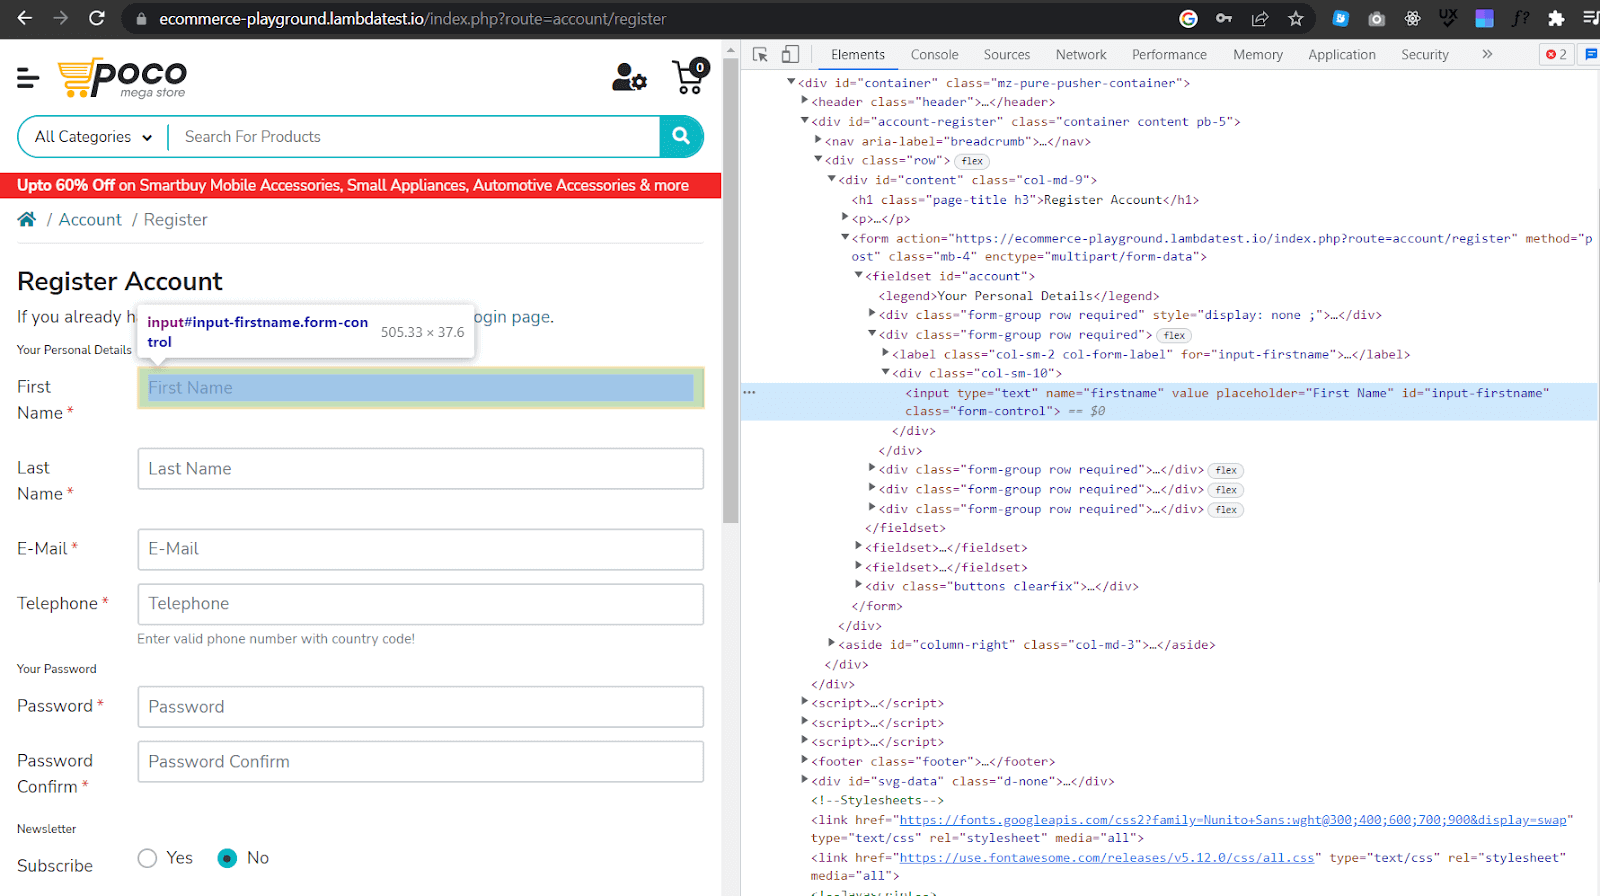
An object returned by the getElementById async function instructs the Selenium Driver to wait until the element we target by id is present on the DOM of the registration page and visible. Visibility means that the element is not only displayed but also has a height and width that is greater than zero. The elementIsVisible() method is used here.

An async function called getElementByXpath with parameters driver, XPath, and timeout set to 8000 milliseconds is declared.

Inside the async function, declare a variable called el, where the variable value instructs the Selenium driver to wait until the element with the targeted XPath is located on the registration page of the eCommerce website, the elementLocated() method is used here

Below is how an element is located by XPath.
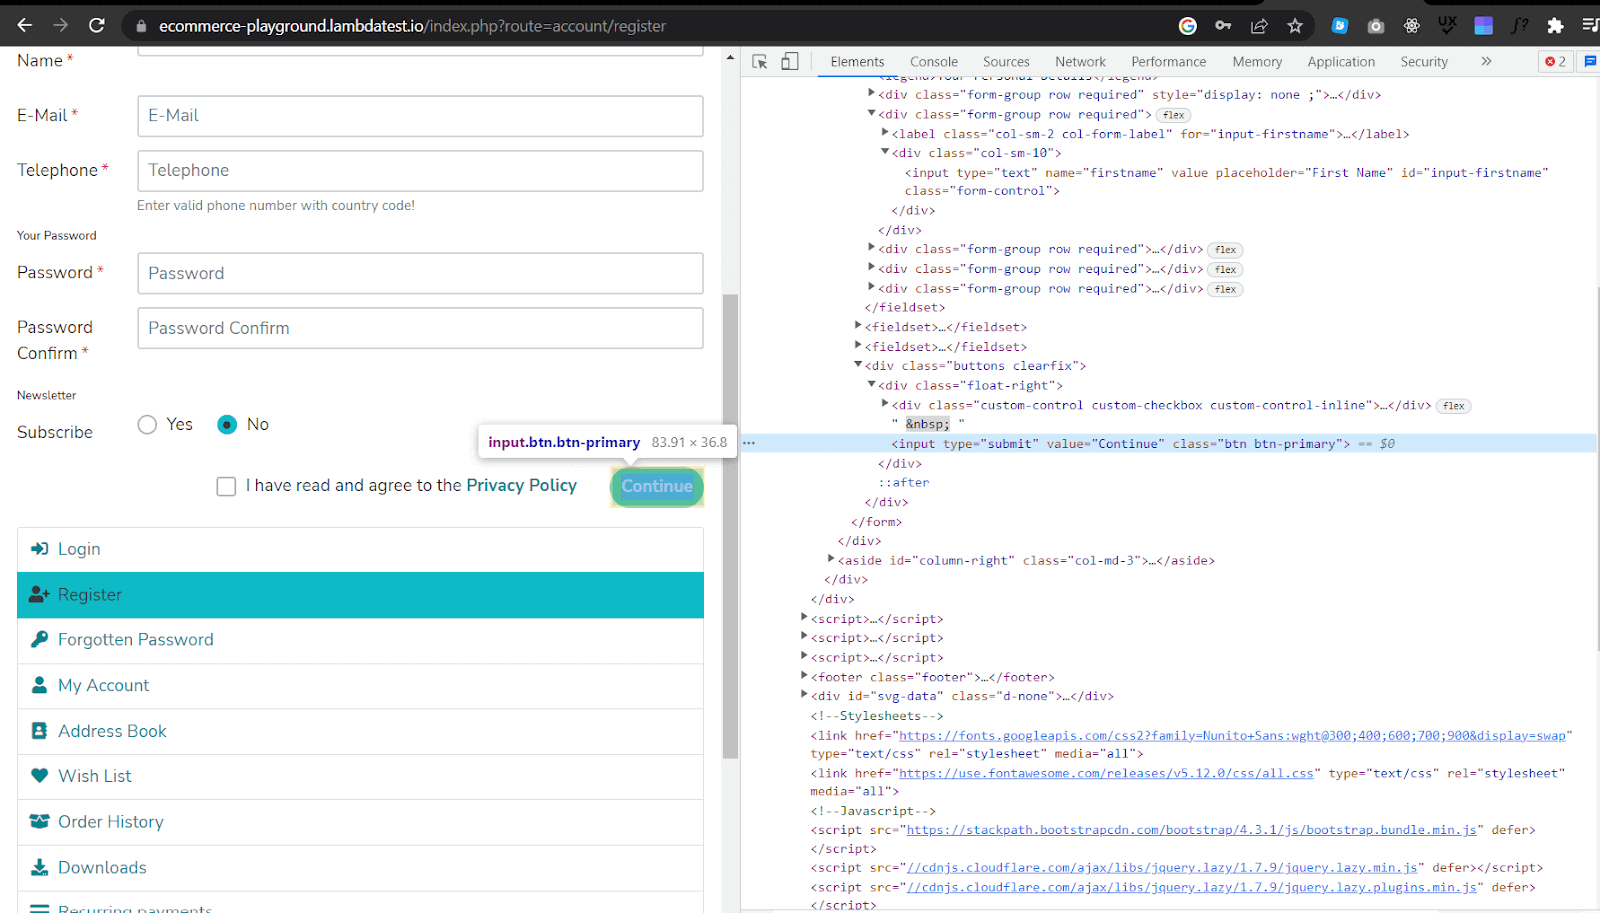
An object returned by the getElementByXpath async function instructs the Selenium Driver to wait until the element we are targeting by Xpath is present on the DOM of the registration page and visible. The elementIsVisible() method is used here.

A variable called seleniumDriver is declared
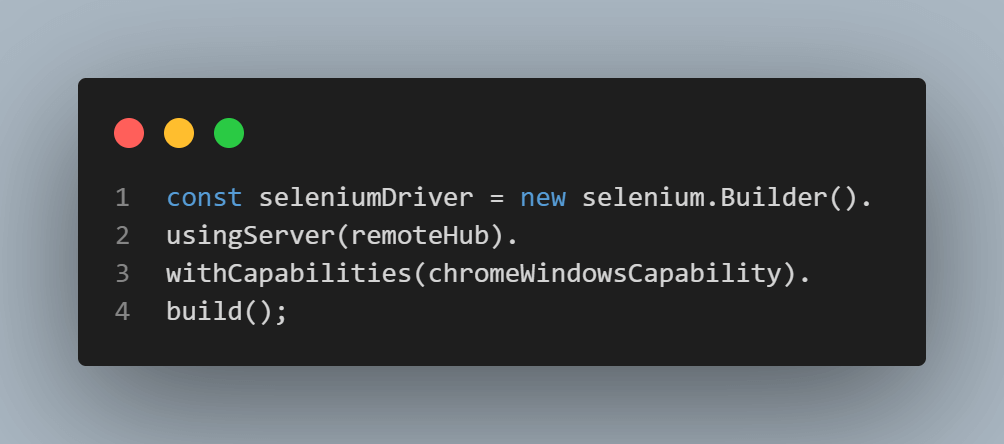
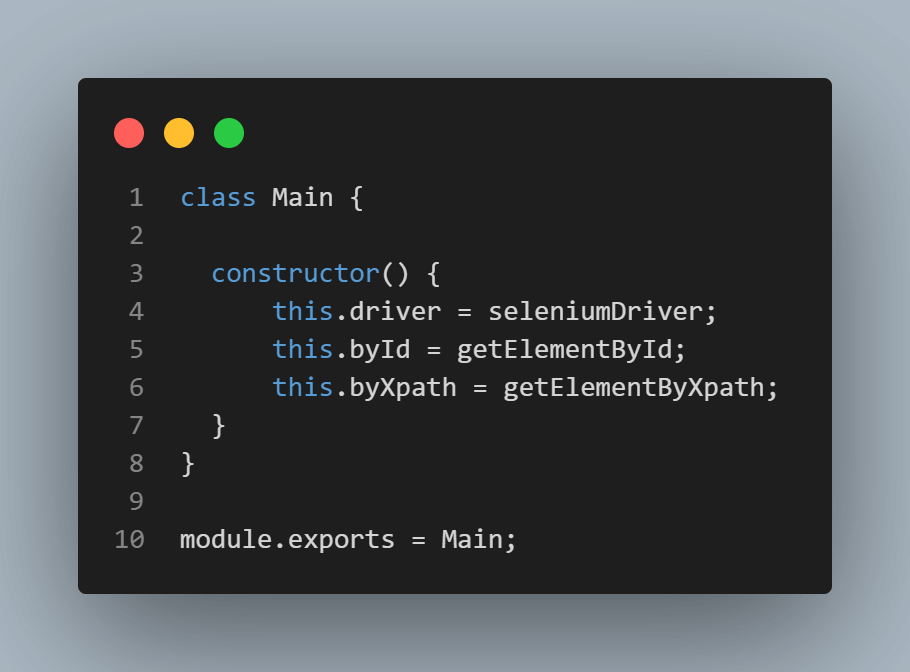
A JavaScript class called Main is created where the class has a constructor method, which is a special method that is called when an object of the class is created. The constructor method initializes the properties of the class.
A value of seleniumDriver is assigned to this.driver property, a value of getElementById to this.byId property, and a value of getELementXpath to this.byXpath property in this constructor method.
Finally, the Main class is exported to be used in other files.
Step 5: In the signupPage.Main.js file, add the following code.
File: SignupPage.Main.js File
const Main = require('./main')

const signupUrl = 'https://ecommerce-playground.lambdatest.io/index.php?route=account/register'

class SignupPage extends Main {

    constructor() {
      super();
      this.url = signupUrl;

      this.firstNameInput = ('input-firstname');
      this.lastNameInput = ('input-lastname');
      this.emailInput = ('input-email');
      this.telephoneInput = ('input-telephone');
      this.passwordInput = ('input-password');
      this.confirmPasswordInput = ('input-confirm');
      this.agreePolicyBtn = ('//label[@for="input-agree"]');
      this.submitButton = ('//input[@value="Continue"]');
      this.successMessageText = ('//h1[@class="page-title my-3"]');
    }

    async visit() {
      await this.driver.get(this.url);
    }

    async setFirstName(firstname) {
        const userFirstName = await this.byId(this.driver, this.firstNameInput);
        await userFirstName.clear();
        await userFirstName.sendKeys(firstname);
    }

    async setLastName(lastname) {
        const userLastName = await this.byId(this.driver, this.lastNameInput);
        await userLastName.clear();
        await userLastName.sendKeys(lastname);
    }

    async setEmail(email) {
      const userEmail = await this.byId(this.driver, this.emailInput);
      await userEmail.clear();
      await userEmail.sendKeys(email);
    }

    async setTelephone(telephone) {
        const userTelephone = await this.byId(this.driver, this.telephoneInput);
        await userTelephone.clear();
        await userTelephone.sendKeys(telephone);
    }

    async setPassword(password) {
      const userPassword = await this.byId(this.driver, this.passwordInput);
      await userPassword.clear();
      await userPassword.sendKeys(password);
    }

    async setPasswordConfirm(passwordConfirm) {
        const userPasswordConfirm = await this.byId(this.driver, this.confirmPasswordInput);
        await userPasswordConfirm.clear();
        await userPasswordConfirm.sendKeys(passwordConfirm);
    }

    async agreePolicy() {
        const agreePlolicyBtn = await this.byXpath(this.driver, this.agreePolicyBtn);
        await agreePlolicyBtn.click();
    }

    async submitBtn() {
      const submitBtn = await this.byXpath(this.driver, this.submitButton);
      await submitBtn.click();
    }

    async successMessage() {
        const successMessage = await this.byXpath(this.driver, this.successMessageText);
        successMessage.getText().then(function(value) {
        expect(value).toBe('Your Account Has Been Created!');
        });
    }

    async before() {
        this.driver;
    }

    async quitB() {
        await this.driver.quit();
    }

    async sleep(){
      await this.driver.sleep(3000);
    }
}

module.exports = new SignupPage();
Code Walkthrough:
Variable Main is assigned the value of the Main class imported from the main.js file. Then variable signupUrl is assigned the URL of the eCommerce online store registration page.

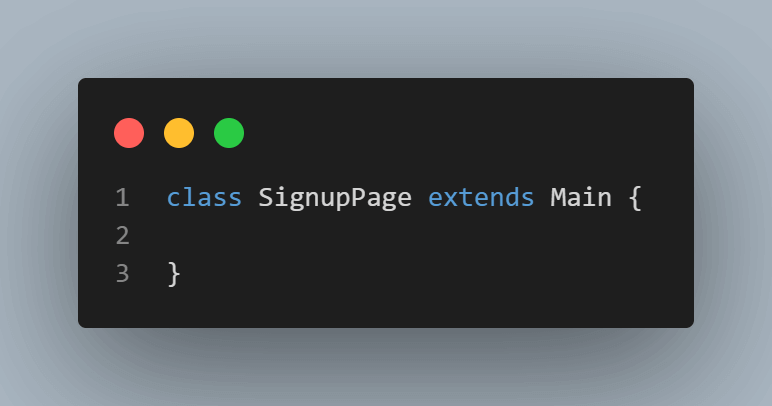
The child class of the parent class Main, called SignupPage, is created using extends keyword. The signupPage class will inherit all the methods from the main class. For code reusability, inheritance is helpful, especially when implementing Page Object Model.
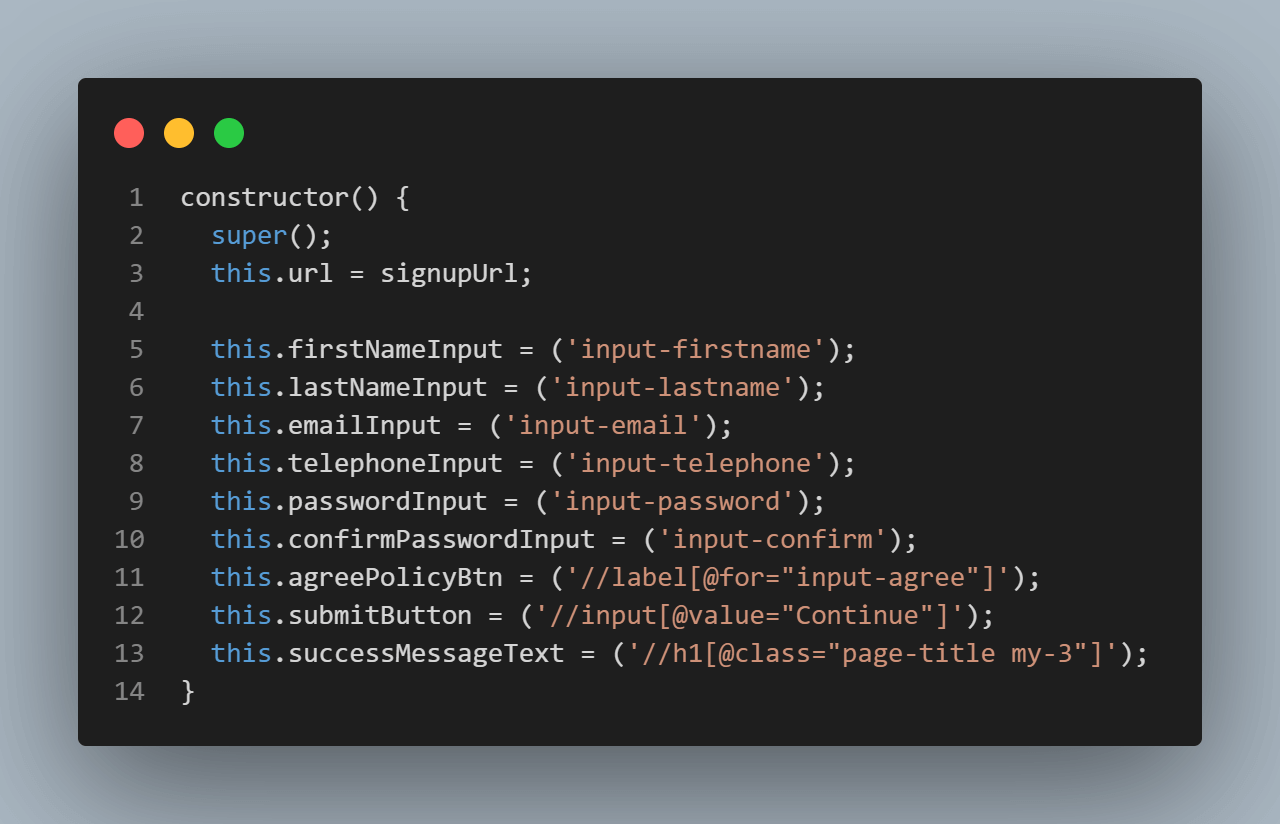
The SignupPage class constructor() method is created where it uses the super() method to call the constructor of the parent class Main. In the constructor method, this.url property is assigned the value of the variable signupUrl.
Properties this.firstNameInput, this.lastNameInput, this.emailInput, this.telephoneInput, this.passwordInput, this.confirmPasswordInput, this.agreePolicyBtn, this.submitButton, and this.successMessageText are assigned selectors values that will be used to find or select registration page form inputs, buttons, or text.
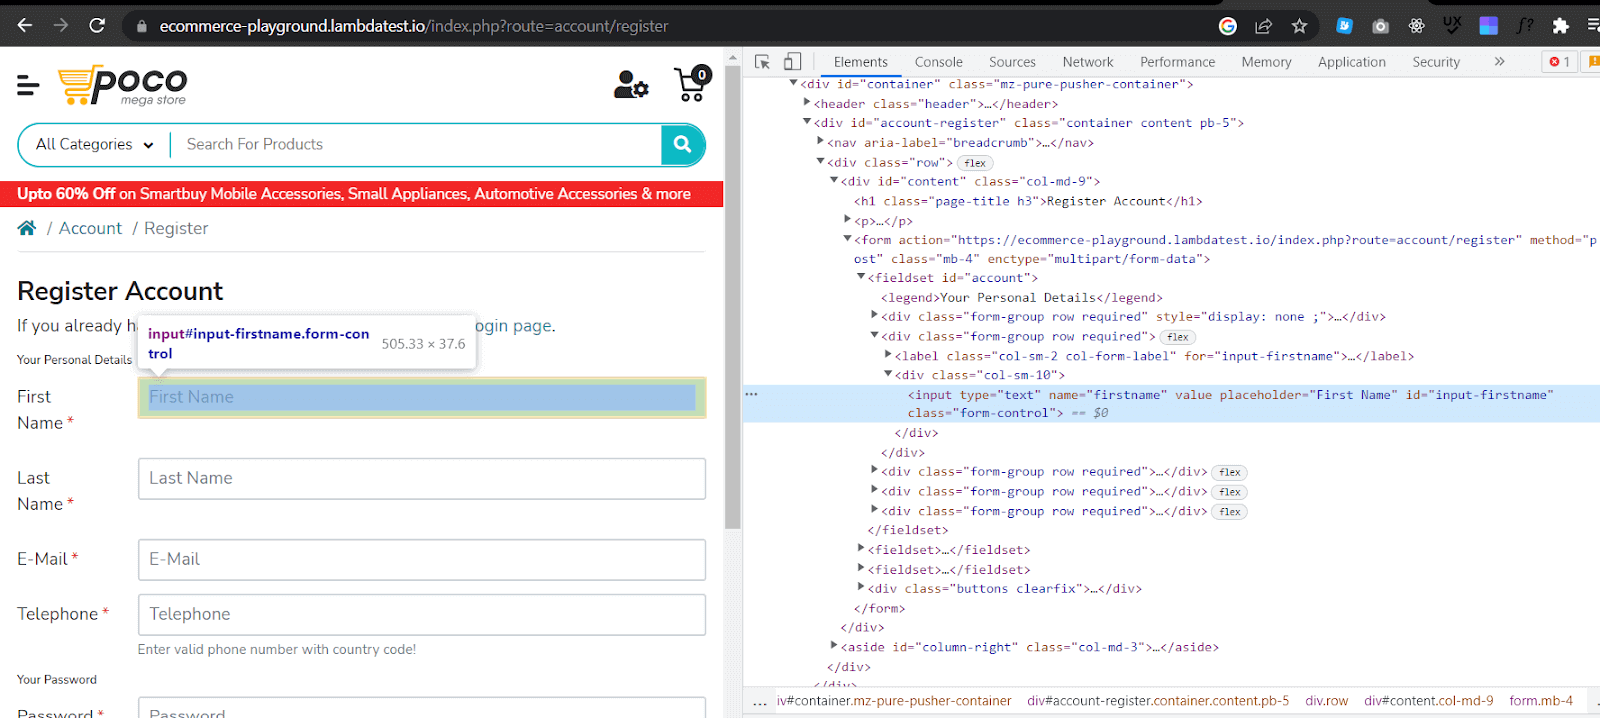
To add the selectors, navigate to the eCommerce registration page.
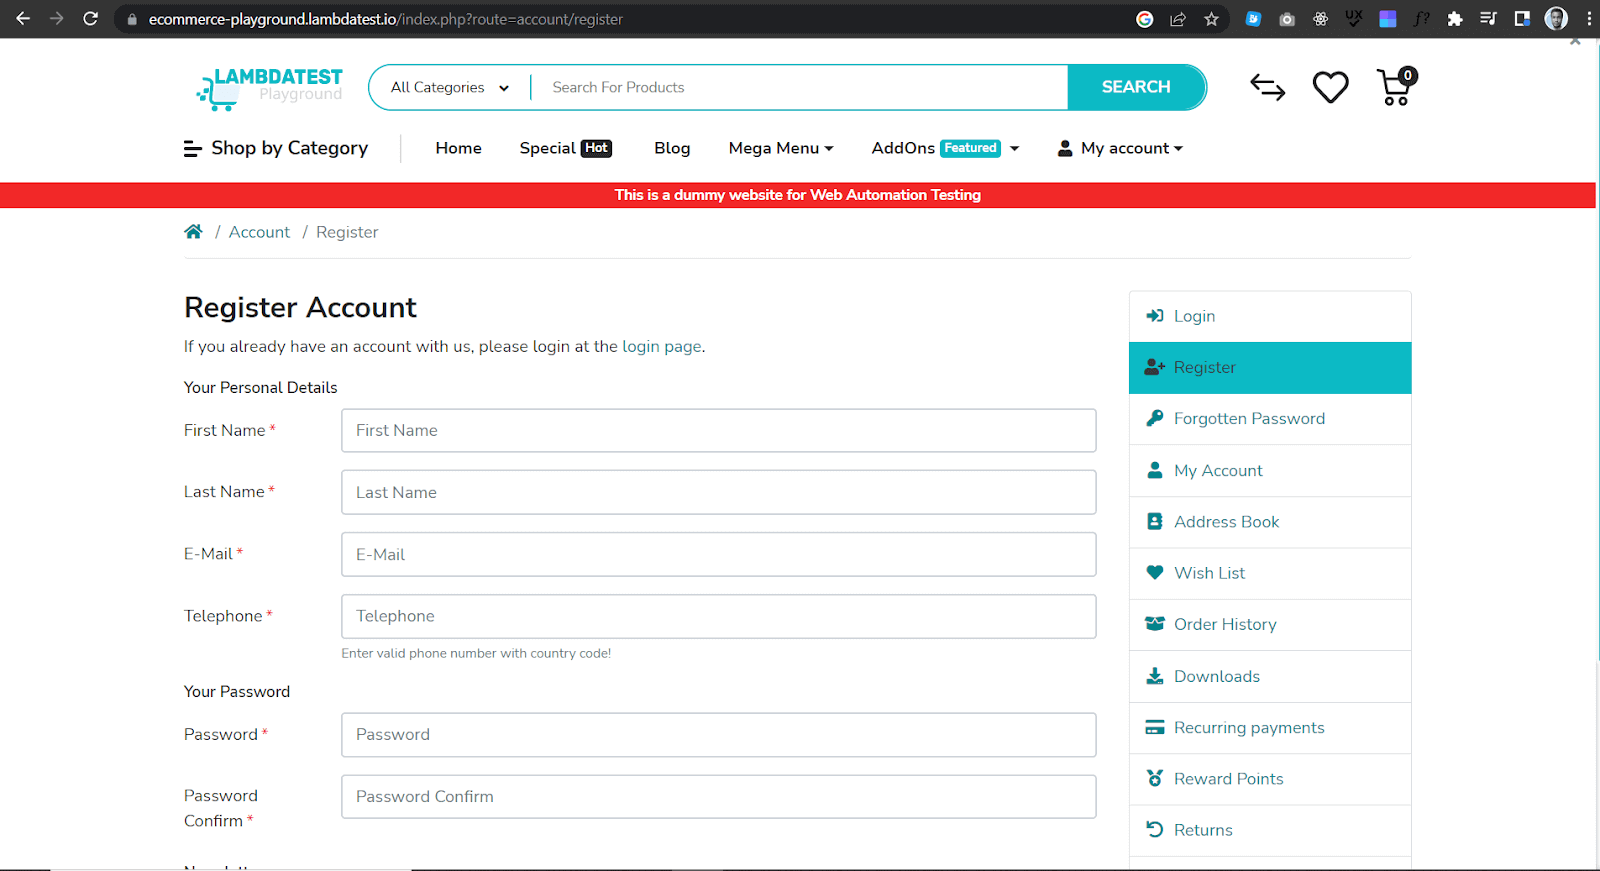
Then inspect the web page and get the ID locator of the input fields and buttons a user must fill and click when creating an account, as shown below.
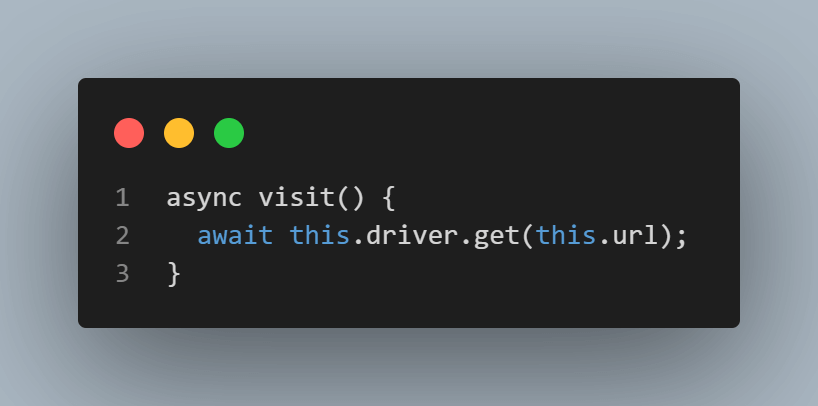
The Async function visit() is created where the get() method is used to load the URL of the eCommerce store registration page.
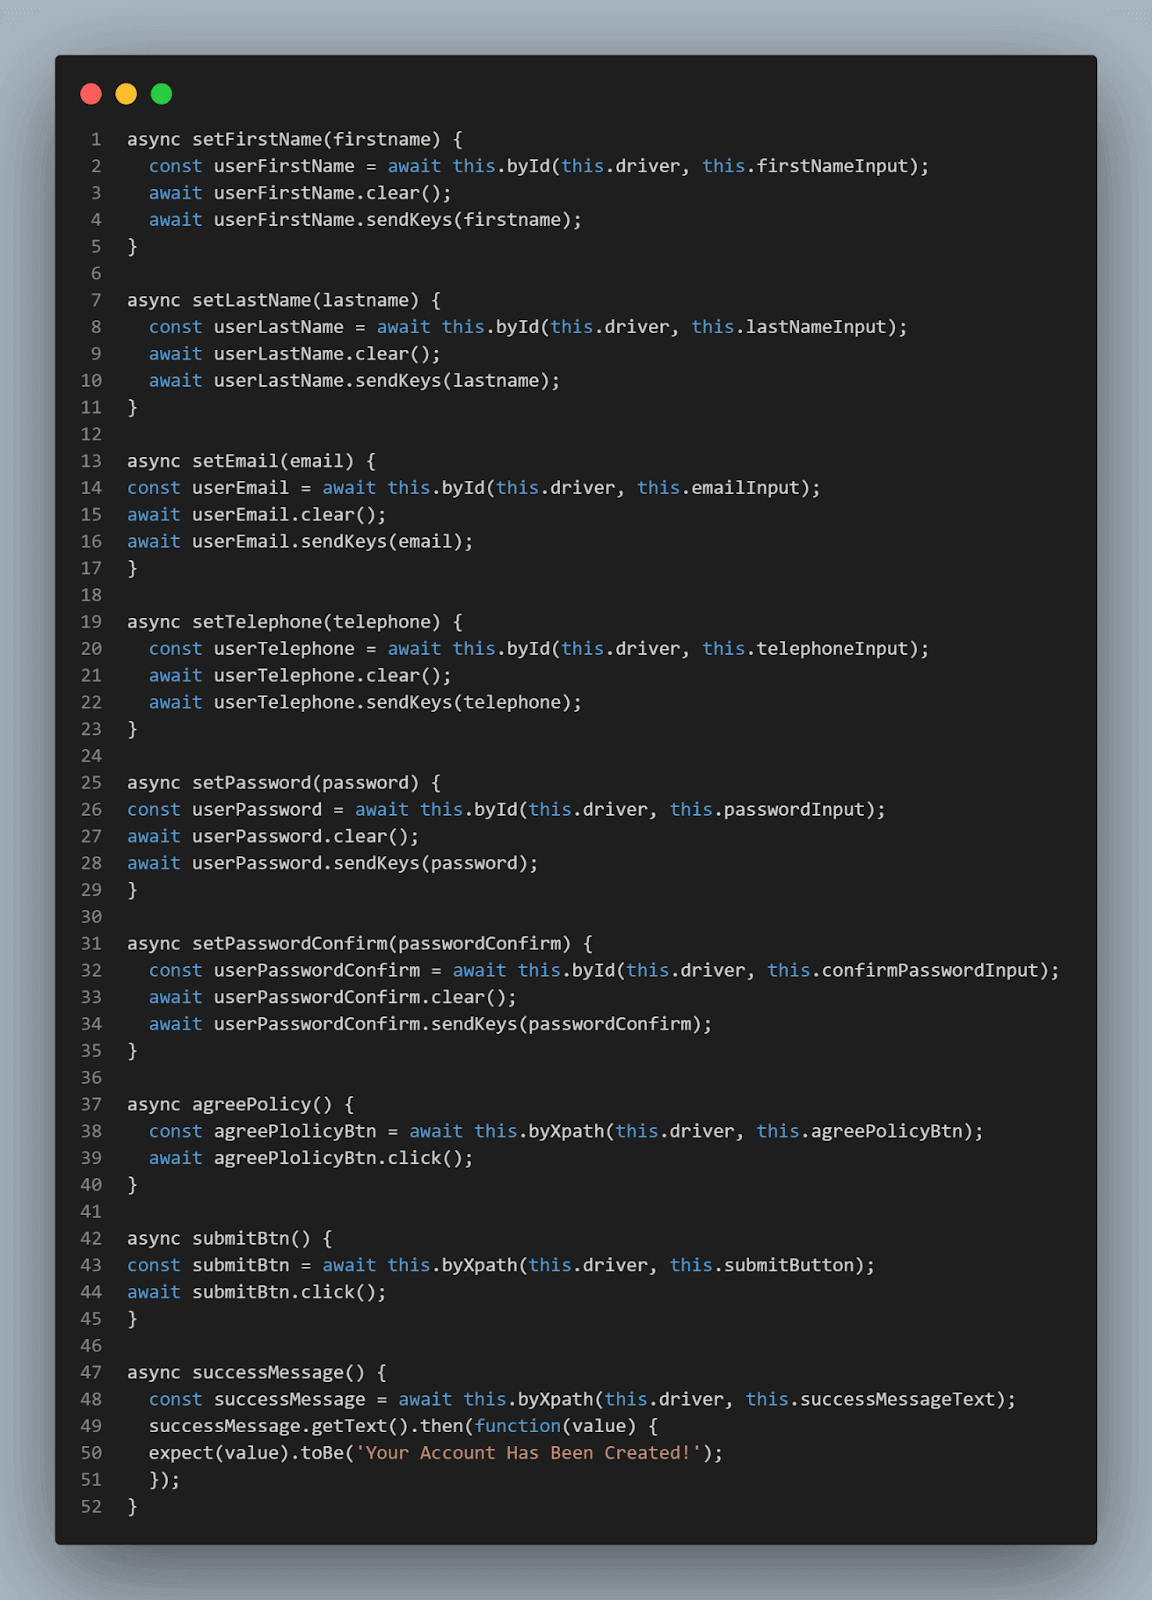
The Async functions setFirstName(), setLastName(), setEmail(), setTelephone(), setPassword(), setPasswordConfirm(), agreePolicy(), submitBtn(), and successMessage() are created. In the async functions, the path for web elements, input fields, and buttons to be tested on the registration page are defined.
The Async functions representing input fields have variables declared to take values that will be added to registration form input fields.
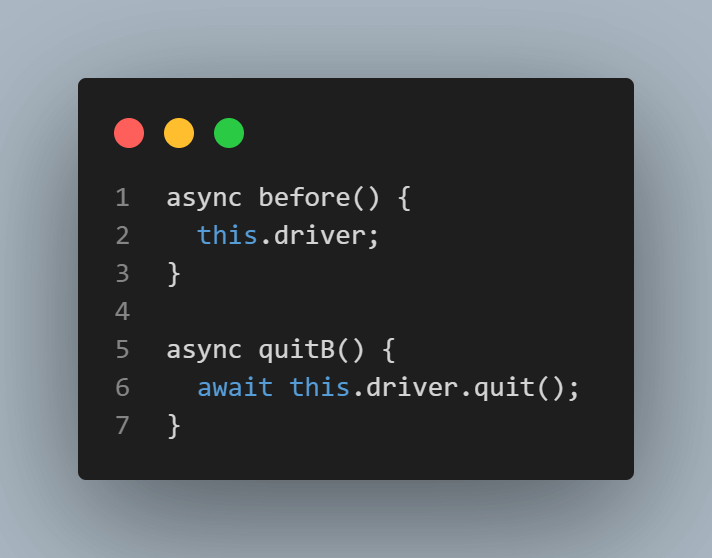
The Async functions before() and quitB() are created where the async function before() starts a browser session while the async function quitB() ends the browser session.
Finally, the SignupPage class is exported to be used in other files.
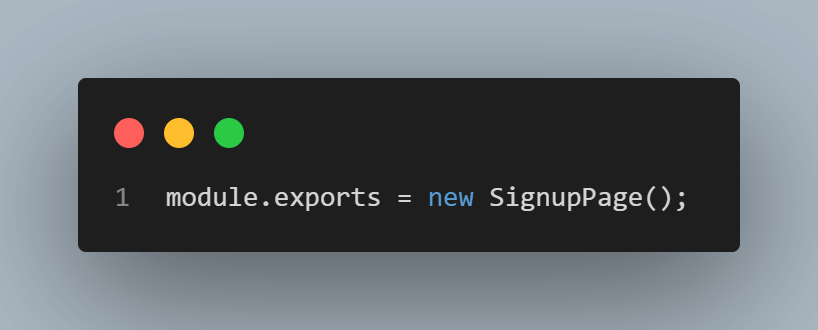
Step 6: In the loginPage.Main.js file, add the following code.
File: LoginPage.Main.js
const Main = require('./main')

const loginUrl = 'https://ecommerce-playground.lambdatest.io/index.php?route=account/login'

class LoginPage extends Main {

    constructor() {
      super();
      this.url = loginUrl;

      this.emailInput = ('input-email');
      this.passwordInput = ('input-password');
      this.loginButton = ('//input[@value="Login"]');
    }

    async visit() {
      await this.driver.get(this.url);
    }

    async setEmail(email) {
      const userEmail = await this.byId(this.driver, this.emailInput);
      await userEmail.clear();
      await userEmail.sendKeys(email);
    }

    async setPassword(password) {
      const userPassword = await this.byId(this.driver, this.passwordInput);
      await userPassword.clear();
      await userPassword.sendKeys(password);
    }

    async login() {
      const loginBtn = await this.byXpath(this.driver, this.loginButton);
      await loginBtn.click();
    }

    async accountDash() {
        let currentUrl = await this.driver.getCurrentUrl();
        expect(currentUrl).toEqual('https://ecommerce-playground.lambdatest.io/index.php?route=account/account');
    }
}

module.exports = new LoginPage();
Code Walkthrough:
Variable Main is assigned the value of the Main class imported from the main.js file. Then variable loginUrl is assigned the eCommerce online store login page URL.

The child class of the parent class Main, LoginPage is created using extends keyword. The LoginPage class will inherit all the methods from the Main class.
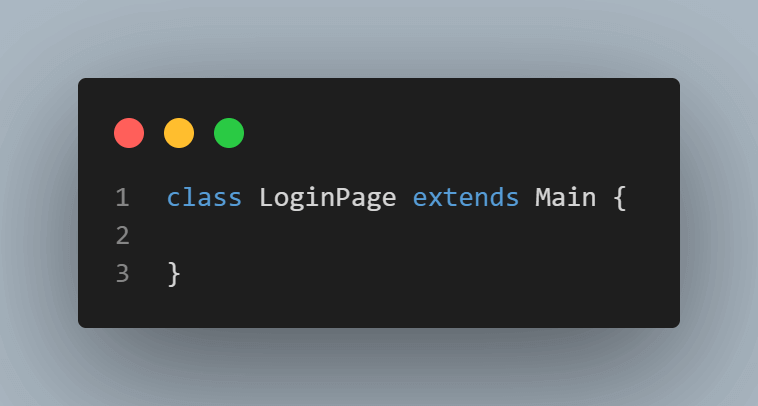
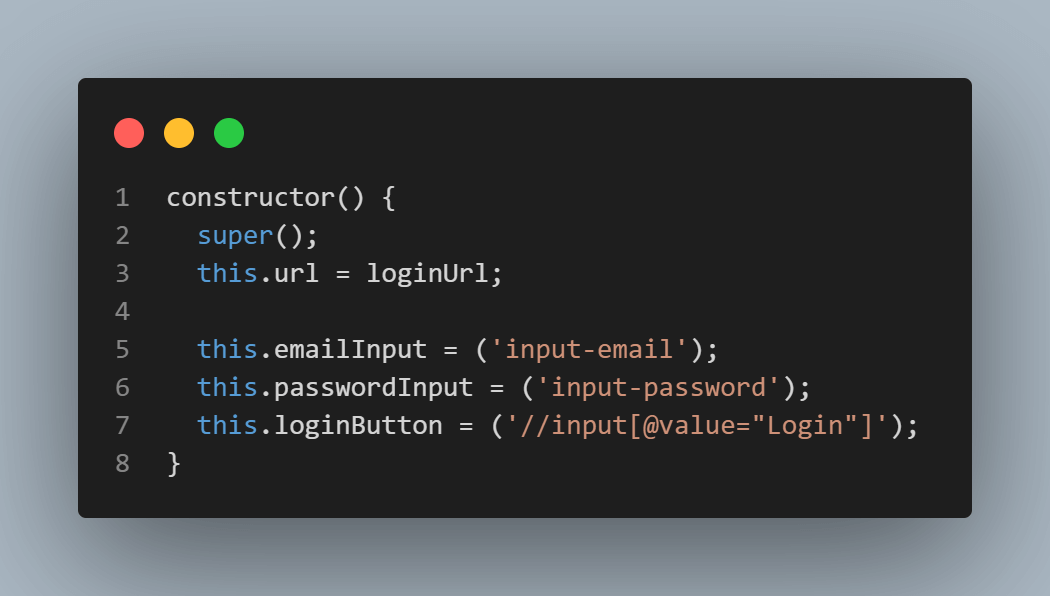
The LoginPage class constructor() method is created where it uses the super() method to call the constructor of the parent class Main. In the constructor method, this.url property is assigned the value of the variable loginUrl.
Properties this.emailInput, this.passwordInput, and this.loginButton are assigned selectors values that will be used to find or select login page form inputs, buttons, or text.
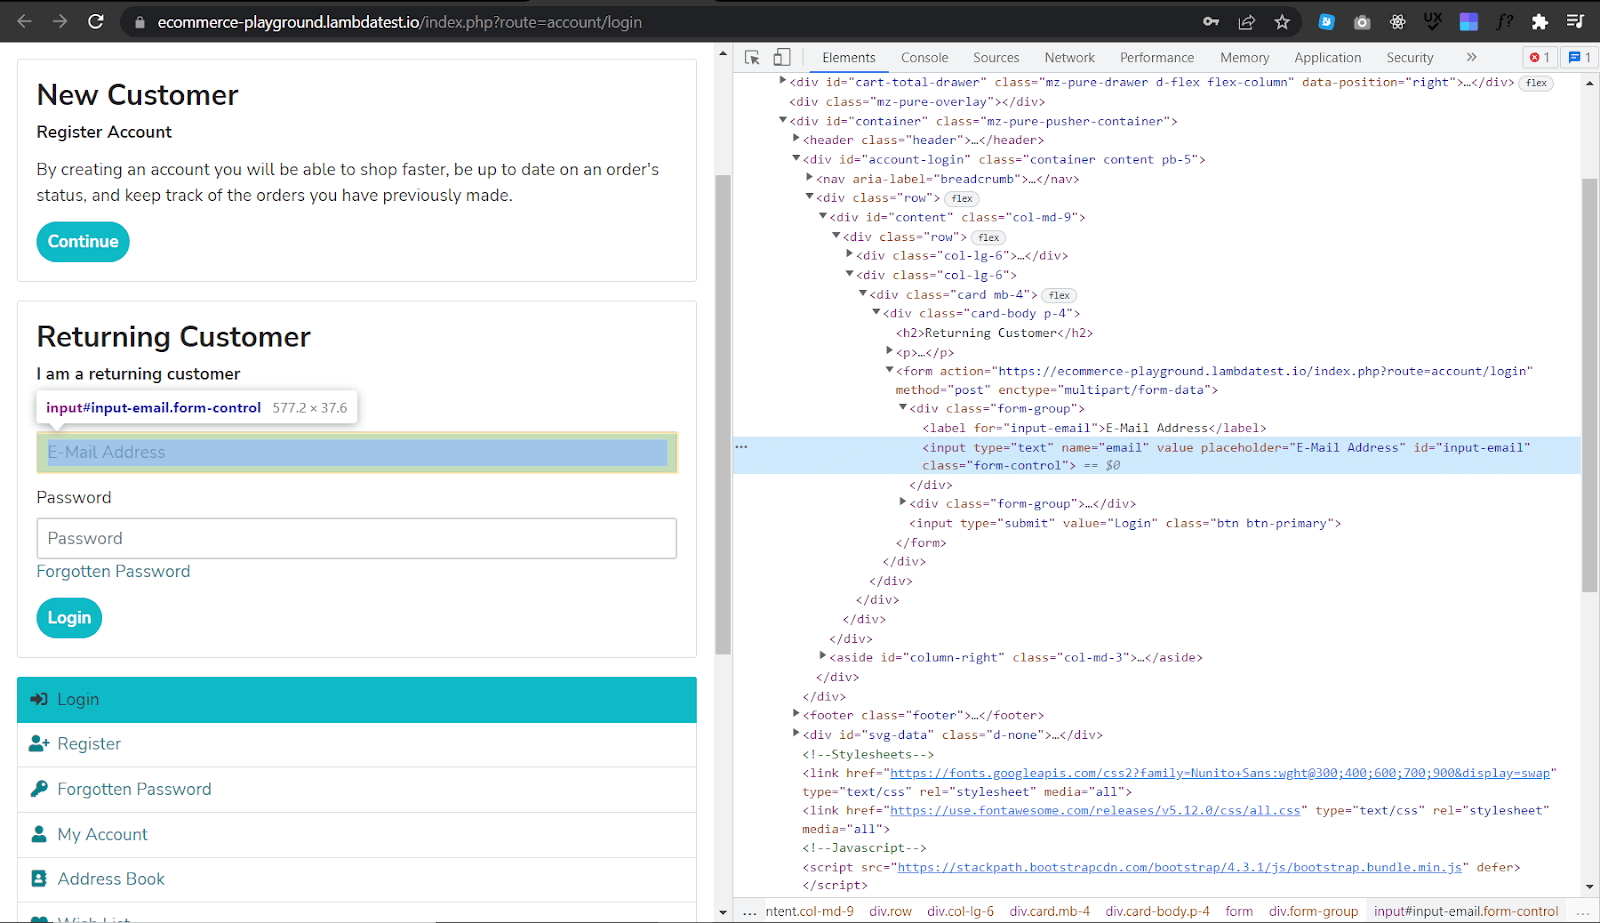
To add the selectors, navigate to the eCommerce login page.
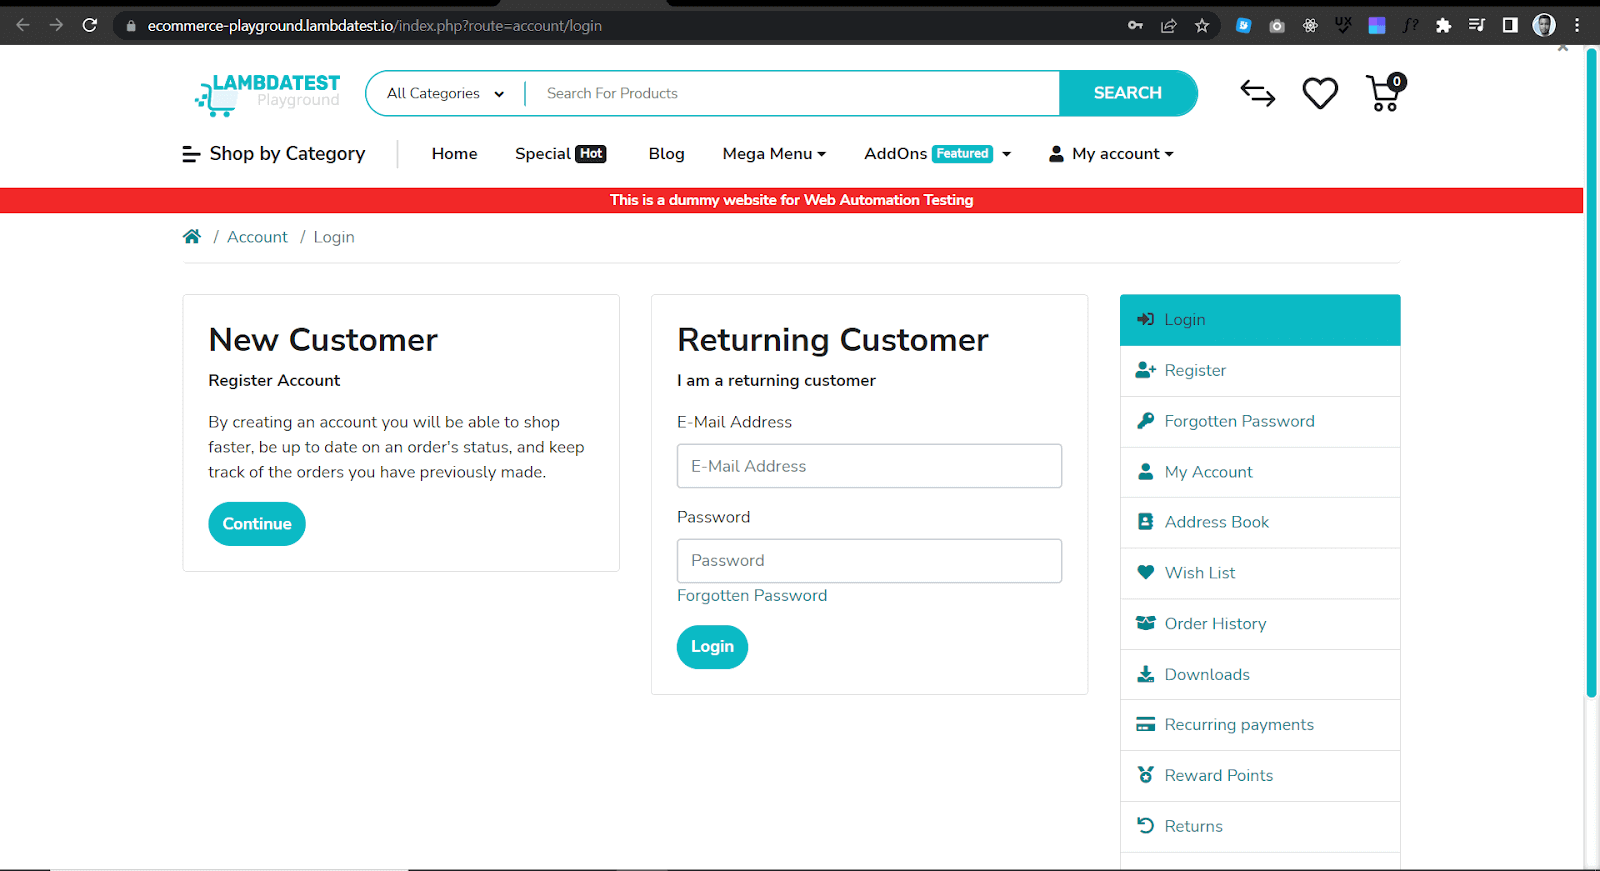
Then inspect the web page and get the ID locator of the input fields and buttons a user must fill and click when login, as shown below.
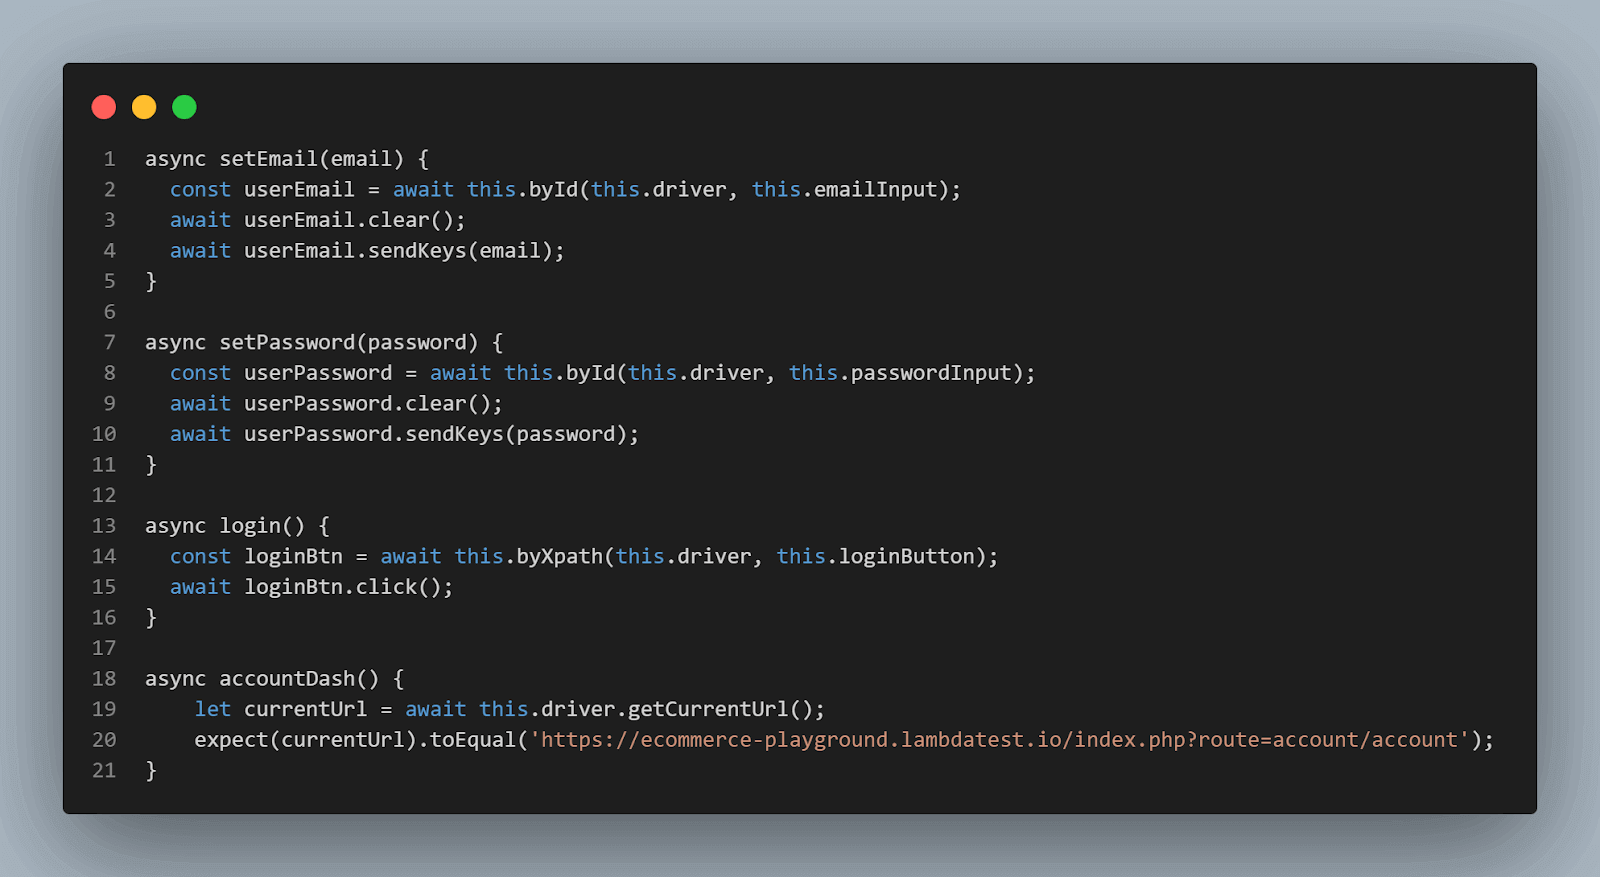
The Async functions setEmail(), setPassword(), login(), and accountDash() are created where the path for web elements, input fields, and buttons to be tested on the login page are defined.
Finally, the LoginPage class is exported to be used in other files.
Step 7: In the AddToCart.Main.js file, add the following code.
FileName: AddToCart.Main.js
const Main = require('./main')

class AddToCart extends Main {

    constructor() {
      super();

      this.categoryButton = ('//a[normalize-space()="Shop by Category"]');
      this.phonesCategoryButton = ('//span[normalize-space()="Phone, Tablets & Ipod"]');
      this.HTCPhoneButton = ('//div[@class="carousel-item active"]//img[@title="HTC Touch HD"]');
      this.addToCartButton = ('//div[@id="entry_216842"]//button[@title="Add to Cart"][normalize-space()="Add to Cart"]');
      this.cartButton = ('//a[@class="btn btn-primary btn-block"]');
      this.itemNameText = ('//td[@class="text-left"]//a[contains(text(),"HTC Touch HD")]');
    }

    async categoryBtn() {
      const categoryBtn = await this.byXpath(this.driver, this.categoryButton);
      await categoryBtn.click();
    }

    async phonesCategoryBtn() {
        const phonesCategoryBtn = await this.byXpath(this.driver, this.phonesCategoryButton);
        await phonesCategoryBtn.click();
    }

    async HTCPhoneBtn() {
        const HTCPhoneBtn = await this.byXpath(this.driver, this.HTCPhoneButton);
        await HTCPhoneBtn.click();
    }

    async addToCartBtn() {
        const categoryBtn = await this.byXpath(this.driver, this.addToCartButton);
        await categoryBtn.click();
    }

    async cartBtn() {
        const cartBtn = await this.byXpath(this.driver, this.cartButton);
        await cartBtn.click();
    }

    async itemName() {
        const itemName = await this.byXpath(this.driver, this.itemNameText);
        itemName.getText().then(function(value) {
        expect(value).toBe('HTC Touch HD');
        });
    }
}

module.exports = new AddToCart();
Code Walkthrough:
Variable Main is assigned the value of the Main class imported from the main.js file.
The child class of the parent class Main, called AddToCart, is created using extends keyword. The AddToCart class will inherit all the methods from the Main class.
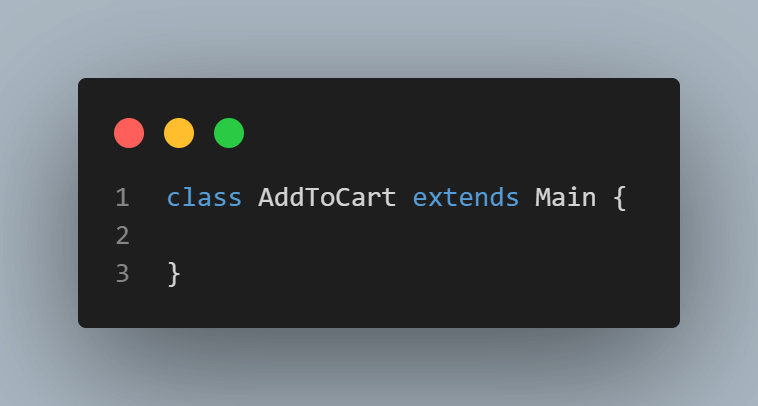
The AddToCart class constructor() method is created where it uses super() method to call the constructor of the parent class Main.
Properties this.categoryButton, this.phonesCategoryButton, this.HTCPhoneButton, this.addToCartButton, this.cartButton, and this.itemNameText are assigned selectors values that will be used to find or select buttons or text to add an item to a cart.

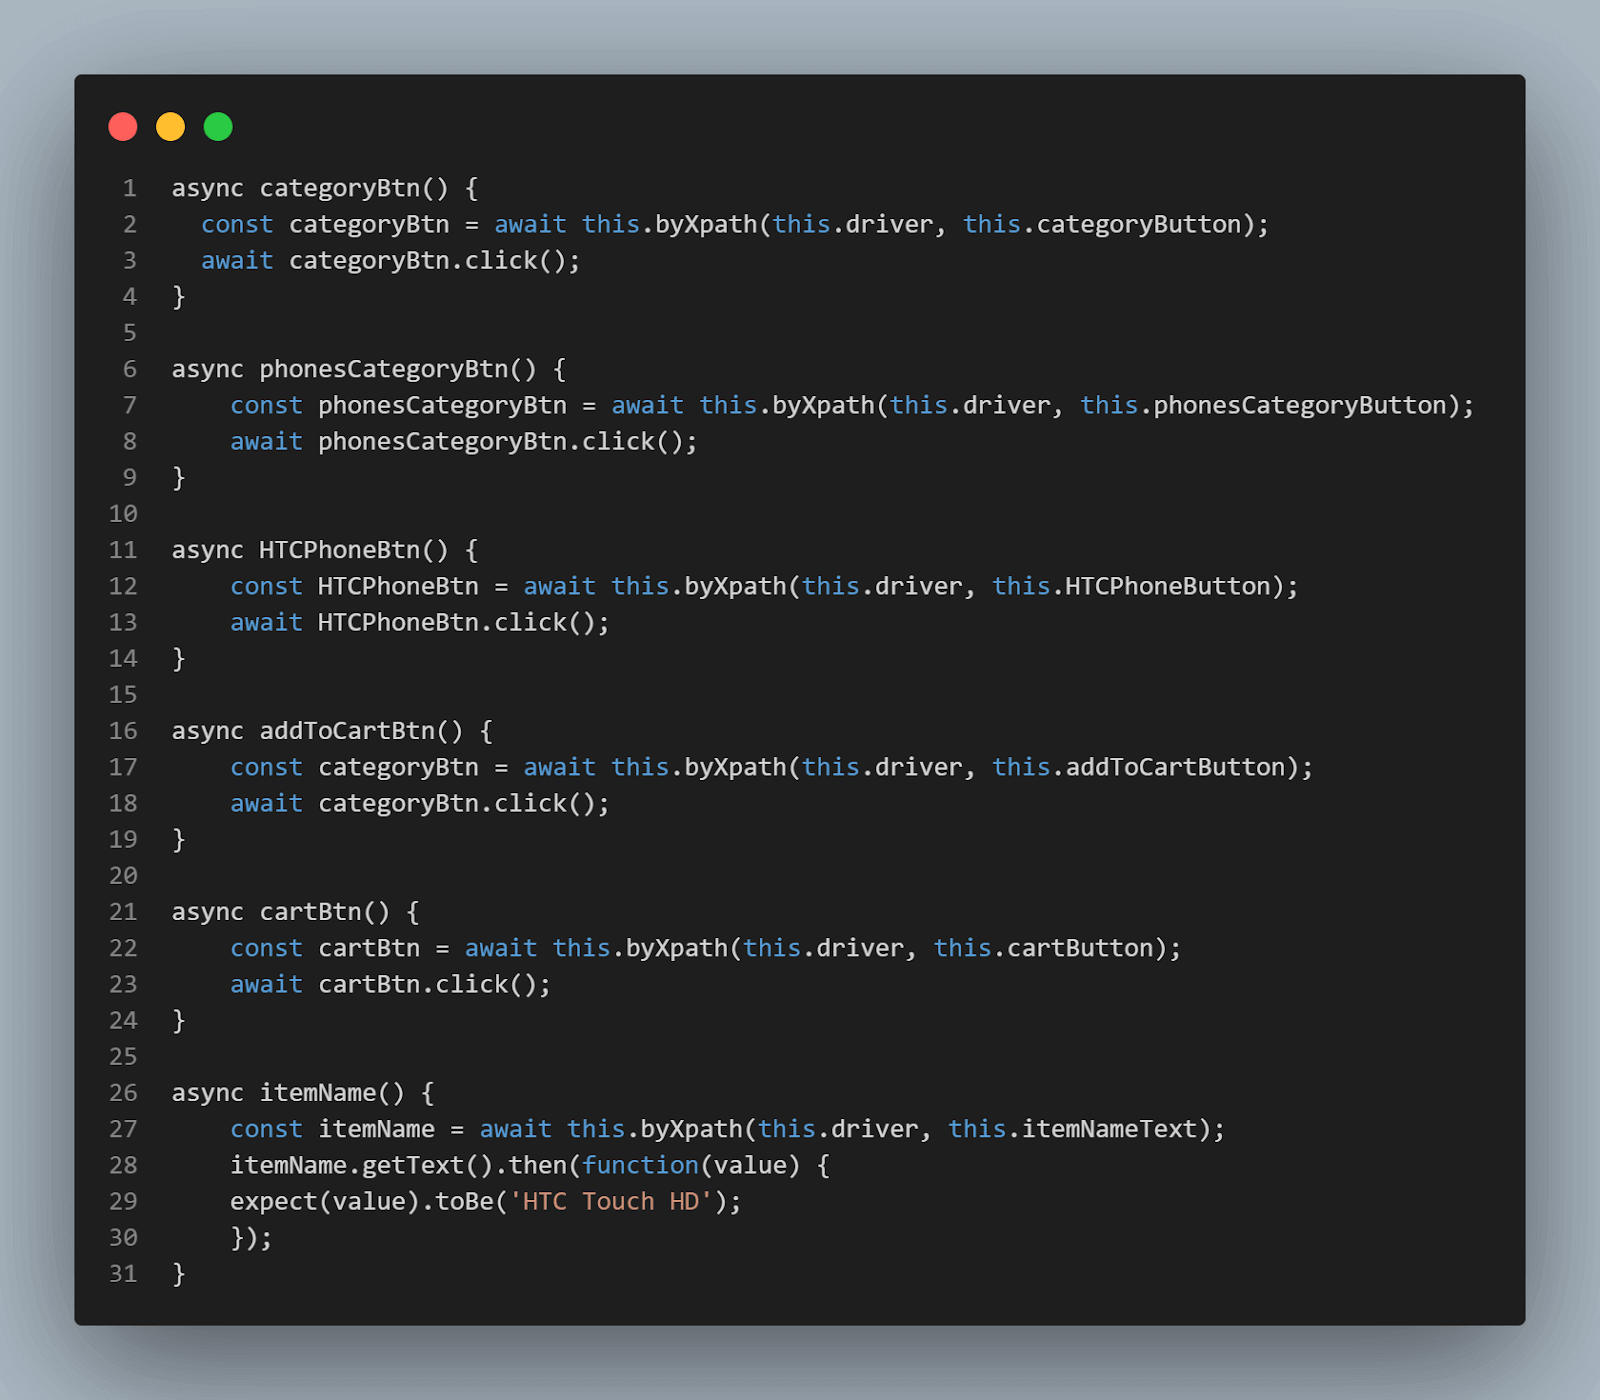
Async functions categoryBtn(), phonesCategoryBtn(), HTCPhoneBtn(), addToCartBtn(), cartBtn(), and itemName() are created where the path for web elements, texts, and buttons to be tested when adding item to cart is defined.
Finally, the AddToCart class is exported to be used in other files.
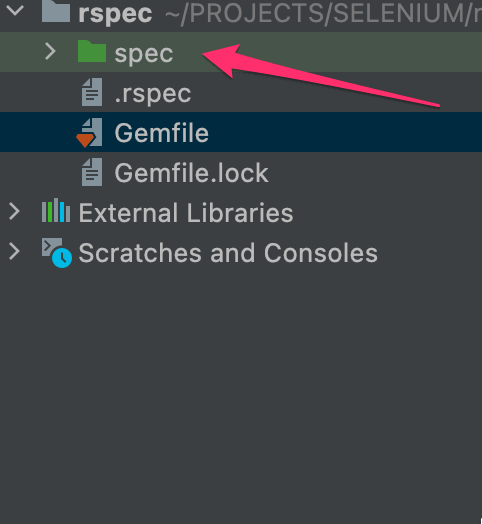
Step 8: Create a folder called Ecommerce in the Spec folder, as shown below.
Step 9: In the Ecommerce folder, create two files named login.spec.js, and signup.spec.js, as shown below.
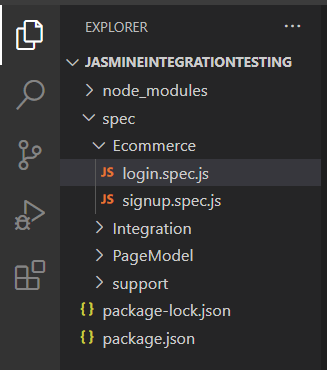
Step 10: In the signup.spec.js file, add the following code.
File: Signup.spec.js
const SignupPage = require('../PageModel/signupPage.main');
const AddToCart = require('../PageModel/addToCart.main');

//to set jasmine default timeout
jasmine.DEFAULT_TIMEOUT_INTERVAL = 60 * 1000;
jasmine.getEnv().defaultTimeoutInterval = 60000;

// Start to write the first test case
describe("Ecommerce Store Integration Tests", function() {
    beforeEach(async () => {
        SignupPage.before();
    });

    afterEach(async () => {
        SignupPage.quitB();
    });


    it("User should be able to create an account and add item to cart", async function() {
        await SignupPage.visit();

        await SignupPage.setFirstName('Joseph');
        await SignupPage.setLastName('Doe');
        await SignupPage.setEmail('jdoe4473@gmail.com'); //Use a different email to run the test to avoid getting an error
        await SignupPage.setTelephone('0712345678');
        await SignupPage.setPassword('12345');
        await SignupPage.setPasswordConfirm('12345');
        await SignupPage.agreePolicy();
        await SignupPage.submitBtn();
        await SignupPage.successMessage();
        await AddToCart.categoryBtn();
        await AddToCart.phonesCategoryBtn();
        await AddToCart.HTCPhoneBtn();
        await AddToCart.addToCartBtn();
        await AddToCart.cartBtn();
        await AddToCart.itemName();
    });
});
Code Walkthrough:
Variable SignupPage is assigned the value of the SignupPage class imported from the signupPage.main.js file. Variable AddToCart is assigned the value of the AddToCart class imported from the addToCart.main.js file.

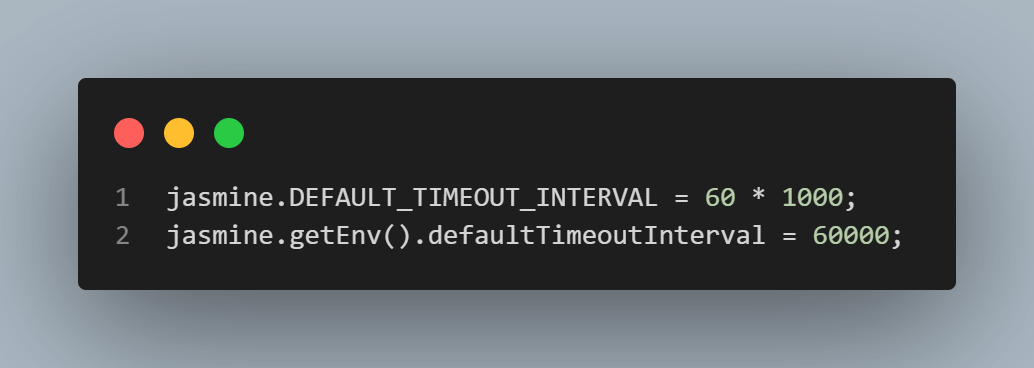
The default timeout interval for tests is set.
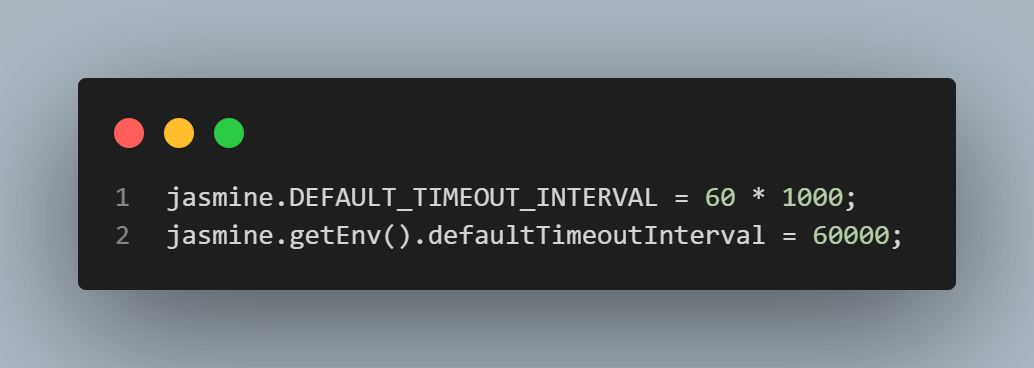
The jasmine.DEFAULT_TIMEOUT_INTERVAL = 80 * 1000; sets the default timeout interval to 80,000 milliseconds or 80 seconds. This means that if a test doesn't complete within 100 seconds, it will be marked as a failure.
The jasmine.getEnv().defaultTimeoutInterval = 80000; changes the default timeout interval to 60,000 milliseconds, or 60 seconds, after the initial default set in the previous line.
A described block function called E-commerce Store Integration Tests, where all the tests for the e-commerce store are written as shown below.
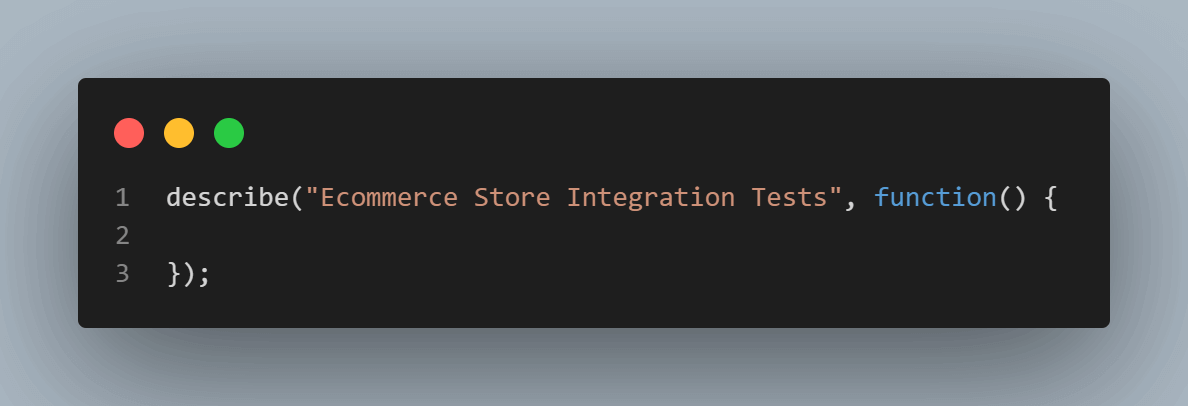
Inside the describe block, beforeEach and afterEach functions are created where they call before() and quitB() async functions created in SignupPage class.
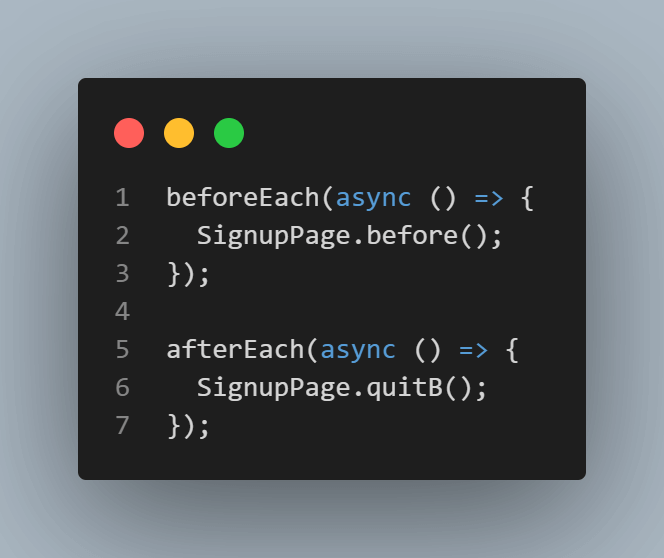
The beforeEach function is called before each test case is run and is used to set up the initial state or environment for the tests.
The beforeEach function uses the Selenium WebDriver to set up a new browser driver with the following options.
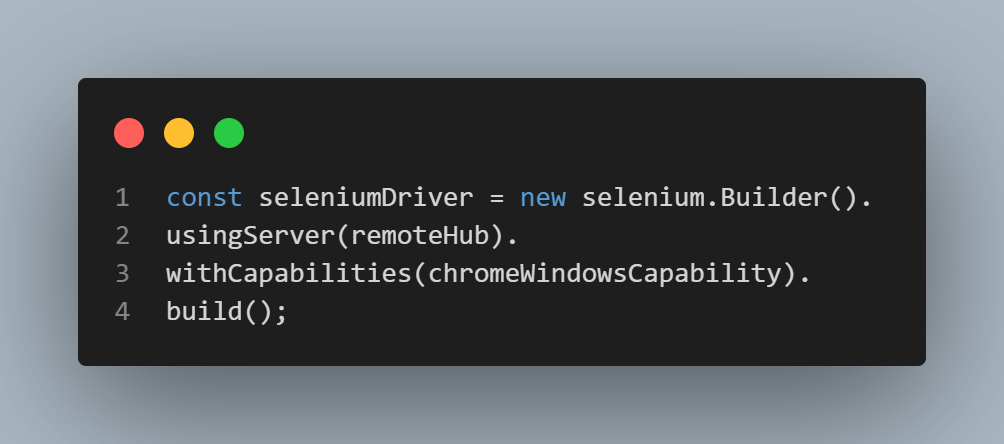
- new selenium.Builder() creates a new instance of the Selenium builder, which is used to configure the browser driver.
- usingServer(remoteHub) specifies that the browser driver should connect to a remote Selenium server, with the server's address specified by the remoteHub variable.
- withCapabilities(chromeWindowsCapability) configures the browser driver with the specified capabilities. chromeWindowsCapability is a variable that defines options like the browser type and version, and this capability is passed to the web driver.
- build() method creates and returns a new instance of the browser driver with the specified configuration.
Once the driver instance is created, it is available for all the tests in the current described block until the end.
This code block is usually used to set up browser test automation; the code will create a new browser instance before running each test case, so each test case will have a new browser environment to run on. This can be useful to ensure that the browser's state is consistent between test cases.
The afterEach function is called after each test case is run, and it is used to clean up or reset the state of the environment after a test case is completed.
In this case, the code uses the Selenium WebDriver to close the current browser session and end the browser process.
The await keyword closes the browser before the next test case is run. This ensures that the browser environment is consistent between test cases and that resources are cleaned up after each test.
This code block is used to clean up after each test, making sure that resources are correctly closed and releasing them so that they can be used by other tests. This is usually done to ensure that test results are not affected by the state of the previous test.
A test case is defined.

The it function is used to define a single test case, and it takes two arguments: the first is a string that describes the test case, and the second is a function that contains the test logic.
The test case is defined as: "User should be able to create an account and add item to cart". This test case checks if a user can create an account and add an item to the cart on the tested eCommerce store. The test case description string provides context and explains what the test is checking for.
The async keyword indicates that the function will contain one or more asynchronous operations, such as network requests or browser interactions. This is used in the test case to perform some operations that will interact with the browser, like clicking on elements, filling fields, etc. After that, the test assertion must be defined to check whether the test case passed or failed.
Inside it function, the visit() async function from SignupPage class is called on the driver object, which is an instance of the Selenium WebDriver.
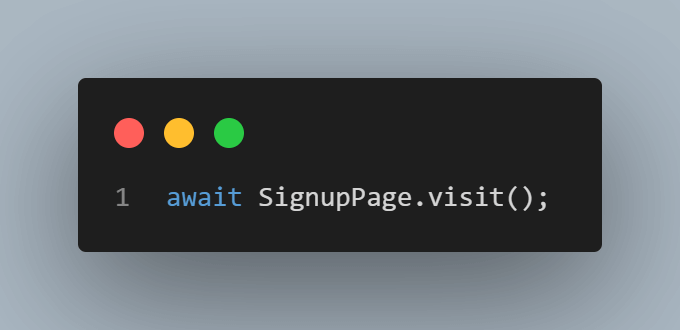
The await keyword is used before the SignupPage.visit() to ensure that the browser has fully loaded the new page before the next step of the test is executed. Without await, the code would proceed to the next step without waiting for the page to load, and any following test that relies on the page being loaded could fail.
Next, the async functions where the path for web elements, input fields, and buttons on the registration page defined in SignupPage class are called. Also, the async functions where the path for web elements and buttons for adding items into a cart defined in AddToCart class are called.
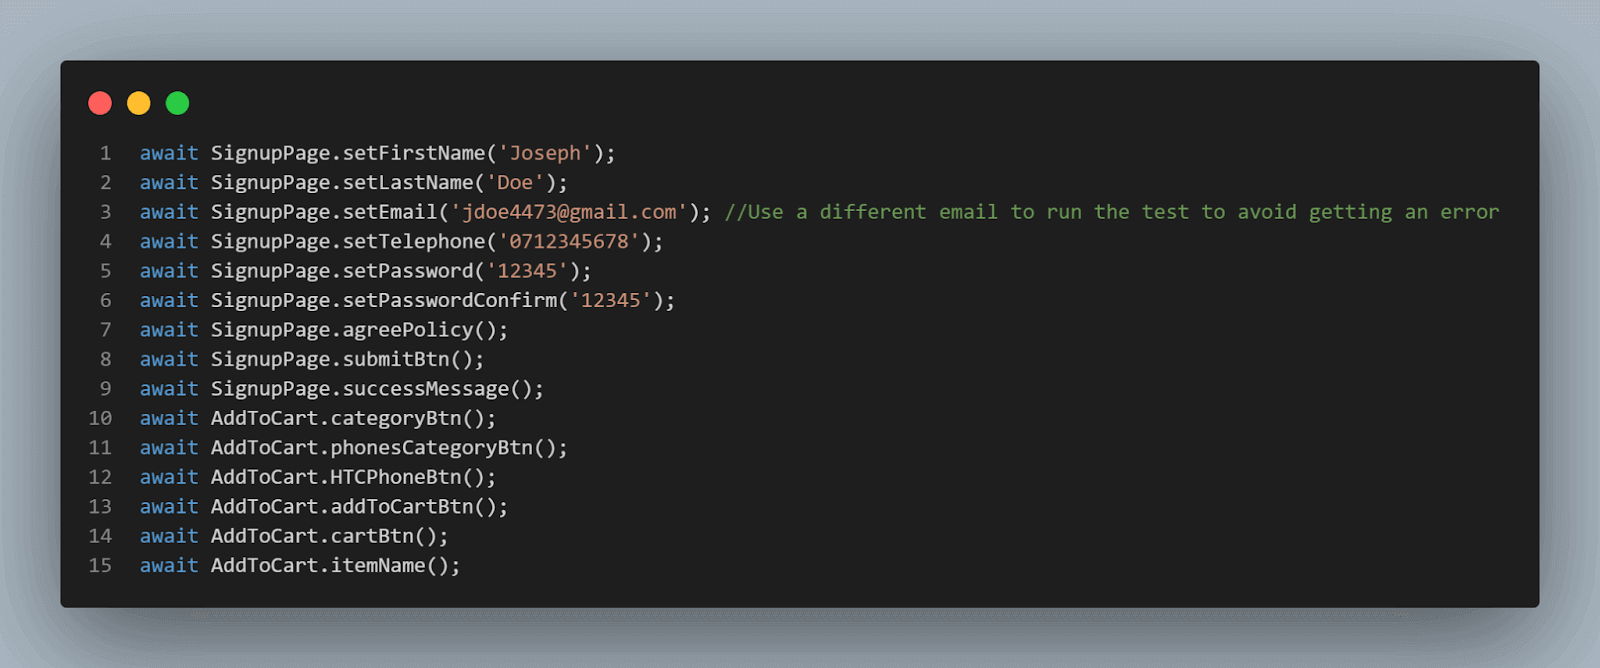
Step 11: In the login.spec.js file, add the following code.
const SignupPage = require('../PageModel/signupPage.main');
const LoginPage = require('../PageModel/loginPage.main');
const AddToCart = require('../PageModel/addToCart.main');
//to set jasmine default timeout
jasmine.DEFAULT_TIMEOUT_INTERVAL = 80 * 1000;
jasmine.getEnv().defaultTimeoutInterval = 800000;
// Start to write the first test case
describe("Ecommerce Store Integration Tests", function() {
    beforeEach(async () => {
        SignupPage.before();
    });
    afterEach(async () => {
        SignupPage.quitB();
    });
    it("User should be able to login and add item to cart", async function() {
        await LoginPage.visit();
        await LoginPage.setEmail('jdoe@example.com');
        await LoginPage.setPassword('12345');
        await LoginPage.login();
        await LoginPage.accountDash();
        await AddToCart.categoryBtn();
        await AddToCart.phonesCategoryBtn();
        await AddToCart.HTCPhoneBtn();
        await AddToCart.addToCartBtn();
        await AddToCart.cartBtn();
        await AddToCart.itemName();
    });
});
Code Walkthrough:
Variable is assigned the value of the SignupPage class imported from the signupPage.main.js file. Variable LoginPage is assigned the value of the LoginPage class imported from the loginPage.main.js file, while Variable AddToCart is assigned the value of the AddToCart class imported from the addToCart.main.js file.

The default timeout interval for tests is set.
A describe block function called Ecommerce Store Integration Tests, where all the tests for the eCommerce store are written as shown below.
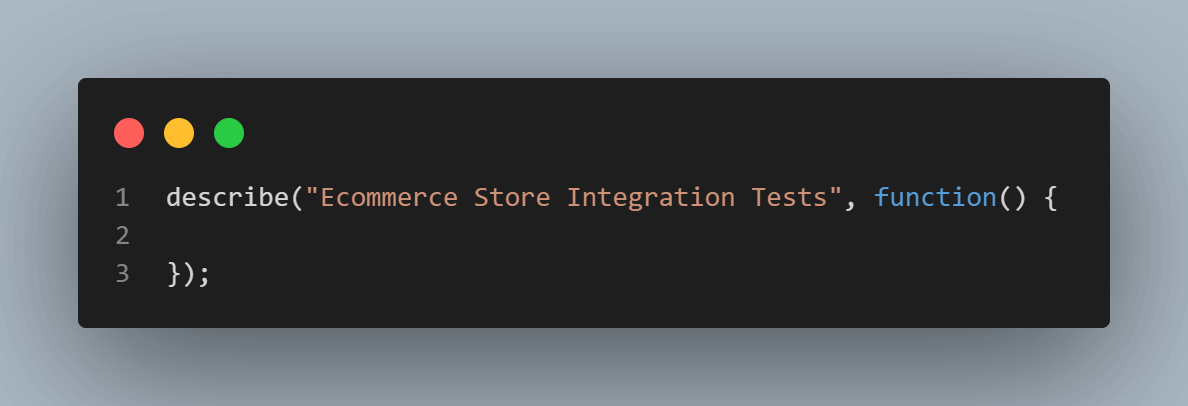
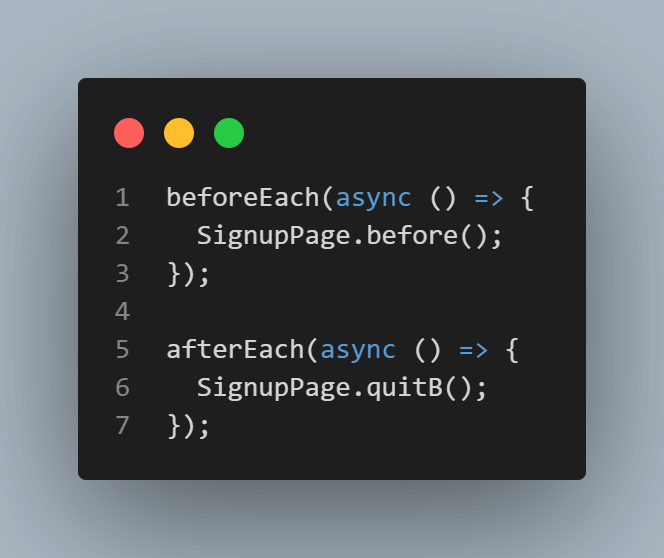
Inside the describe block, beforeEach and afterEach functions are created where they call before() and async functions created in the SignupPage class.
A test case is defined.

Inside it function, the visit() async function from LoginPage class is called.
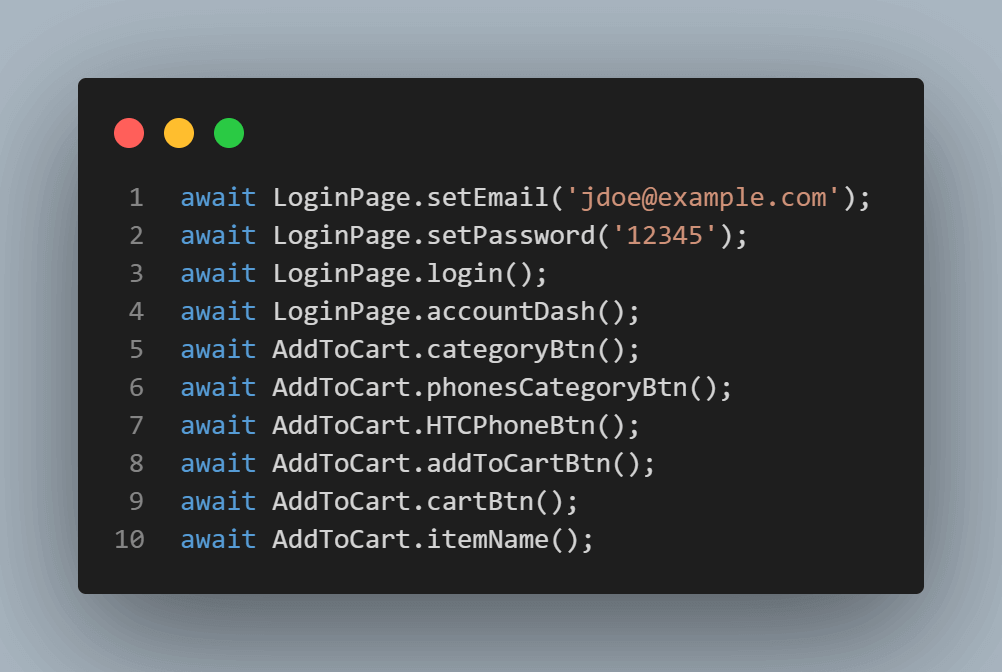
Next, the async functions where the path for web elements, input fields, and buttons on the login page defined in LoginPage class are called. Also, the async functions where the path for web elements and buttons for adding items into a cart defined in AddToCart class are called.
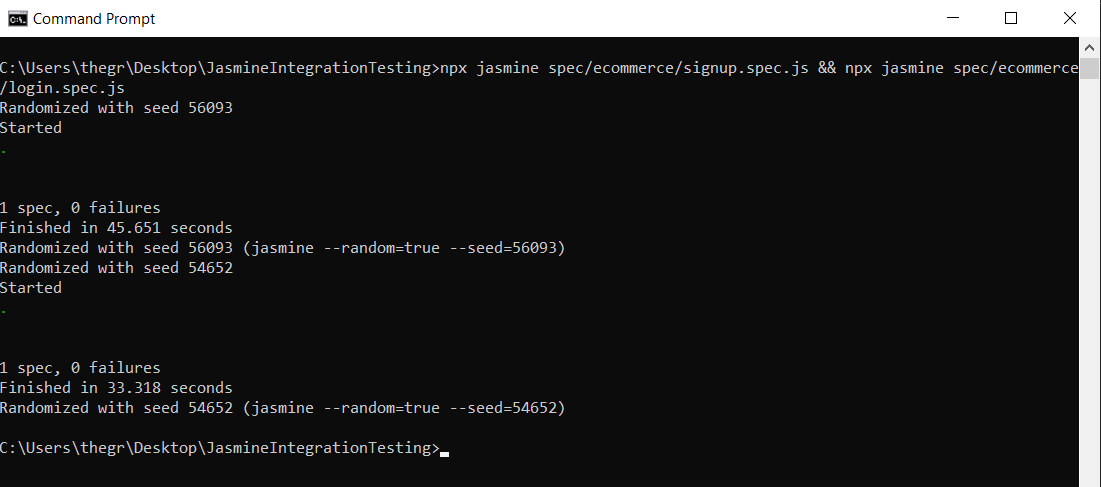
Step 12: Run the commands below on the command line.
npx jasmine spec/ecommerce/signup.spec.js && npx jasmine spec/ecommerce/login.spec.jsOnce the commands run, you should see on your command line that the tests have passed successfully.
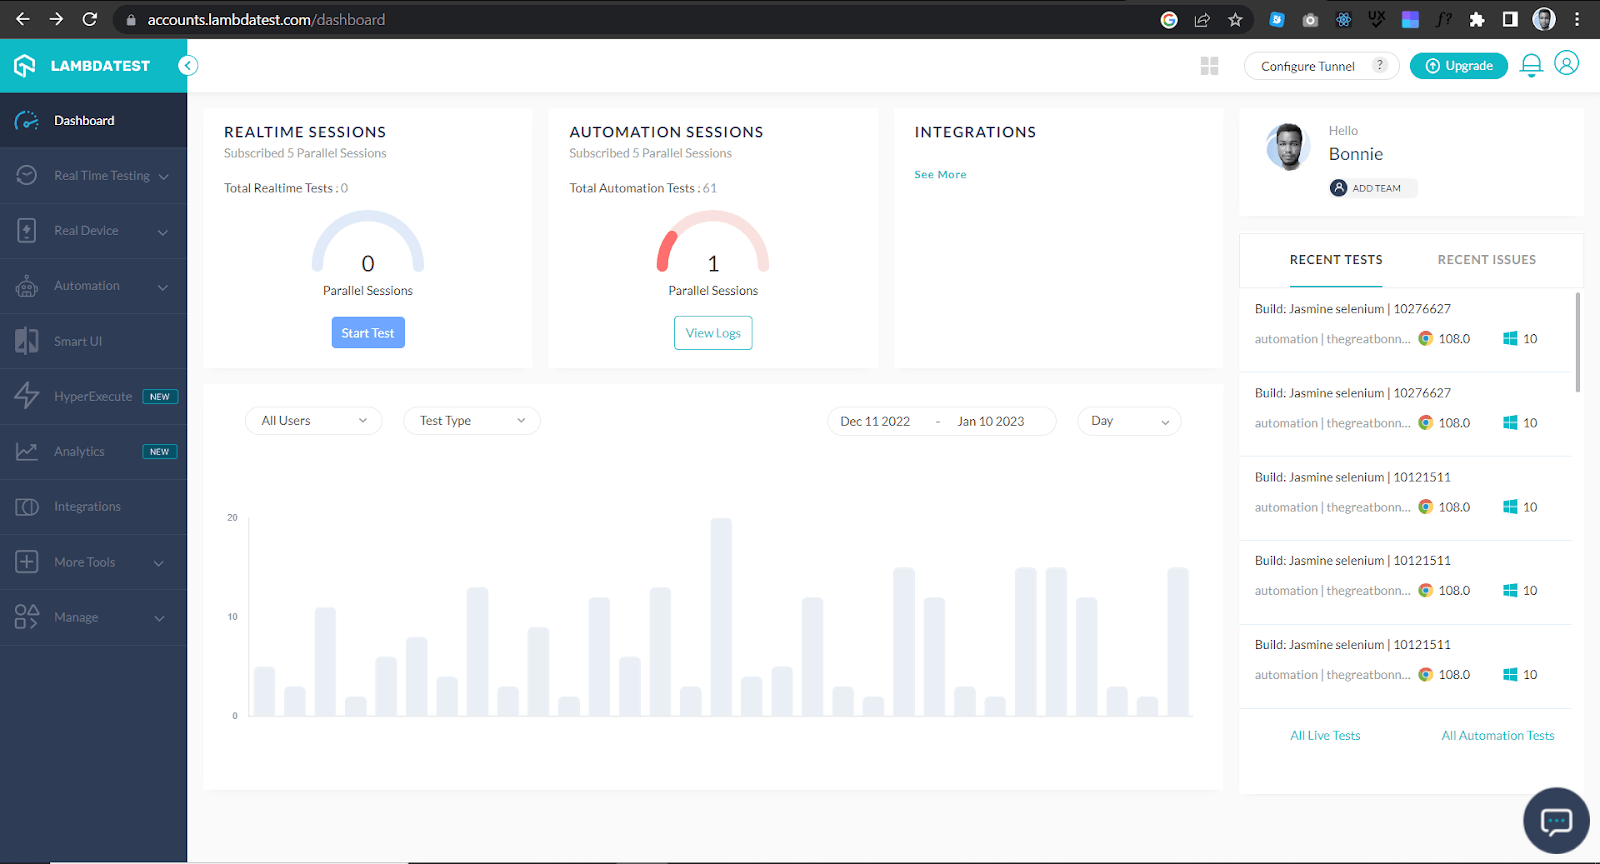
Visit your LambdaTest Dashboard, and on the right side of the screen, you should be able to see your recent tests, as shown below.
Click on one of the tests, and you will be redirected to the Automation Dashboard, as shown below.
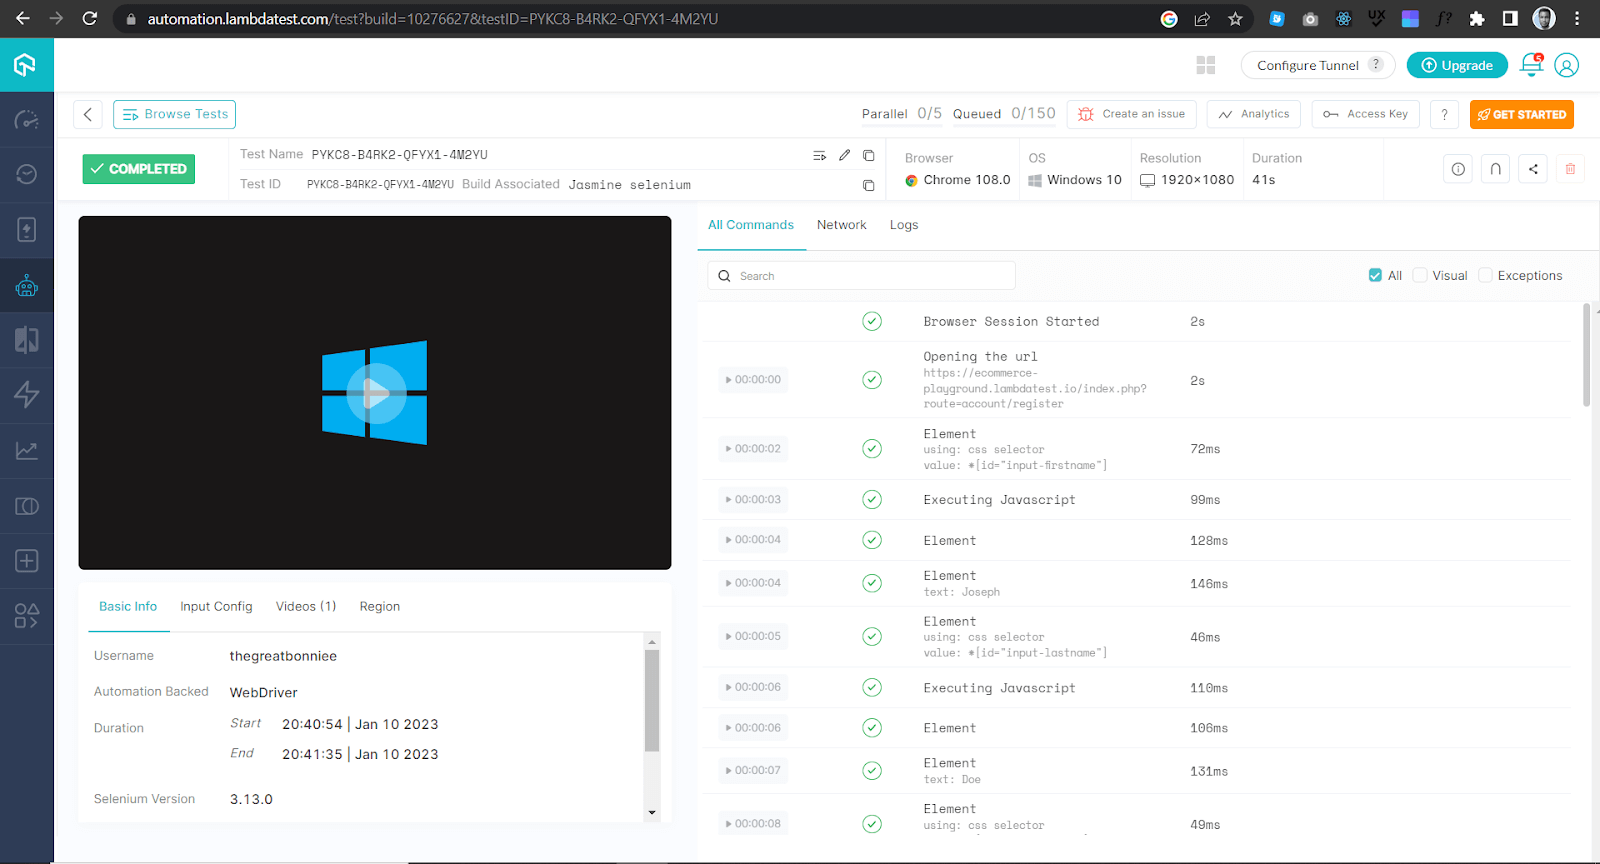
The Automation Dashboard has all the information about the test, including a video and a screenshot showing how the test went. You can also access the report on Analytics Dashboard, which shows all the details and metrics related to your tests.
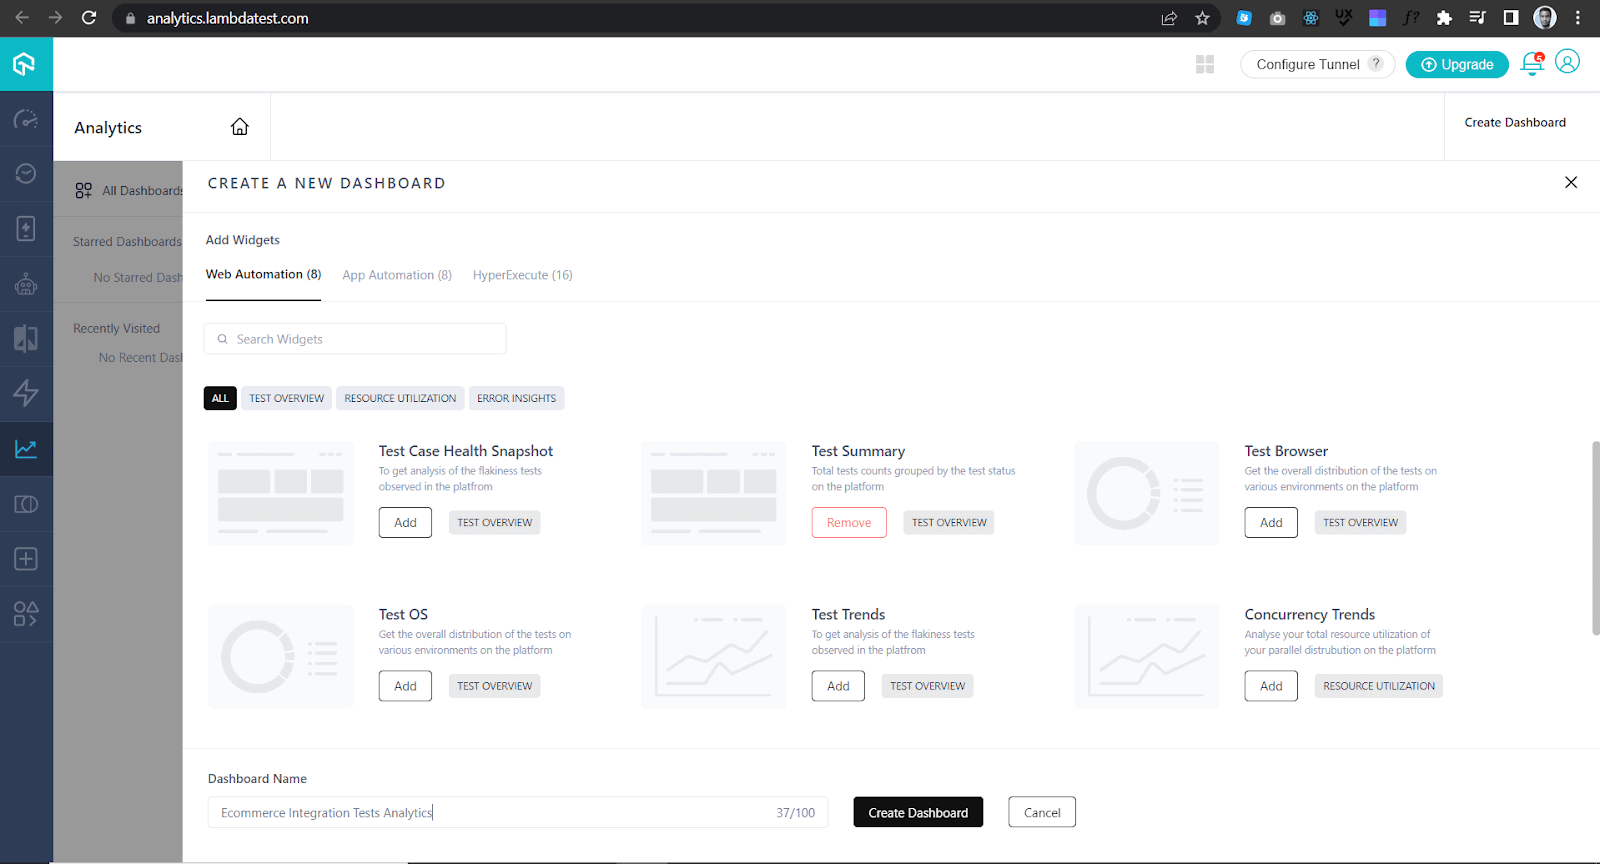
To see all the details and metrics related to your tests, navigate to the Analytics Dashboard and create a new Dashboard by clicking the Create New Dashboard button.
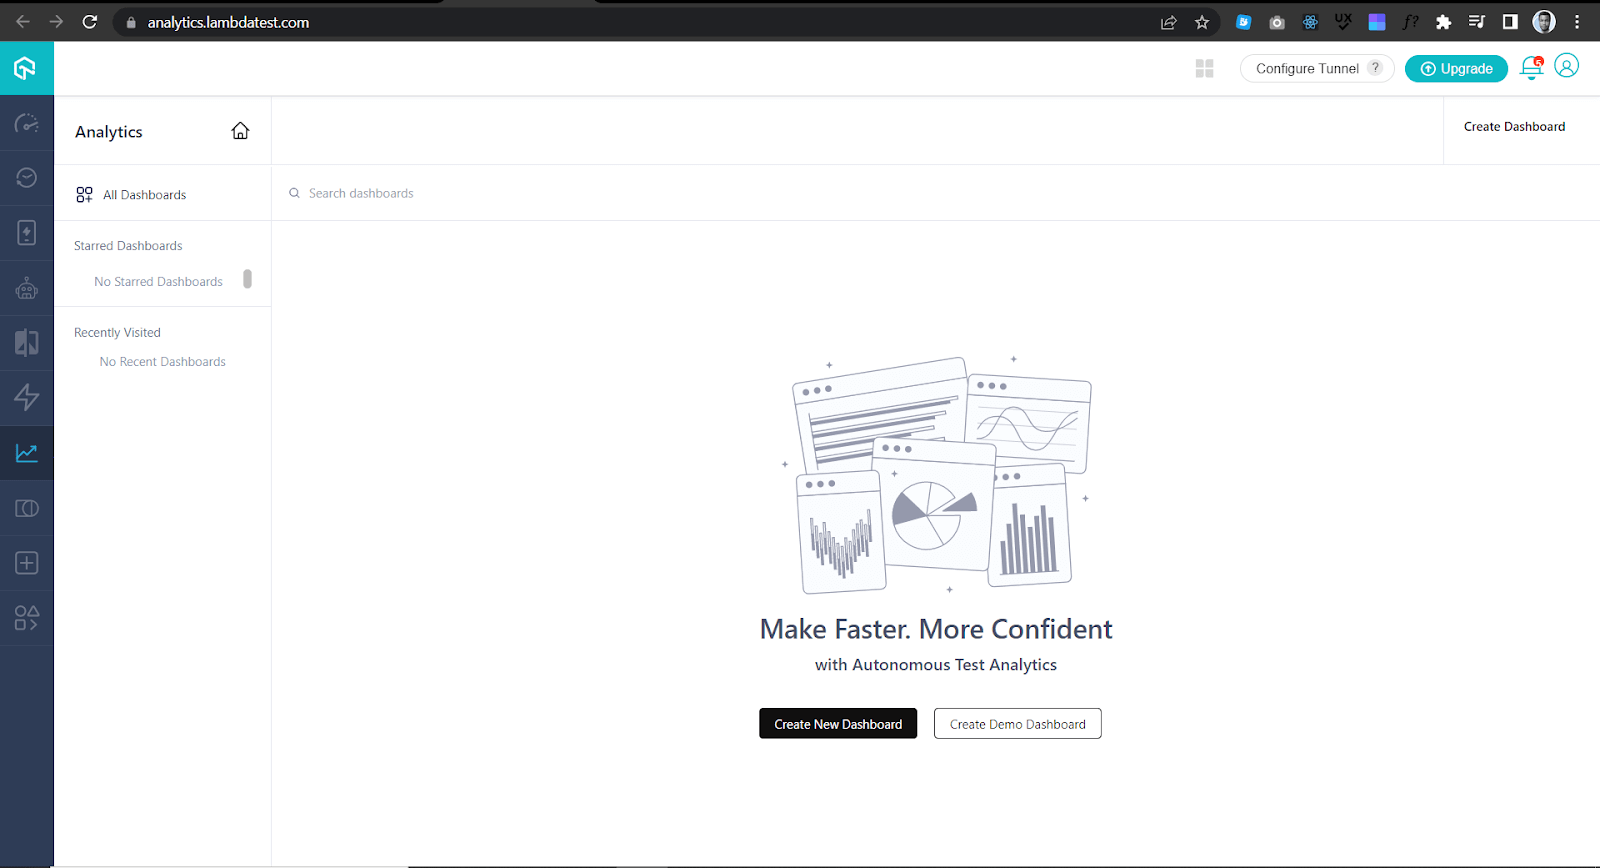
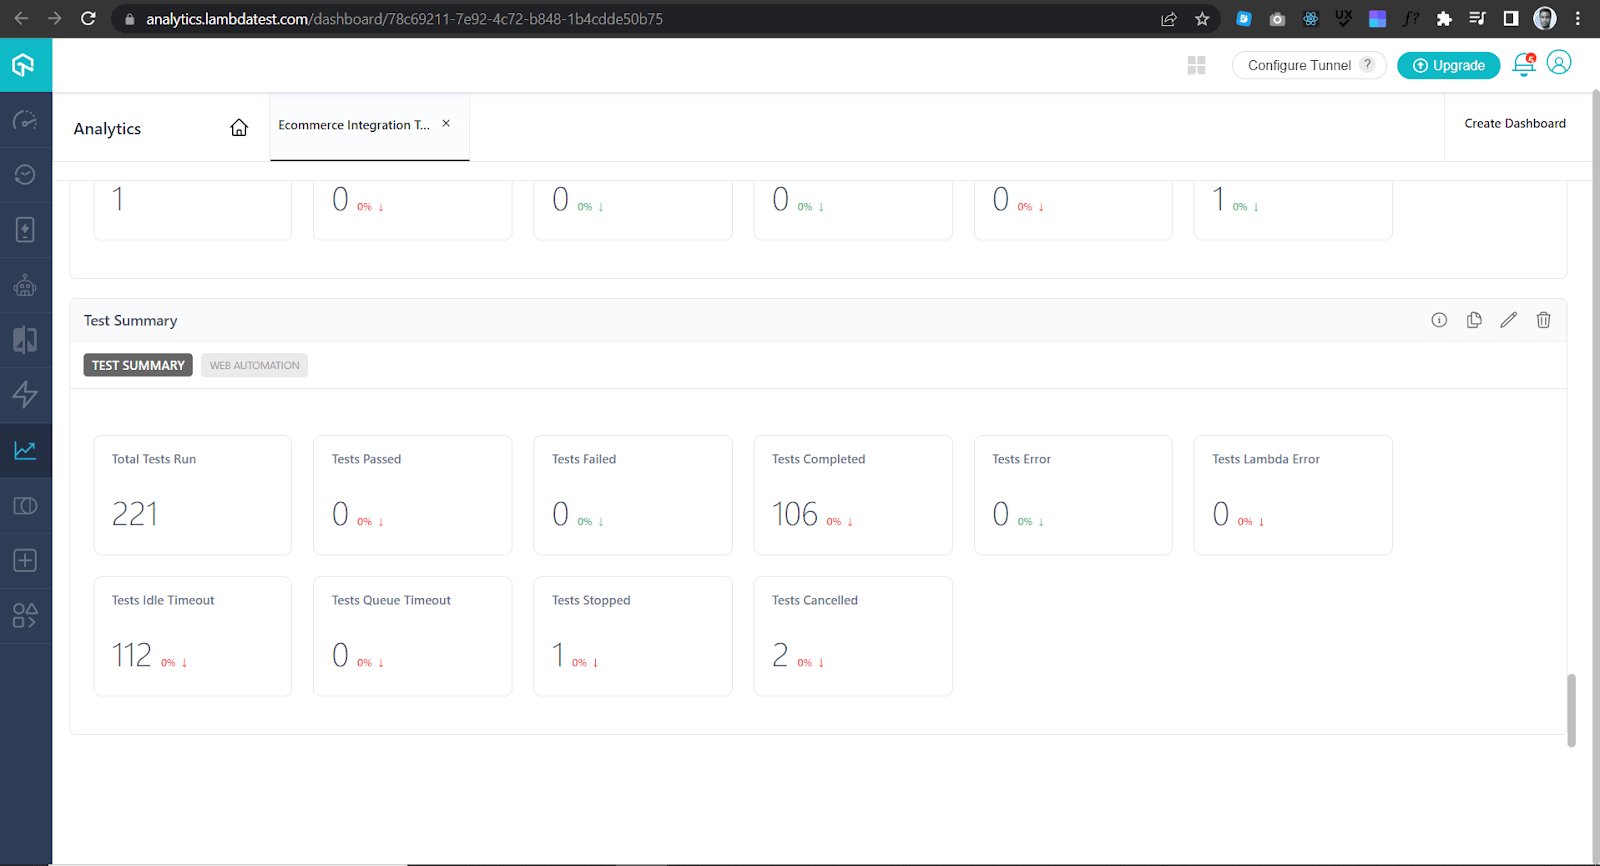
Add widgets like Test Summary that show total test counts grouped by the test status on the platform. At the bottom, give the dashboard the name of Ecommerce Integration Tests Analytics and click Create Dashboard button.
Test Summary gives you a high-level overview of your test performance by showing how many tests passed and failed.
Whether you aim to advance in a JavaScript automation position or seek to establish yourself as a proficient automation tester, this Selenium JavaScript 101 certification can help you achieve your goals. This certification will equip you with the comprehensive knowledge and vital skills required to excel as a JavaScript automation tester.
"Furthermore, delve into an extensive compilation of commonly asked Jasmine Interview Questions in 2023. This resource is designed to aid interview preparation and enhance your Jasmine framework proficiency."

Conclusion
As you have seen from the examples used in this integration testing with the Jasmine JS testing framework tutorial, the Jasmine JS framework can play a major role in ensuring that your code works as expected.
Apart from testing your code, you have also learned that you can combine Jasmine and Selenium to ensure your web app works as expected.
Frequently Asked Questions (FAQs)
Is Jasmine better than jest?
Jasmine and Jest are popular JavaScript testing frameworks offering a range of features for unit testing, integration testing, and end-to-end testing. Jasmine is a behavior-driven development (BDD) framework that provides a clean and expressive syntax for writing tests. On the other hand, Jest is a newer testing framework that has gained much popularity in recent years. It is designed to be easy to set up and use, and it comes with built-in support for a range of features such as mocking, code coverage, and snapshot testing. Ultimately, the choice between Jasmine and Jest depends on your needs and preferences.
Is Jasmine BDD or TDD?
Jasmine is a behavior-driven development (BDD) testing framework. It was designed to be a more human-readable and expressive alternative to traditional test-driven development (TDD) frameworks like JUnit.
Reviewer's Profile

Shahzeb Hoda
Shahzeb currently holds the position of Senior Product Marketing Manager at LambdaTest and brings a wealth of experience spanning over a decade in Quality Engineering, Security, and E-Learning domains. Over the course of his 3-year tenure at LambdaTest, he actively contributes to the review process of blogs, learning hubs, and product updates. With a Master's degree (M.Tech) in Computer Science and a seasoned expert in the technology domain, he possesses extensive knowledge spanning diverse areas of web development and software testing, including automation testing, DevOps, continuous testing, and beyond.
 Christmas Deal is on: Save 25% off on select annual plans for 1st year.