How To Run Selenium IDE Test Over Online Selenium Grid?
Himanshu Sheth
Posted On: June 2, 2020
![]() 56283 Views
56283 Views
![]() 8 Min Read
8 Min Read
The Selenium IDE is a popular record and playback testing tool that is used for automated browser testing. It makes it easy to get started with automation testing as the IDE is a simple turn-key solution that is web-ready and works out of the box.
The development of Selenium IDE picked up pace in the last few years and an interesting set of features such as editing test scripts, performing cross browser testing using SIDE runner, parallel testing, extensibility with plugins, etc. has made the Selenium IDE a worthy proposition for performing cross browser tests.
In the previous Selenium IDE tutorial, we covered what is Selenium IDE & talked about the features responsible behind the comeback of Selenium IDE in the QA world?. Today, I am going to give you a practical insight on how you could run Selenium IDE tests on an online Selenium Grid.
TABLE OF CONTENT
Prerequisites To Install Selenium IDE
So before getting started with performing Selenium test automation, you’ll have to install few dependencies for SIDE runner to work with LambdaTest platform :
- Node – Node.js programming language (version 8 or 10) [Download Link]
- NPM – Node.js Package Manager that is typically installed with Node. The download link is here.
- Selenium IDE Plugin – Selenium IDE is available for Google Chrome and Mozilla Firefox. You can install Selenium IDE in chrome by downloading the chrome extension from here. To install Selenium IDE in firefox you can download the add-on from here.
- Selenium IDE (SIDE) Runner – You can install Selenium IDE Runner or SIDE runner by using the command stated below on the terminal
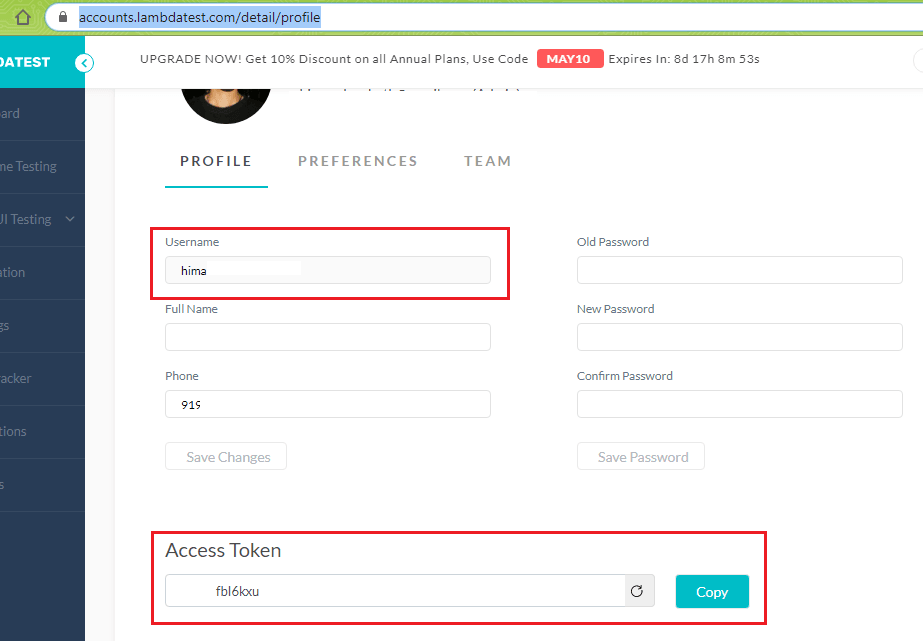
1npm install -g selenium-side-runner - Working account on LambdaTest – As automation testing with Selenium IDE will be performed on LambdaTest, you would need a valid account on the platform. Visit the registration link to perform Selenium testing on LambdaTest. The profile link contains the user-name and access key required for accessing the platform.
The Selenium IDE runner (or SIDE runner)
The SIDE runner is a command-line tool that lets you run a .side project on a Node.js platform. Automated browser testing can be executed in parallel using the SIDE runner by inputting the number of parallel processes that have to be executed. The -w option is used to control the number of parallel processes that are running.
As we’ll perform automated browser testing on a cloud Selenium Grid i.e. LamdaTest, the throughput will depend on the maximum number of tests that can be executed in parallel on the platform. As shown below, my plan supports 5 parallel tests. In case you’re wondering why you’d need parallel tests, you can refer to this blog on parallel testing.

As automated browser testing is performed on a Selenium Grid, there is no necessity for installing the browser drivers on the local machine from where the tests would be triggered.
Exporting The Test From Selenium IDE
For the demonstration of executing tests on the LambdaTest grid in this Selenium IDE tutorial, I’ll create a test suite that comprises four test cases. Two test cases will perform a search for ‘LambdaTest’ on Google & DuckDuckGo, whereas the other two tests will perform a search for ‘LambdaTest Blog’ on Google & DuckDuckGo.
The test cases are recorded using the Selenium IDE plugin for Google Chrome. Once the project is saved, navigate to the Test Suites that is available in the left-side panel.
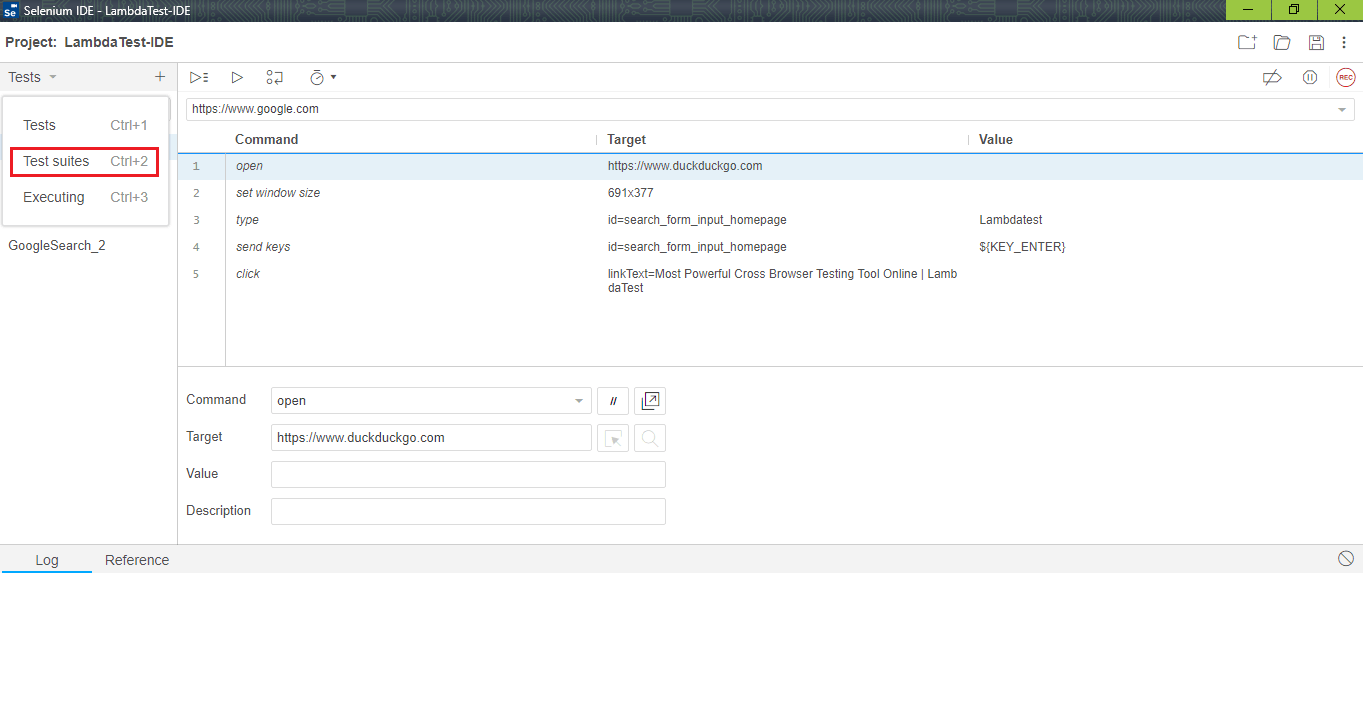
To enable parallel testing for this Selenium IDE tutorial, you need to right-click on the test suite and navigate to Settings. In the Settings window, enable Test in Parallel. It is important to note that parallel testing on the Cloud Selenium Grid only works when tests are executed using the SIDE Runner (and not the Selenium IDE GUI).
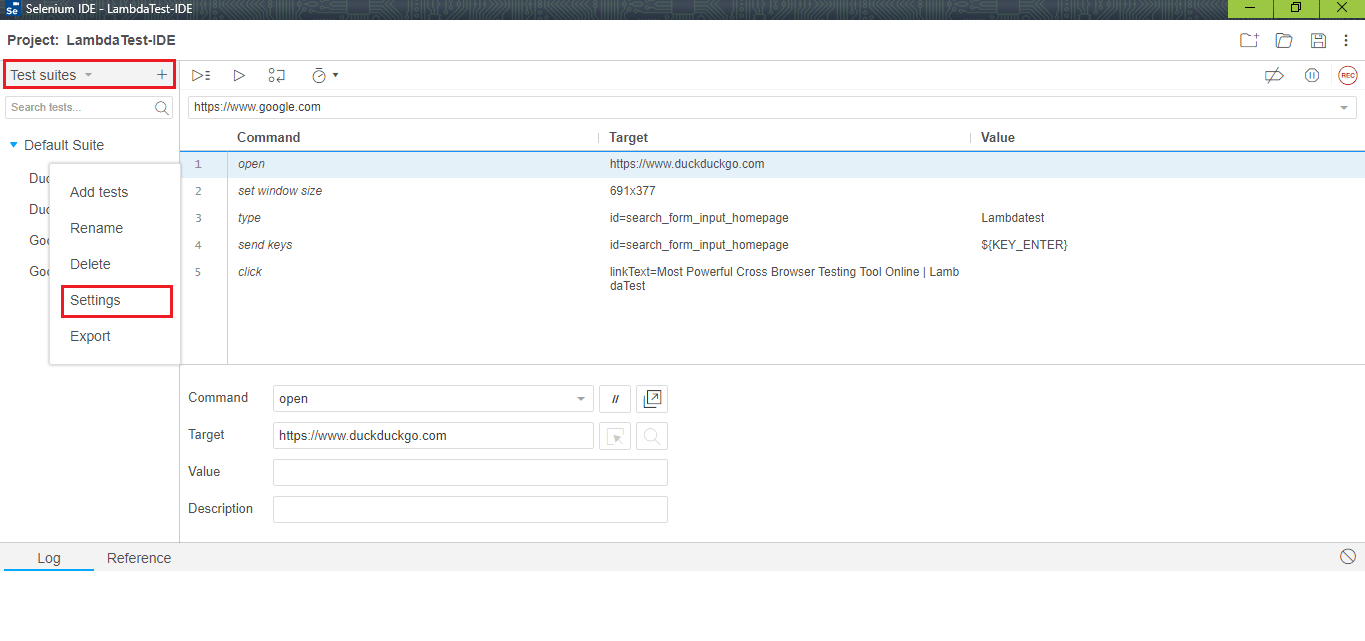
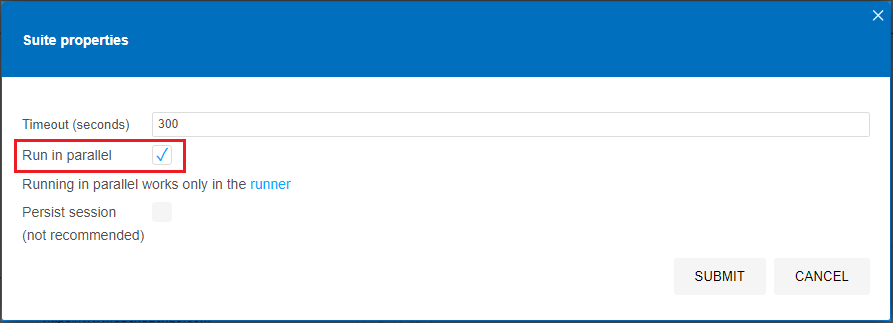
Now save the SIDE project so that it can be executed using the SIDE runner for this Selenium IDE tutorial.
Running The Test On Selenium Grid Online
For this Selenium IDE tutorial, we are executing the test on the Chrome browser (version 72.0) for Windows 10. The LambdaTest Selenium Desired Capabilities Generator is used to generate the capabilities. You can choose any language as the required cross-browser configuration has to be supplied on the SIDE Runner command. Here are the desired capabilities used in this Selenium IDE tutorial for the required test combination (in the Python Language):
|
1 2 3 4 5 |
capabilities = { "platform" : "Windows 10", "browserName" : "Chrome", "version" : "72.0" } |
For running the tests on the LambdaTest Cloud Selenium Grid, you have to specify the desired WebDriver capabilities along with the URL to the Grid
|
1 |
selenium-side-runner --server <LambdaTest Grid URL> --capabilities <Browser Capabilities> |
Grid URL for LambdaTest
|
1 |
https://user-name:access-key@hub.lambdatest.com/wd/hub |
The user-name and access key are available in the Profile section of LambdaTest.
Specify The Number Of Parallel Processes
To exploit parallel testing for this Selenium IDE tutorial, the –w < n > (or –max-workers
|
1 |
selenium-side-runner --max-workers <num of parallel processes> --server https://user-name:access-key@hub.lambdatest.com/wd/hub |
Executing The Test On LambdaTest
Let us assume that the project being executed on LambdaTest in this Selenium IDE tutorial is LambdaTest-IDE.side and the test has to be executed on ‘Windows 10| Chrome 72.0’. The number of tests that would be executed in parallel is set to 4. The command that has to be triggered on the terminal is below:
|
1 |
selenium-side-runner -w 4 "LambdaTest-IDE.side" --server https://user-name:acces-key@hub.lambdatest.com/wd/hub -c "browserName='chrome' version='72.0' platform='Windows 10'" |
The browser capabilities are passed in this Selenium IDe tutorial as a single string are shown below:
|
1 |
"browserName='chrome' version='72.0' platform='Windows 10'" |
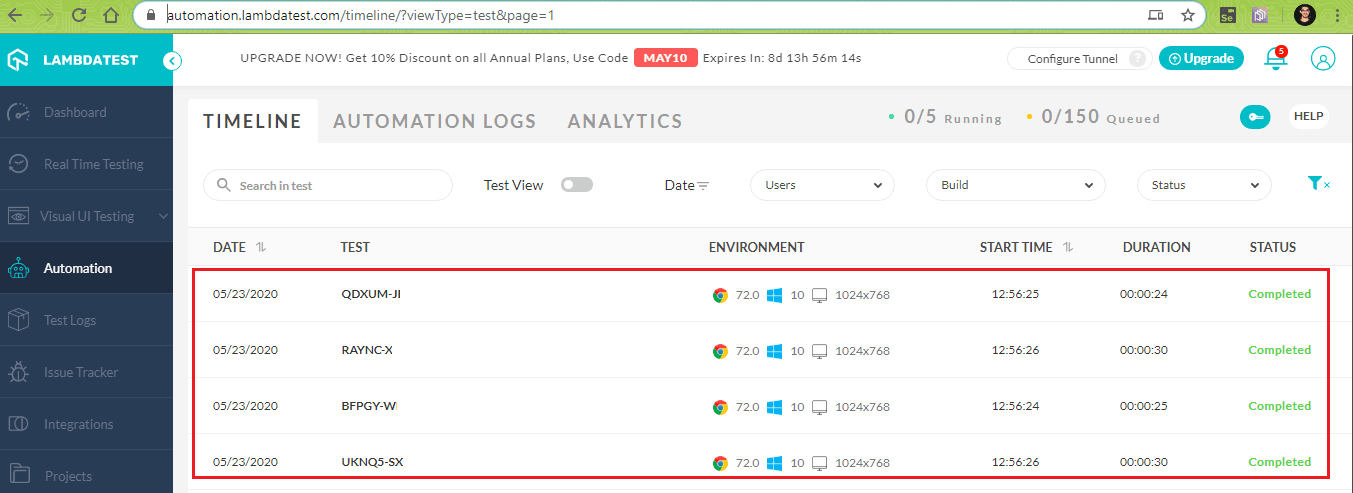
The test results for this Selenium IDE tutorial are available in the automation timeline where you can see the results for Selenium test automation you have performed on LambdaTest. As shown below, four tests are executing in parallel.
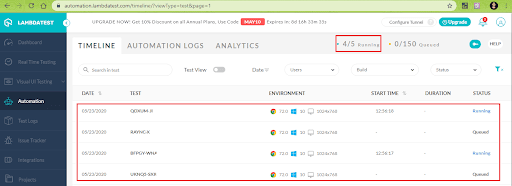
Here is the execution snapshot which indicates that the execution is successful.

Using Configuration Files For Automated Browser Testing with Selenium IDE
Instead of remembering all the command-line arguments that have to be passed for test execution, there is an option offered by the SIDE runner where the run-time parameters can be stored in a simple configuration file.
There are two options when it comes to configuration files in Selenium IDE:
Using .side.yml
By default, the SIDE runner looks for a configuration file named .side.yml. The desired capabilities and server details used in the earlier test can be moved to .side.yml. Here are the contents of .side.yml for the earlier example:
|
1 2 3 4 5 |
capabilities: browserName: "Chrome" version: "72.0" platform: "Windows 10" server: "https://user-name:access-key@hub.lambdatest.com/wd/hub" |
We place the .side.yml file in the same folder where the .side project is present. The following command is used for triggering the tests:
|
1 |
selenium-side-runner -w 4 "LambdaTest-IDE.side" |
In case if you still want to ignore the contents of .side.yml and instead use command-line arguments, you can use –no-sideyml along with the command triggered from the terminal. Here is the execution snapshot using the .side.yml configuration file for this Selenium IDE tutorial:

Using Custom Configuration File
There is an option to specify the run-time parameters in a custom YAML file (instead of .side.yml). The location and name of the custom configuration file has to be specified using –config-file option
|
1 |
selenium-side-runner --config-file "location of custom yaml file" |
When –config-file flag is used, the default .side.yml (even if present) will be ignored. Shown below is the directory structure used for our Selenium IDE tutorial:
|
1 2 3 4 5 |
Code/ LambdaTest-IDE.side .side.yml config/ chrome72.windows10.yml |
The following command is triggered once we are inside the Code directory:
|
1 |
selenium-side-runner -w 4 --config config\chrome72.windows10.yml "LambdaTest-IDE.side" |
Here is the execution snapshot using the custom configuration file:

The Selenium IDE runner has other additional options, details about the same can be found on the Selenium IDE official documentation.
Also Read: Selenium IDE: What Is It? Why Is It Trending In The QA World?
Wrapping It Up
Automated browser testing with Selenium IDE has become much more effective as the IDE can be used to execute automation tests on Selenium Grid. As the SIDE runner supports parallel test execution, it enables the parallelism feature of a cloud Selenium Grid platform like LambdaTest.
Default (.side.yml), as well as, custom configuration files make it easy to perform automated browser testing on Selenium Grid online as you no longer need to specify the configuration parameters (and the browser capabilities) along with the SIDE runner command.
That’s all for now! I hope you enjoyed this Selenium IDE tutorial on running your first test on LambdaTest Selenium Grid. Help us reach out to your peers by sharing this Selenium IDE tutorial with them. In case of any doubts, you can reach out to us in the comments section down below. Do not forget to retweet or share this article on LinkedIn. Happy Testing!!!?
Got Questions? Drop them on LambdaTest Community. Visit now


