How to Automate Registration Page Using Selenium And Java
Ramit Dhamija
Posted On: October 29, 2019
![]() 99253 Views
99253 Views
![]() 15 Min Read
15 Min Read
If you are just starting with Selenium automation testing of your product, the first page you would probably want to automate Registration page or Login Page. If you have an online platform like an ecommerce company or a Software-as-a-Service product, the Signup page acts as the door to welcome your web application visitors. It is one of the simplest yet one of the most important pages of your platform, and comes at the start of every possible user journey that you may want to test. Hence, it is also one of the most important web pages for your web application.
So today, we are going deeper into How to Automate Registration Page Using Selenium. We are going to execute automation testing with Selenium and Java. In one of our previous Selenium Java tutorials, we demonstrated how to automate the login process using Selenium automation testing.
TABLE OF CONTENTS
- Steps Of How to Automate Registration Page Using Selenium
- WorkFlow Of The Sign Up Page
- Possible Test Scenarios of the Sign Up Page
- How to Automate Registration Page Using Selenium and Java
- Test Automate Registration Page With LambdaTest And Selenium
- Diving Deep Into Test Cases
- Entire Test Script To Automate Registration Page Using Selenium And Java
Steps Of How to Automate Registration Page Using Selenium
Today, we will take an example of a Registration Page / Sign Up Page from LambdaTest. We will start our discussion with the test cases and process for automate registration page of LambdaTest and then move to the Automation part to see how we can increase our browser coverage for efficient cross browser testing and accelerate automation testing through parallel testing on Selenium Grid.
Before moving forward, let’s look at the workflow in a bit more detail and see how Sign Up page of LambdaTest works.
If you’re new to Selenium and wondering what it is then we recommend checking out our guide – What is Selenium?
As a first step, we enter URL https://www.lambdatest.com in any browser to reach the landing page of the LambdaTest website. You can refer following screenshot for the landing page.
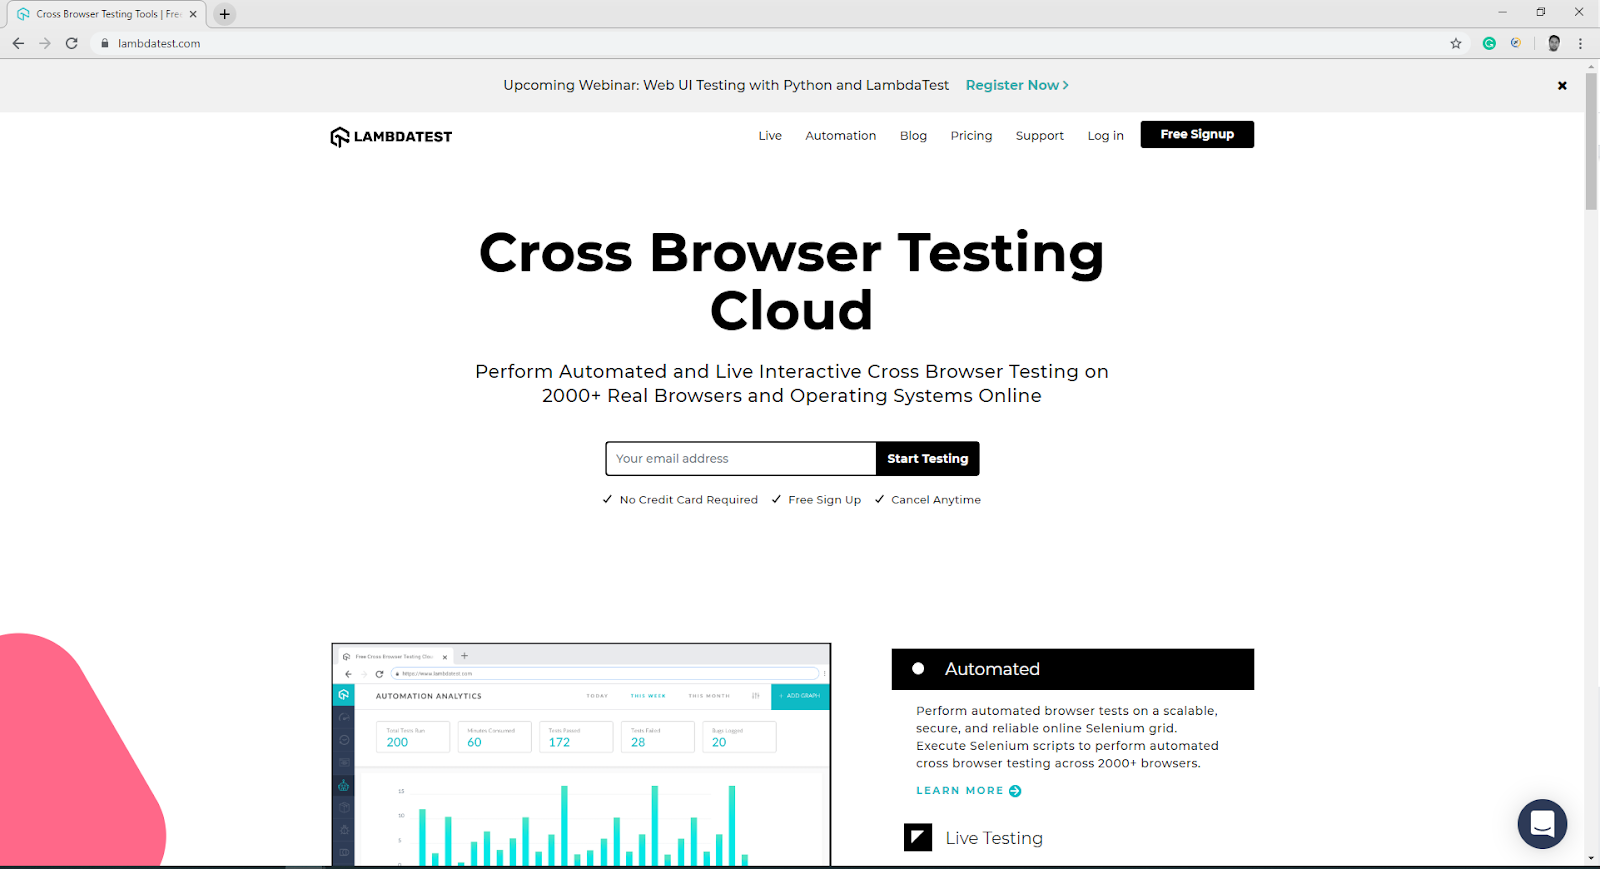
From there we are going to click on ‘Free Signup’ button and reach to the Registration page of the LambdaTest.
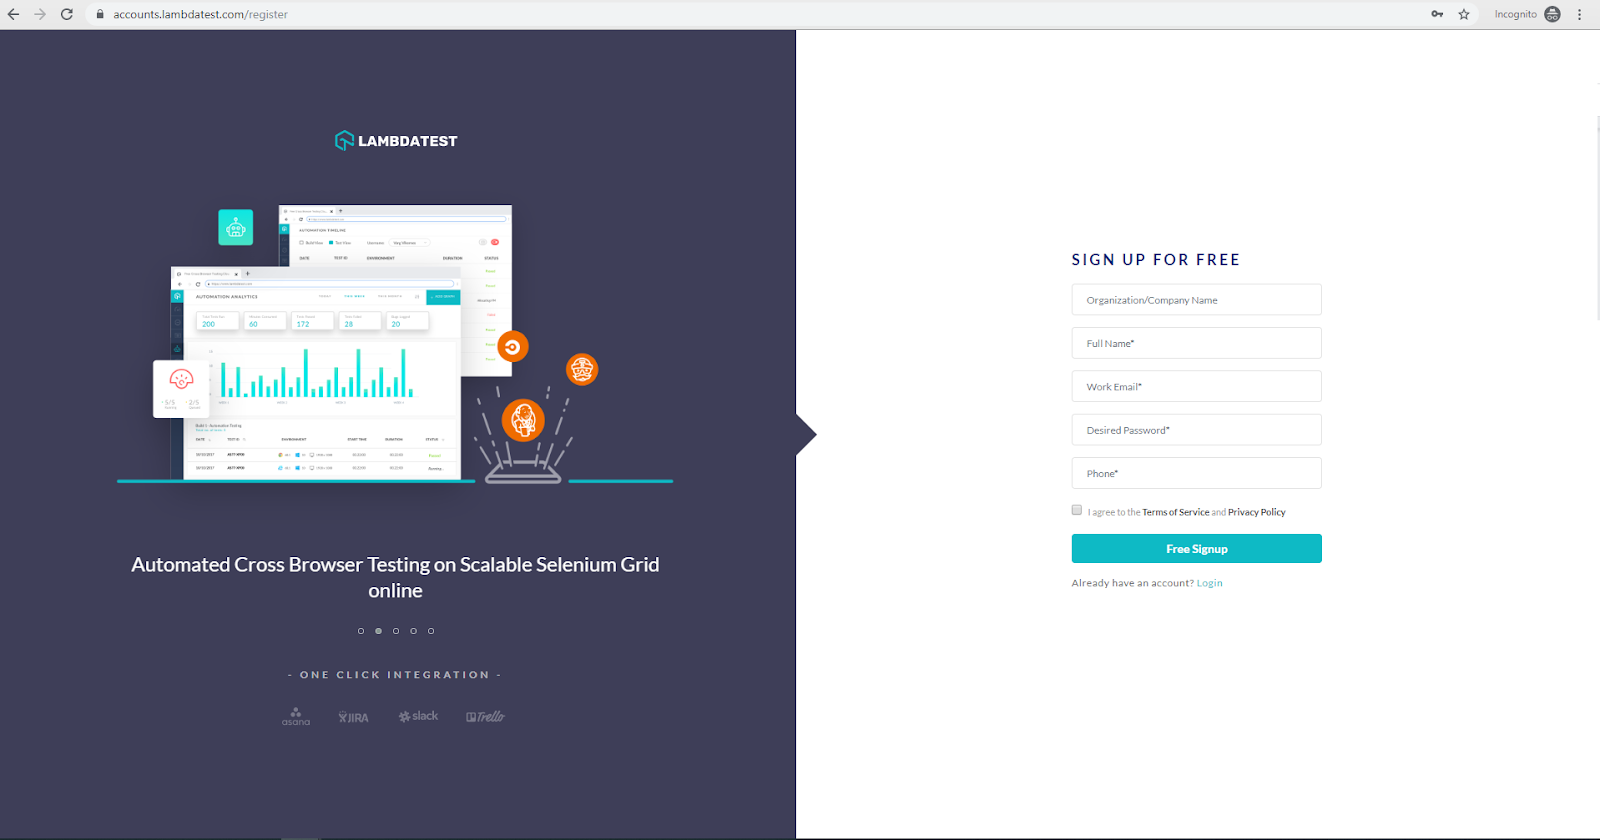
Now, let us check the Functional fields on this Registration page and list them down.
- Organization / Company Name (Text field)
- Full Name of the user (Text field)
- Work Email Id (Text field)
- Desired Password (Text field)
- Phone number of the user (Text field)
- Terms and Privacy Policy (checkbox)
- Free Signup (button)
WorkFlow Of The Sign Up Page
Enter all the required fields: Full Name, Work Email, Desired Password, Phone number, Terms and Privacy policy checkbox.
Validate the fields:
- Work email : Should not be an existing user, valid email.
- Password : Should provide minimum required length for password.
- Phone Number
- Terms and Privacy policy checkbox
Till now, we have discussed all the basic things about the registration page, specifically related to the registration page of LambdaTest. So let us proceed with writing test cases for this page.
This certification demonstrates your knowledge of Selenium and Java, and your expertise at automating tests for any project.
Here’s a short glimpse of the Selenium Java 101 certification from LambdaTest:
Possible Test Scenarios of the Sign Up Page
Elements
Check if all buttons, title, checkboxes are present on the page and if those are working by clicking on all buttons and checkboxes. In case of LambdaTest registration page, we should check the following buttons, text fields, terms and privacy policy checkbox, etc.
Links
Check if all the links present on the page are redirects to the expected pages.
We also need to check if:
- LambdaTest link redirects to LambdaTest are launching the correct page.
- Terms of Service link opens a new tab with redirection to the Terms of service page.
- Privacy Policy link opens a new tab with redirection to the Privacy Policy page.
- Login link redirects from registration page to login page.
Optional Fields
In case of LambdaTest registration page, only optional is Organization or Company Name. So we shall try to register with and without providing Organization or Company name, and it should be possible to complete the registration in both the cases (considering user has provided all other information correctly).
Required Fields
In case of LambdaTest registration page, we have the following required fields , so let us discuss about the cases related to each field.
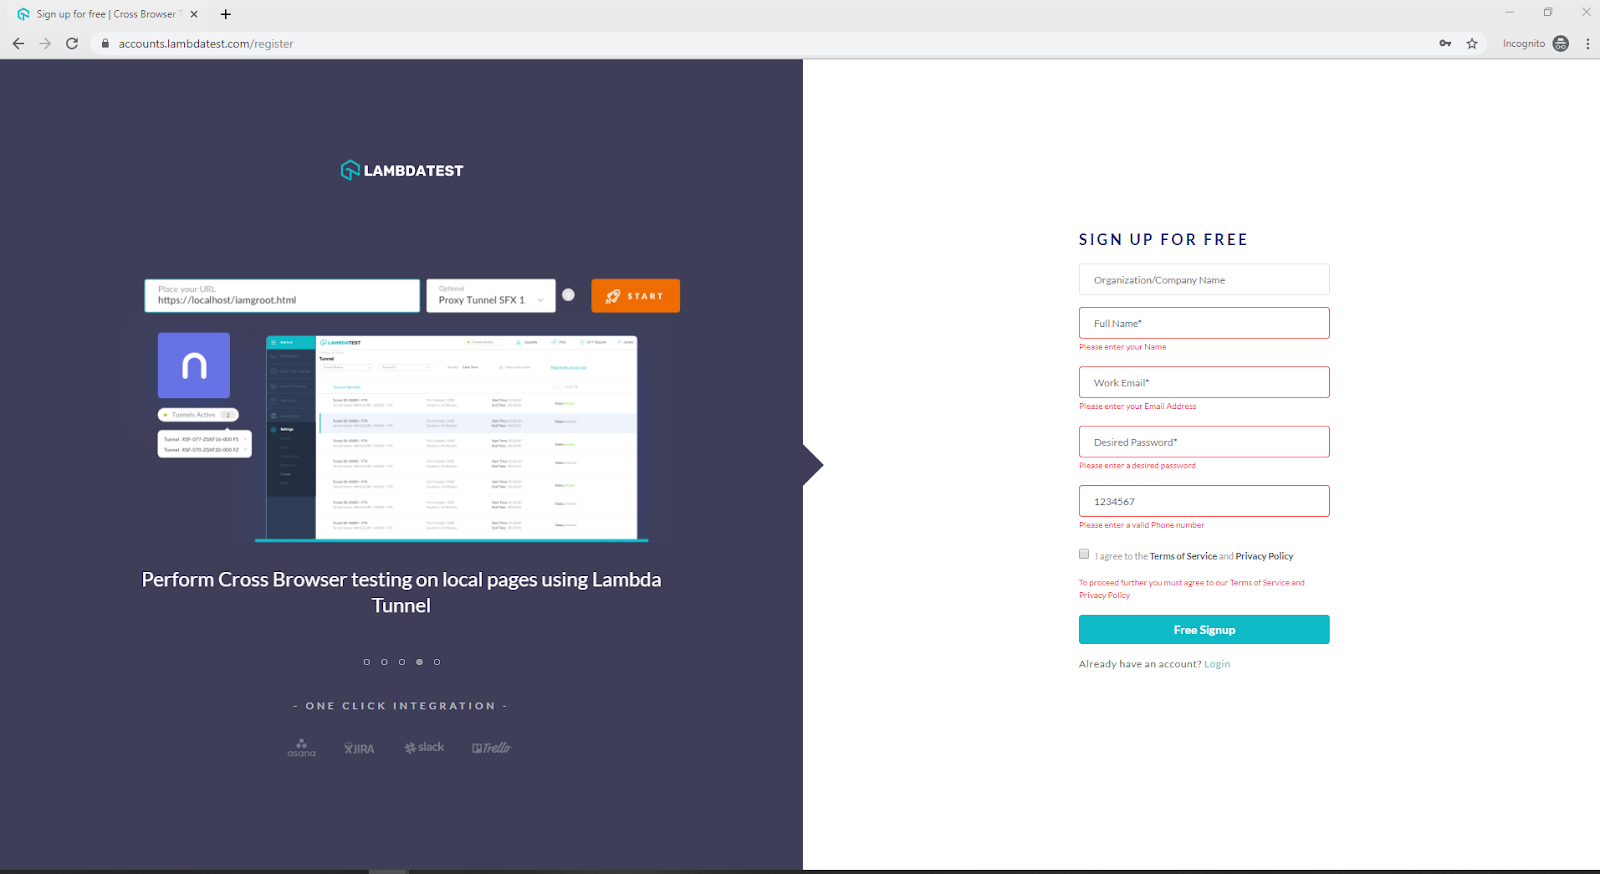
Full Name
→ Verify without providing Full name, it should give the respective error and it should not be possible to proceed further the registration page.
→ verify with providing Full name, it should be possible to complete the registration (considering user has provided all other information correctly).
Work Email
→ Verify with valid email ID, but have an existing account on LambdaTest platform with that email ID, then in that case, it should not be allowed to register with that email ID and should give a respective error message (considering user has provided all other information correctly).
→ Verify without providing any details in the Work Email field, it should not be allowed to register without any email ID and should give a respective error message.
→ Verify with valid email ID, which does not have any account on LambdaTest platform with that email ID, so the user should be able to proceed and register successfully (considering user has provided all other information correctly).
Desired Password
→ Verify without providing any password in the Desired Password field, it should give the respected error message to provide the password.
→ As we can see that there is a minimum length of characters for the password is required, which is at least 8 characters are required. So we can make use of test design technique Boundary Value Analysis (BVA), as we have minimum criteria of 8 characters so we can test with lengths 7, 8 and 9 characters.
- When it is less than 7 then it should give the error to the user and user can proceed to complete the registration process.
- When it is 8 then it should be possible for the user to complete the registration process successfully without any error. (considering user has provided all other information correctly).
- When it is 9 then also it should be possible for the user to complete the registration process successfully without any error. (considering user has provided all other information correctly).
Phone
→ Verify without providing any phone number in the field, as it is also mandatory field so user should not be able to proceed and complete the registration without providing phone number.
→ Verify with providing invalid phone number ( phone number with 2-3 digit), in this case also user should not be able to proceed and complete the registration with invalid providing phone number.
→ Verify with providing valid phone number in the field, in this case the user should be able to register successfully with valid phone number (considering user has provided all other information correctly).
Terms of Service checkbox:
→ Verify without checking Terms of Services checkbox, as it is required field in the registration process user can not proceed to complete the registration process without checking this checkbox.
→ Verify with Terms of services checkbox is selected, then user can complete the registration successfully without any error (considering user has provided all other information correctly).
So we have seen till now
- What are the fields generally present on the Registration Page, along with the example of registration page of LambdaTest.
- Expected workflow of the registration page.
- Test cases/scenarios for the Registration page
How to Automate Registration Page Using Selenium and Java
So far in this Selenium Java tutorial, you have established a fair understanding of what you need to test on the Signup page. With that in mind, let us roll into action and automate Registration page by performing Selenium automation testing with Java and TestNG.
We will now come up with a Selenium automation scripts and execute it on an online Selenium Grid. We will also leverage the power of parallel testing to fast track our automated cross browser testing. But before all that, you should be ready with the below prerequisites.
Prerequisites
Before moving to the script, let us go through some basic prerequisites to write and execute Selenium Automation test script.
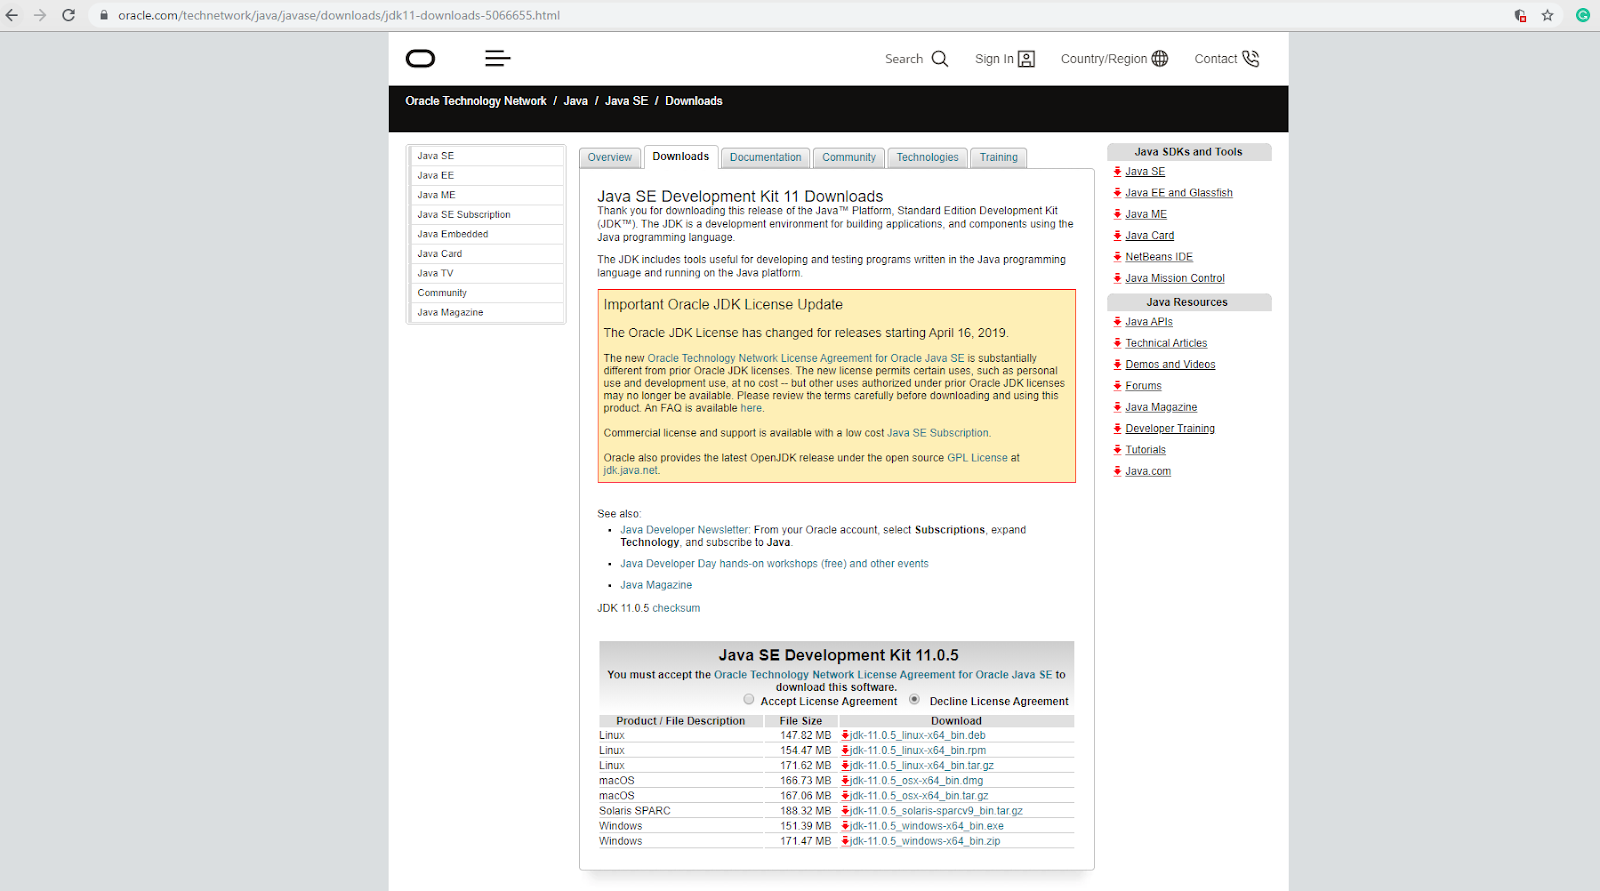
- JDK and JRE – This is required to execute any Java program in our system. You can download it from the official website of Oracle.
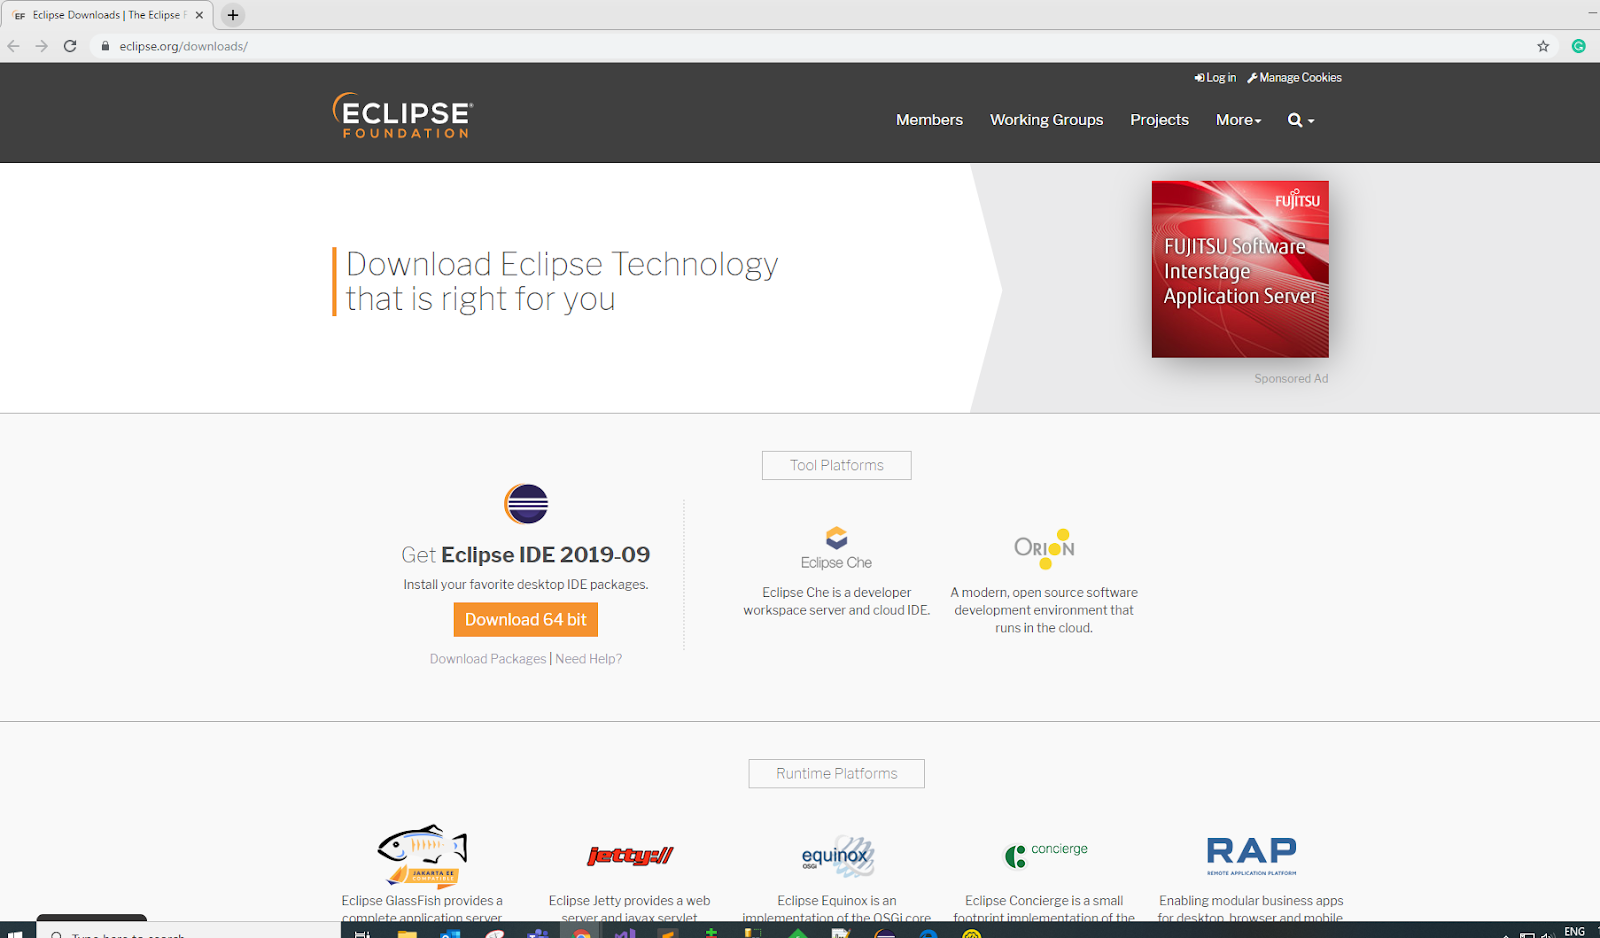
https://www.oracle.com/technetwork/java/javase/downloads/jdk11-downloads-5066655.html - Eclipse IDE – We have used Eclipse to write our program or test script. You can download it from the official website of Eclipse or you can use any other IDE as per your choice.
- Selenium Jars – To write any Selenium automation testing script, it is required to have Selenium Jars in the project. You can download Selenium Jars from the official website of Selenium.
- TestNG Framework – In the following test script we have used TestNG framework for Selenium automation testing which will help us in generating test reports, prioritizing test cases, grouping the test cases and also for parallel execution on different browsers.
You can either download TestNG Jars or you can directly add it inside Eclipse from Eclipse Marketplace using the TestNG Eclipse URL or you may refer to TestNG to download.
In the below example, we have integrated our test script with LambdaTest, a cross browser testing tool. Wondering why we are running our Selenium automation tests on cloud-based Selenium testing tool such as LambdaTest?
Although, Selenium empowers you to automate your web application testing across different browsers. You can only perform Selenium automation testing on browsers installed on your machine where the local webdriver is running. Now, installing hundreds of browsers and maintaining the library for your inhouse Selenium infrastructure can be very strenous, not to forget, time-consuming too.
This is why it is recommended to run Selenium automation testing on an online Selenium testing tool such as LambdaTest but that is not the only reason to it. LambdaTest is a lot more!
What is LambdaTest?
LambdaTest is a cross browser testing tool on cloud which offers both manual and automated browser compatibility testing on a Selenium Grid consisting 3000+ real browsers on cloud. LambdaTest allows you to execute parallel testing, generate detailed test reports of Selenium automation testing, provides you with recorded video of the entire test script execution, along with the ability to seamlessly integrate your Selenium automation testing suite with your favourite CI/CD tools. It also offers native plugins for Jenkins, and more.
Test Automate Registration Page With LambdaTest And Selenium
So, now let’s discuss the process of how we can integrate our test script with LambdaTest and execute it to see the results.In our selenium test script we initialize the WebDriver as,
While to start with, when we want to run test script on LambdaTest Selenium grid we have to initialize the WebDriver as
Now few questions will arise like what are these username and accesskey is for? So we can generate these username and accesskey from LambdaTest Capabilities Generator.
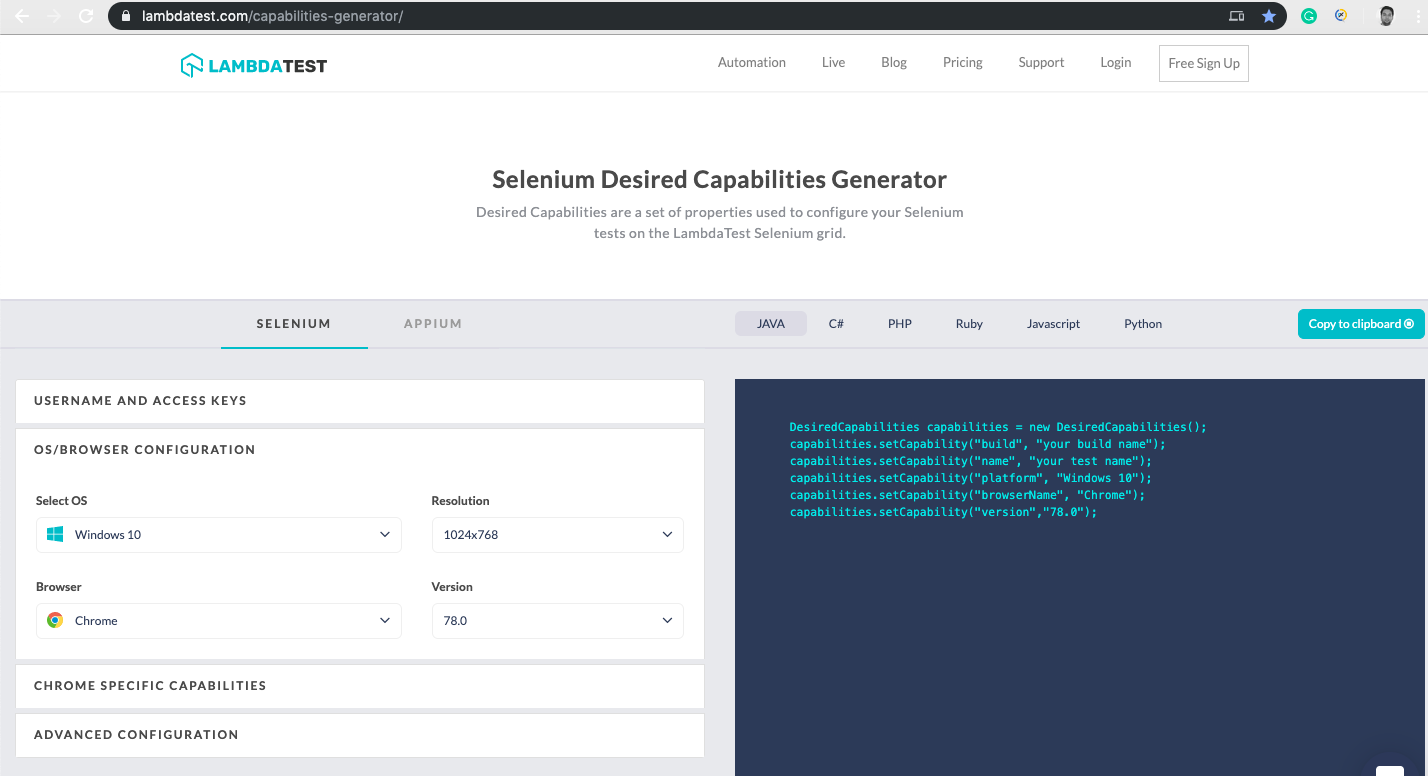
Here once we select the OS, Browser, Selenium WebDriver version etc., we can get the username and accesskey for our users which we can use in the test script.
Note: To generate this username and accesskey, you should be registered and logged in your LambdaTest account.
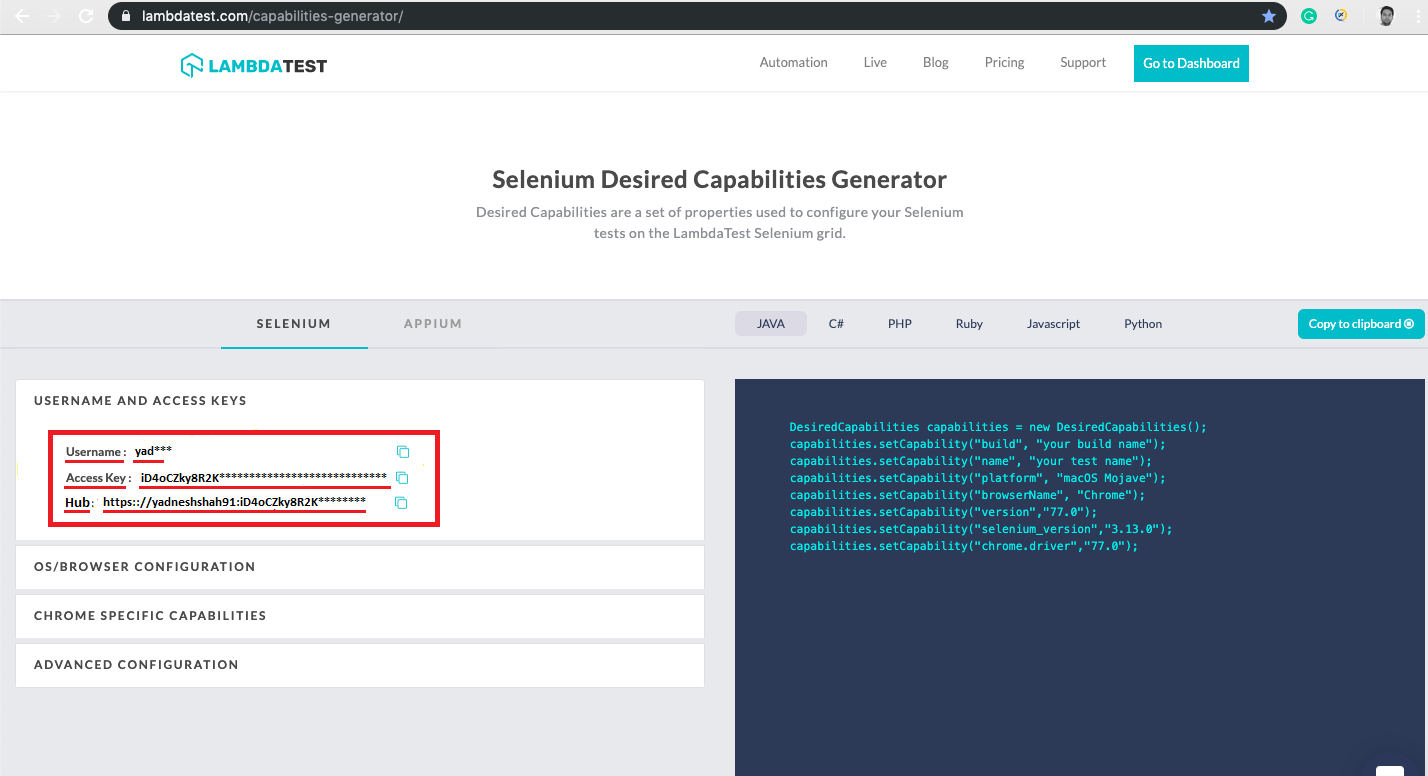
So after we generate those username and accesskey, we can use those in our test script in integration with LambdaTest. We have created the following test script for the LambdaTest registration page/ Sign Up page, we have covered the test scenarios which we have discussed above as manual test cases and scenarios.
While executing any automation test cases, there are few steps which are common and required to perform at the start of the test suite while few needs to perform before every test case which we can call as pre conditions for the test case.
For example: While executing every test case, we need to open the browser and navigate to the target URL before starting to execute the actual test case, delete cookies, etc..
For this purpose we use @BeforeClass and @BeforeMethod annotations from Test NG, so in our case we will need
- to set few capabilities (browser, platform etc.)
- Open the browser
- Delete cookies
- Open LambdaTest platform and navigate to Signup page
In the above part of code, notice the DesiredCapabilities object. This object is used to set capabilities like browser, version, operating system etc, and instructs LambdaTest grid to run tests on the desired configurations. If you want to run tests locally, then you would not necessarily need this object. , then we opened the browser, deleted cookies, navigate to default page of the LambdaTest and then click on the Sign Up button to redirect to our target page which is Sign Up page.
Same is the case for the operations/tasks which are required to perform at the end or after the execution of test cases.
For Example: Closing the browser session, etc.
For this we have used @AfterMethod or @AfterMethod annotations from TestNG. If you are new to TestNG, then I suggest you read our detailed article on TestNG annotations.
In the above part of the code, you can see that we have closed the browser session which we need to do after every test case.
As we have seen, what and how it works before and after every test case now let us execute Selenium automation testing for the test cases, discussed above. In any Selenium automation test script, to perform any actions on the elements of the web page, we need to locate them first. For this, we make use of Selenium Locators.
Diving Deep Into Test Cases
Let’s look into our test cases to comprehend our test scenarios that we need to automate registration page with Selenium testing.
Test Case 1
To verify if the expected elements are available on the Sign Up page.
In the above test case function verifyElemntsOnPageTest, we have located a few elements like LambdaTest logo, Sign up title, terms of services text, etc. To locate the web elements we can use different locating strategies like ID, XPath, CSS Selector, ClassName, etc.. In the above case, we have located those elements using XPath.
Once those elements are located, we have verified each of them if those are displayed using method isDisplayed().
Test Case 2
To verify the redirections with the links present on the pages.
So here, you can see we have added 4 methods for different links present on the Sign Up page and we have verified after clicking those links user is redirected to the correct URL and page or not. In the above methods, we have also added assertions to verify if the redirection is done as expected.
Test Case 3
To verify Registration process with providing valid input data.
Test Case 4
To verify registration process with different invalid input data.
In the above part of code, you can see that we have covered different cases in which one or other field is provided with invalid input data. Also, at the end of every method we have added assertion along with expected error messages for the invalid input we have provided.
Entire Test Script To Automate Registration Page Using Selenium And Java
As we have seen the Selenium automation testing script and different test cases in bits and pieces, now, let us combine this code to present the entire test script which we can be executed on multiple browsers which we provide as parameter.
So please also refer the testng.xml file which is provided at the end, which is very important to execute Selenium automation testing in parallel across different browsers.
Automation test script for LambdaTest Registration Page:
In above test script example you can observe that we have used parameterized option to provide browser name and browser version, so that we can provide the browser and browser version as per our requirement on which we need to test above test script. We can also provide multiple browsers and version to execute our test script parallely.
And to achieve this we need to provide these value of browser name and version from testng.xml file, which we use with every TestNG script.
For example, you can refer following testng.xml in which we have provided 2 browsers (Chrome and Firefox) with their respective versions.

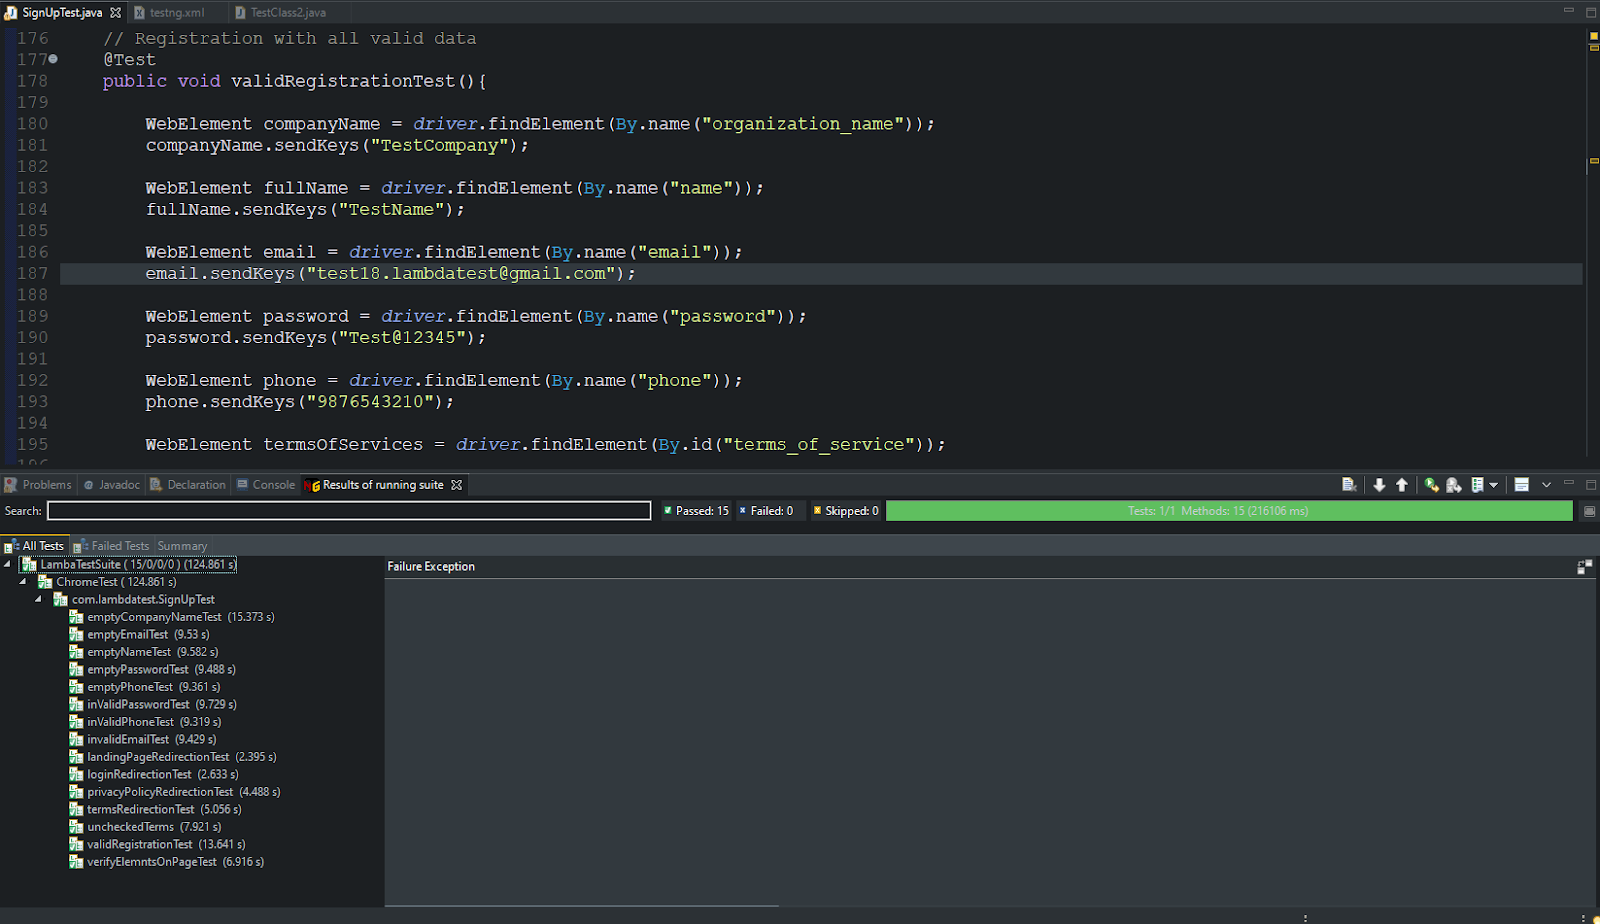
Below is a snapshot of the final execution that was triggered over the LambdaTest platform. We have executed the cross browser testing automation script over two browsers i.e. Google Chrome 77 and Mozilla Firefox 69.
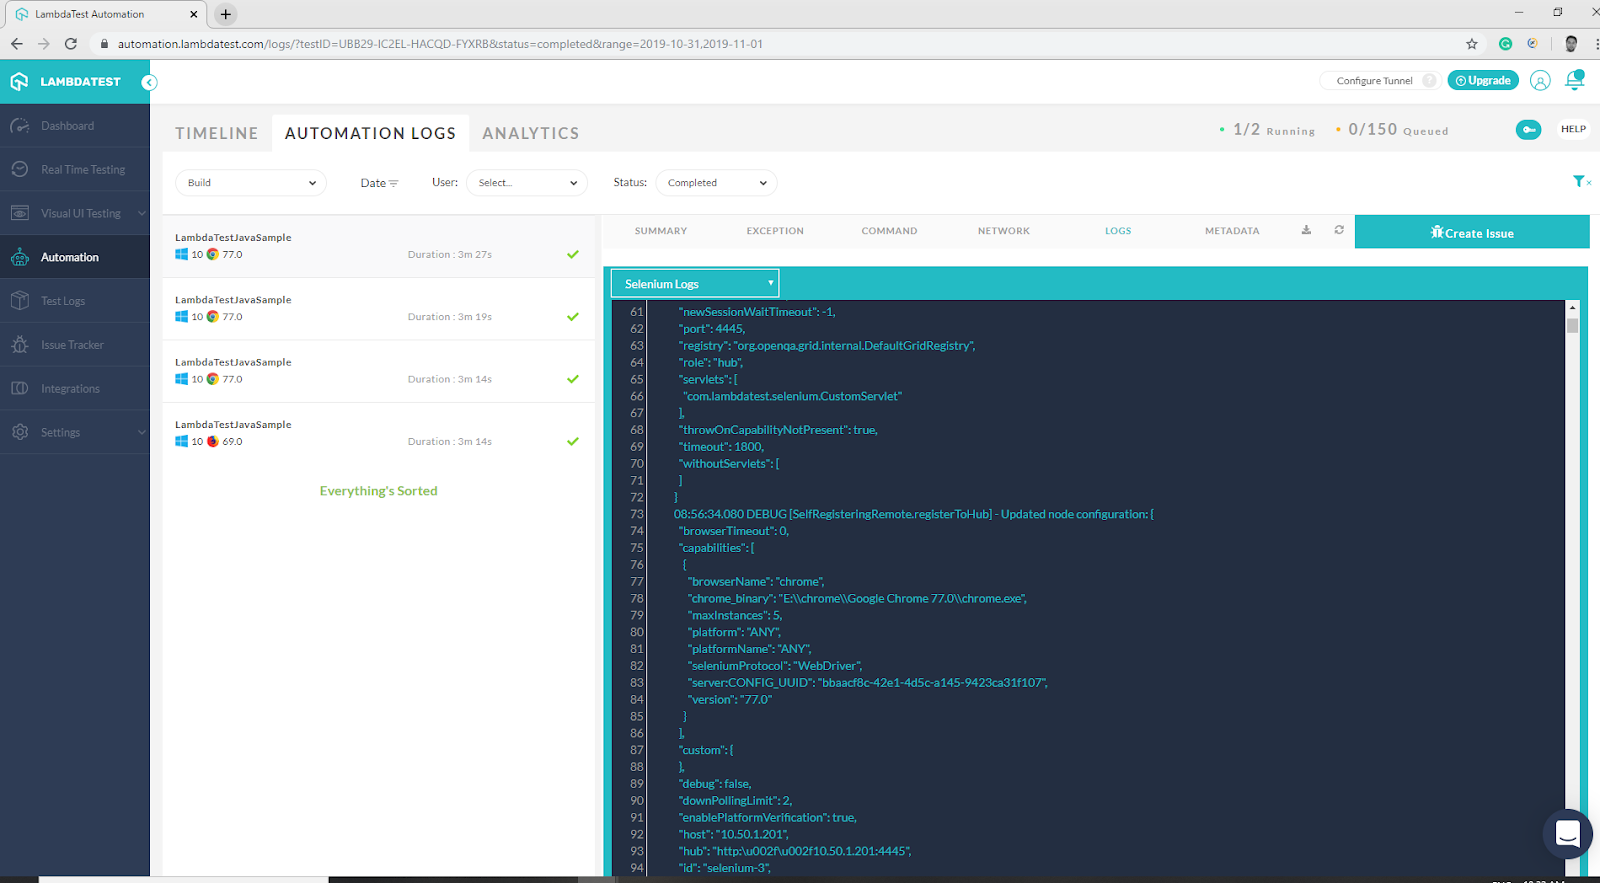
If you gaze over the LambdaTest automation dashboard, you will be able to notice multiple tabs representing different types of logs for your test automation script. You get tabs to analyze command logs, network logs, raw Selenium logs, metadata, and more. You also get a full video-recording of your cross browser testing script over the LambdaTest cloud servers, along with command-by-command screenshot.
Watch this video to learn How to Automate Registration Page Using Selenium 4 and Java.
That Was All
Now, you are good to go with automate registration page using Selenium and Java. In blog of How to Automate Registration Page Using Selenium And Java, we gazed upon the registration process of LambdaTest. We thought of different test cases, compiled a test script to have them executed and the Selenium Automation testing script was then analyzed to run for different browsers in parallel.
The Selenium automation test scripts were executed using Selenium and Java, with the help of TestNG framework. In case you feel I missed out on a peculiar test cases regarding the LambdaTest registration page then feel free to let me know. I am all ears! Happy testing. 🙂
Got Questions? Drop them on LambdaTest Community. Visit now


