TeamCity Plugin Integration
The TeamCity plugin will help you to manage your LambdaTest credentials, write and execute tests directly on the LambdaTest platform, and test your local, internal, dev, or stage environments securely with the help of Lambda Tunnel.
Downloading The TeamCity Plugin From Marketplace
Visit the JetBrains marketplace and enter “LambdaTest” in the search bar.
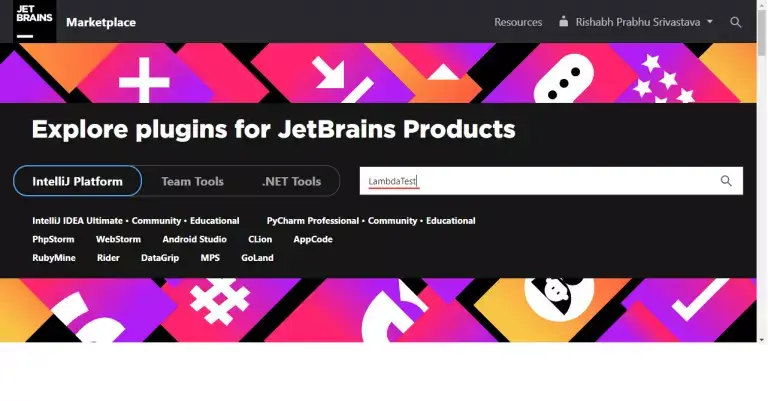
You will need to clear the filter (set as default by JetBrains) to view the result, as shown in the image below.
Once you do, you can see the LambdaTest Plugin appearing in the search results.
Select the LambdaTest test result and click on Get button to download the LambdaTest’s TeamCity Plugin.
Installing the TeamCity plugin
To install the TeamCity plugin, you need to download the compressed zip file from here. Once downloaded, follow the below steps to upload the plugin on your TeamCity server.
- Go to your server Administration and then to Plugins List
- Now inorder to add the LambdaTest’s TeamCity plugin, choose the option Upload ZIP file and upload the earlier downloaded zip file.
- You will need to restart your TeamCity server. Once done, the LambdaTest TeamCity plugin will be shown, as an External plugin, as shown below.
That's it. The LambdaTest TeamCity plugin has been added in your TeacmCity Server successfully.
Configuring Project To Use LambdaTest TeamCity Plugin
For demo purpose, we have used this sample Github repository. Below are the steps on how to configure the project:
- In this sample TeamCity server project, we have used two basic steps as a part of the test, based on the Github repo.
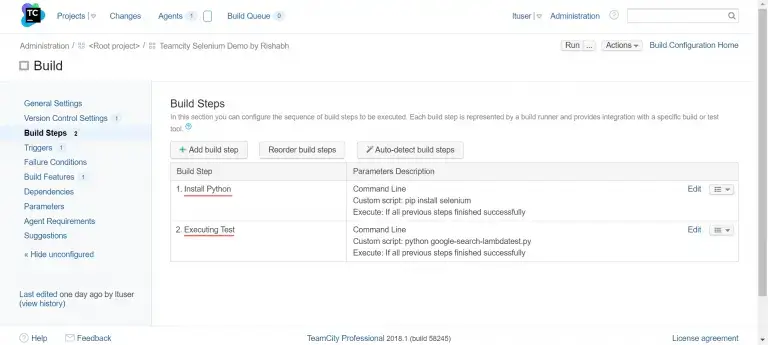
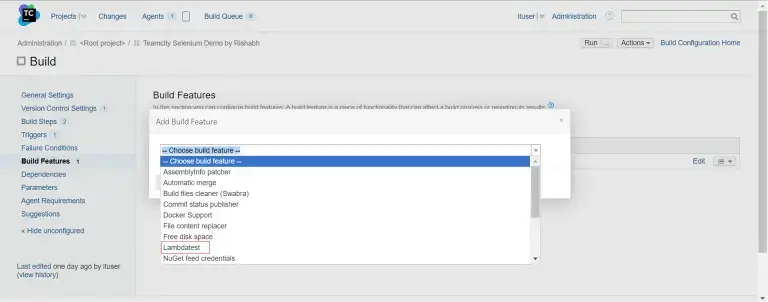
- Now to configure your Build Features, visit the Build Features from the left bar and click on the button to Add Build Feature.
- In the drop down box that appears, choose the LambdaTest feature.
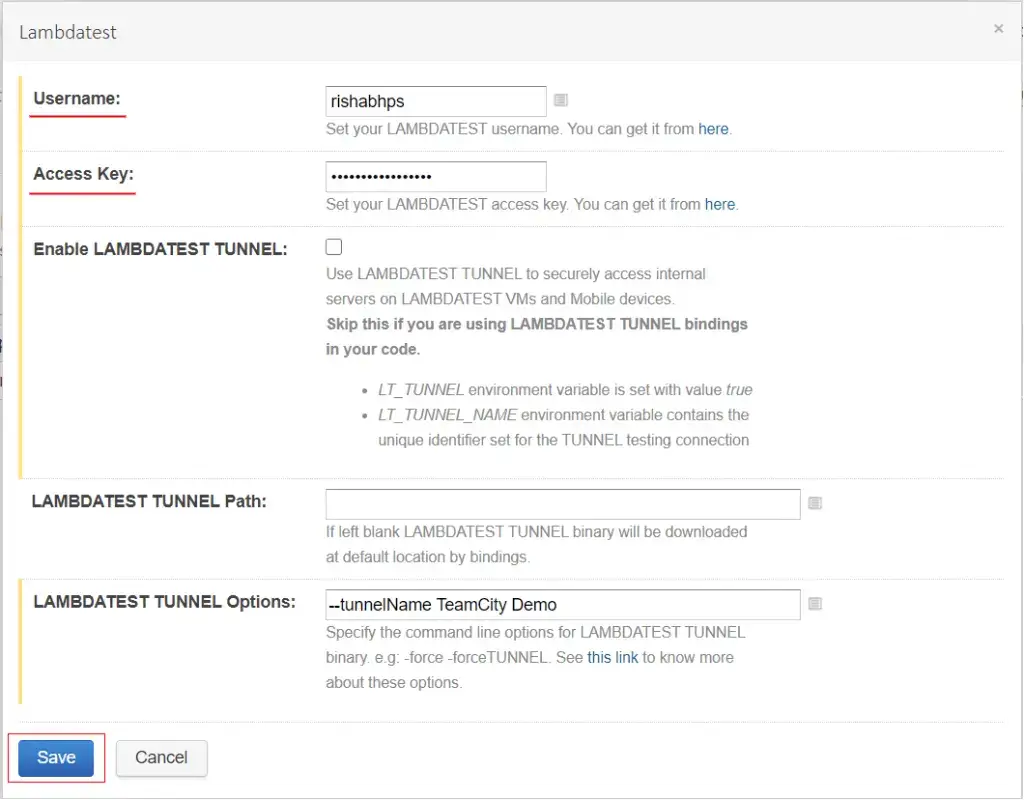
- Now a window will appear where you can configure the LambdaTest feature. Insert your LambdaTest username and access key into it and save the feature. You can fetch your username and access key from your LambdaTest profile.
- Upon saving, you can see that the LambdaTest build feature has been added in your project.
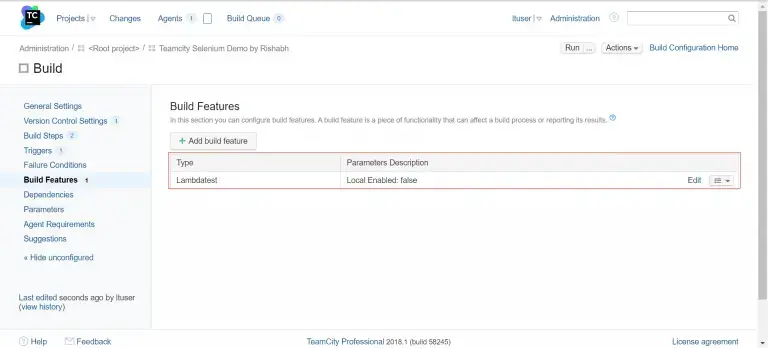
That’s it. Your project has been successfully configured to run tests using the LambdaTest TeamCity plugin.
Executing The Test On LambdaTest
Upon executing the project, you can see the test status and the automation report directly on your automation dashboard.
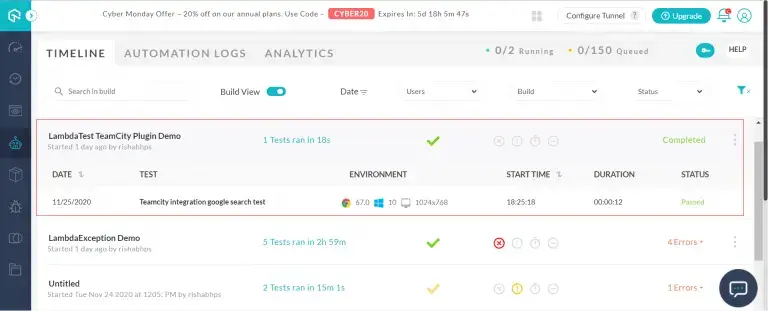
Configuring Lambda Tunnel For Local Testing
To test your locally or privately hosted website, or your dev or stage environments securely, you can make use of Lambda Tunnel. To activate the Tunnel in your project, while adding the LambdaTest build feature, make sure to tick the Enable LAMBDATEST TUNNEL option.
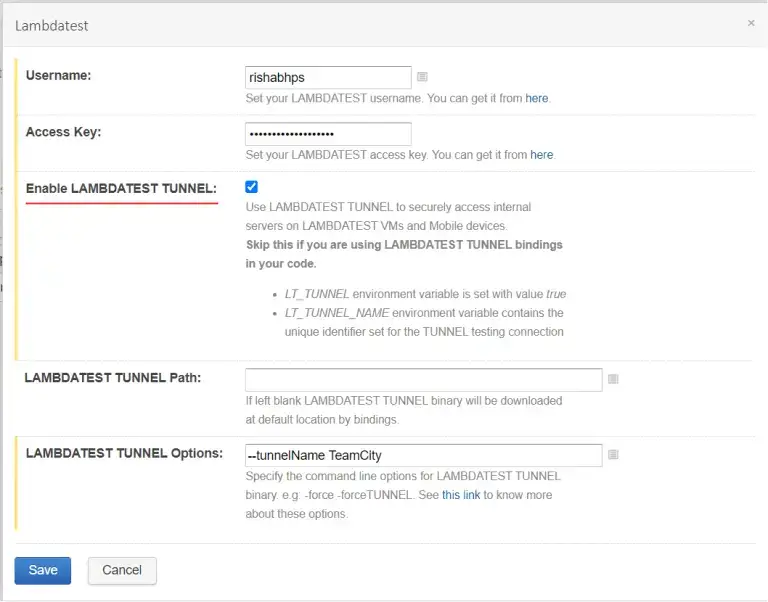
If you want to save the Tunnel binary file in a specific location, you provide its path in the LAMBDATEST TUNNEL Path option. If not provided, ‘checkout directory’ will be chosen to download and install the Lambda Tunnel Binary.
Also, you can also customize this tunnel based on your requirements, using the Tunnel modifiers. For example, we have used the –tunnelName modifier to customize the Tunnel connection name.
--tunnelName TeamCity
To know more about the Tunnel modifiers, please refer here.
Testing Privately Hosted Site Using LambdaTest TeamCity Plugin
After the above configuration of Lambda Tunnel in your project’s Build Features, you can now execute your local projects and test your localhost, dev, or even stage environments securely with just a click.
Once you run your tests, you can see the Lambda Tunnel getting activated during your test execution, on the toolbar of your LambdaTest’s automation dashboard, as shown below.
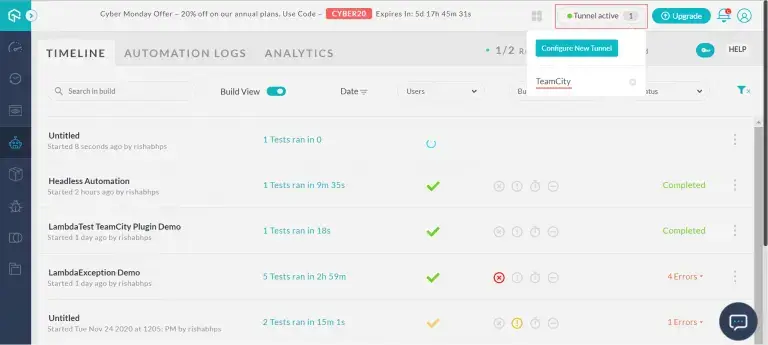
That's it folks! If you have any doubt or questions, feel free to contact our experts at 24/7 chat support or mail us at support@lambdatest.com. Happy testing! 🙂