LambdaTest Underpass Application For Secure Tunnel
With LambdaTest Underpass, you can perform cross browser testing of locally hosted web applications on 3000+ browsers for both mobile & desktop, without executing any command from your terminal. LambdaTest Underpass is a desktop application to help you establish an SSH(Secure Shell) tunnel between your operating system & our cloud servers, all through GUI.
Downloading & Installing The Underpass Tunnel Application
| Important Links |
|---|
| Download Underpass For Windows |
| Download Underpass For macOS |
| Download Underpass For Linux |
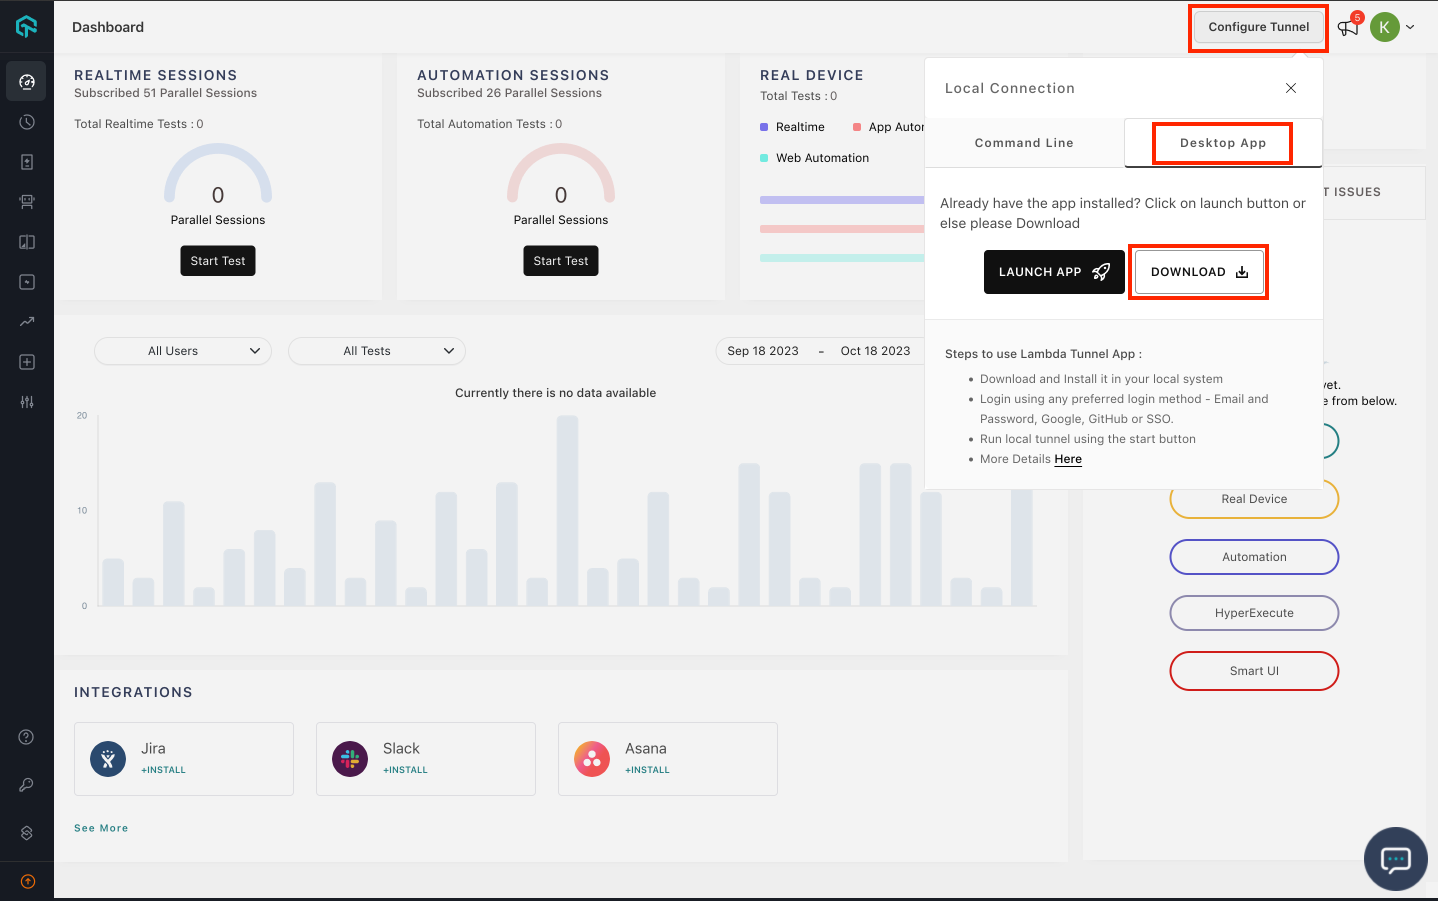
You can also download the Underpass tunnel application from the LambdaTest web-application. Login to your LambdaTest account, and hit the button to configure tunnel. After that, switch to the tab “Download App” and click the button which says “Download Tunnel App”. This will download the binary file using which you can perform browser compatibility testing over your locally hosted web-applications or websites.
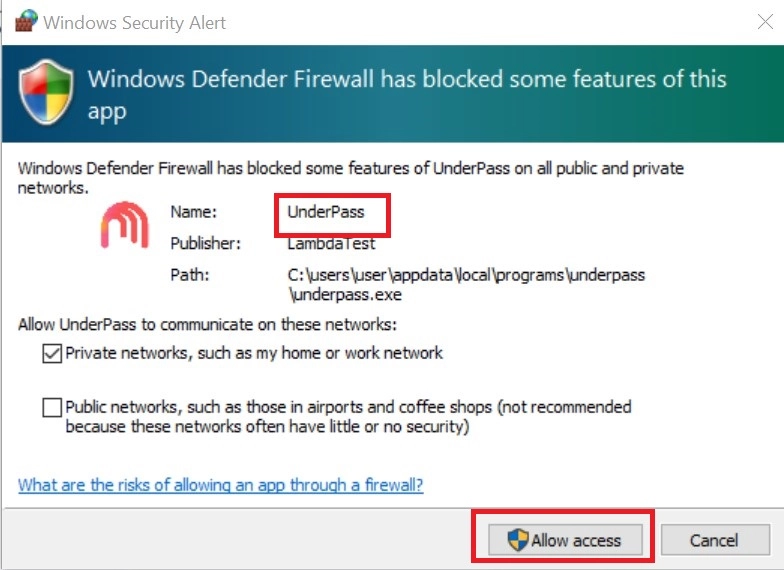
After downloading the Tunnel App, also known as the Underpass, you need to run it. You may get a prompt from your operating system asking you to allow Underpass through the firewall on your system.
Note: If you are using a Linux operating system, you need to give app executable permission using the command:
chmod +x UnderPass.AppImage
Launching Underpass and the secure Tunnel
Launching Underpass on Linux
Make sure you’ve given the permissions to the Underpass executable file through the command highlighted in the above note. If you have, you can run the application by either double clicking it or by running the below command in terminal:
./UnderPass.AppImage
Launching Underpass on Windows
Once Underpass is downloaded and installed, simply launch Underpass through the start menu or a shortcut.
Launching Underpass on MacOS
Once Underpass is downloaded and installed, simply launch Underpass through the Launchpad (Applications page).
Launching Tunnel
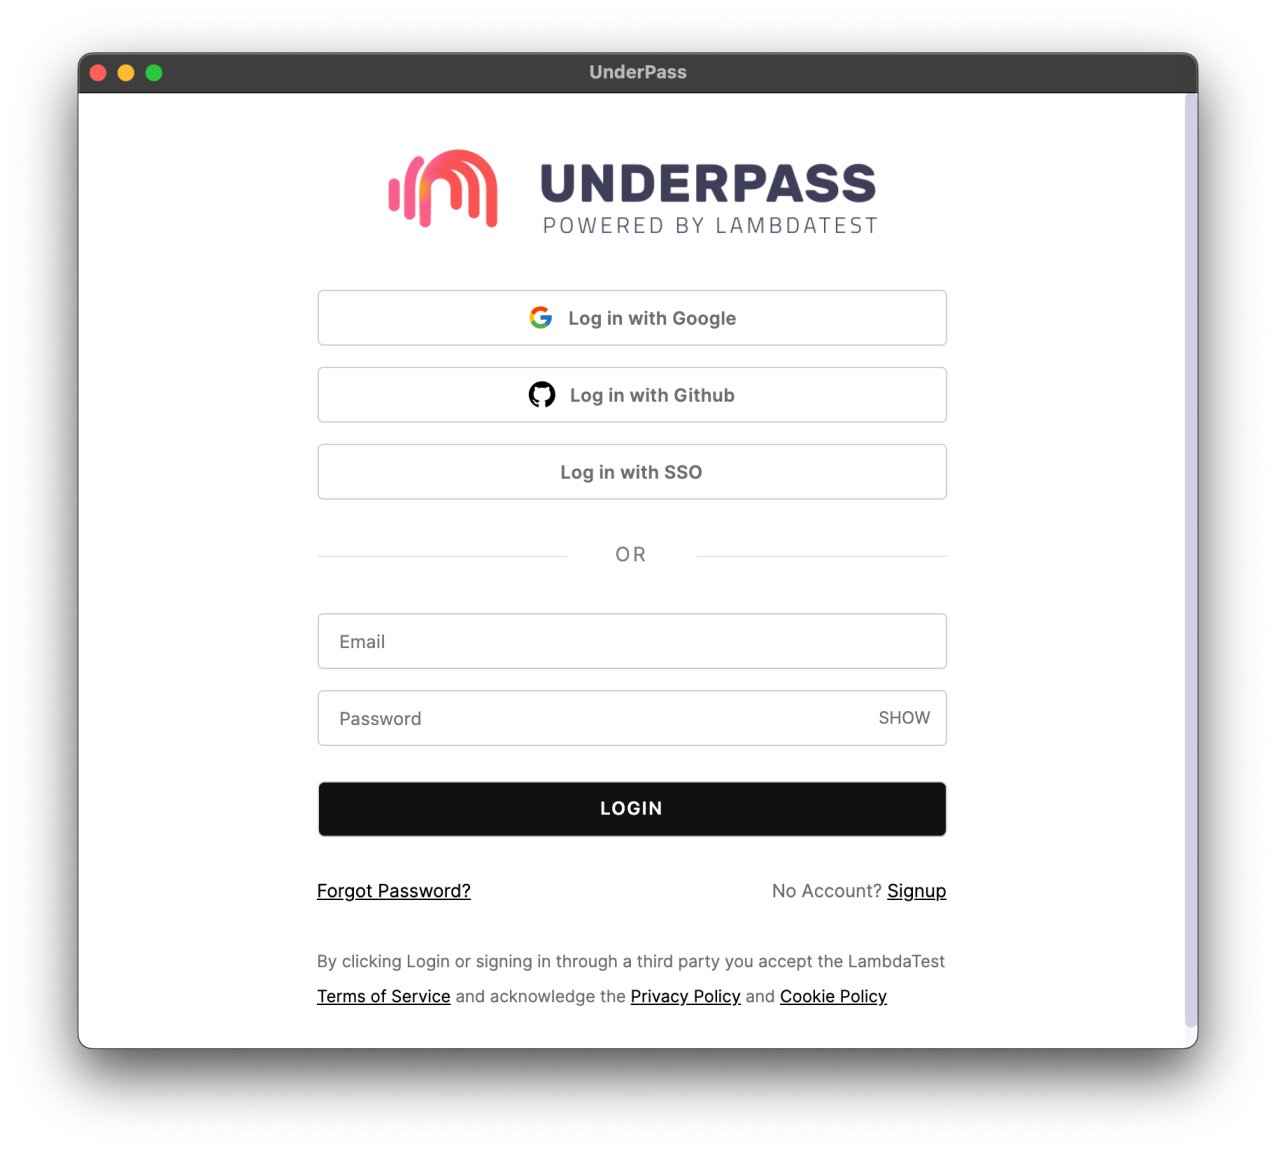
To use LambdaTest Underpass, you need to begin by logging in with your preferred login method. Underpass supports login through Email and Password, Google, GitHub or your organisation SSO.
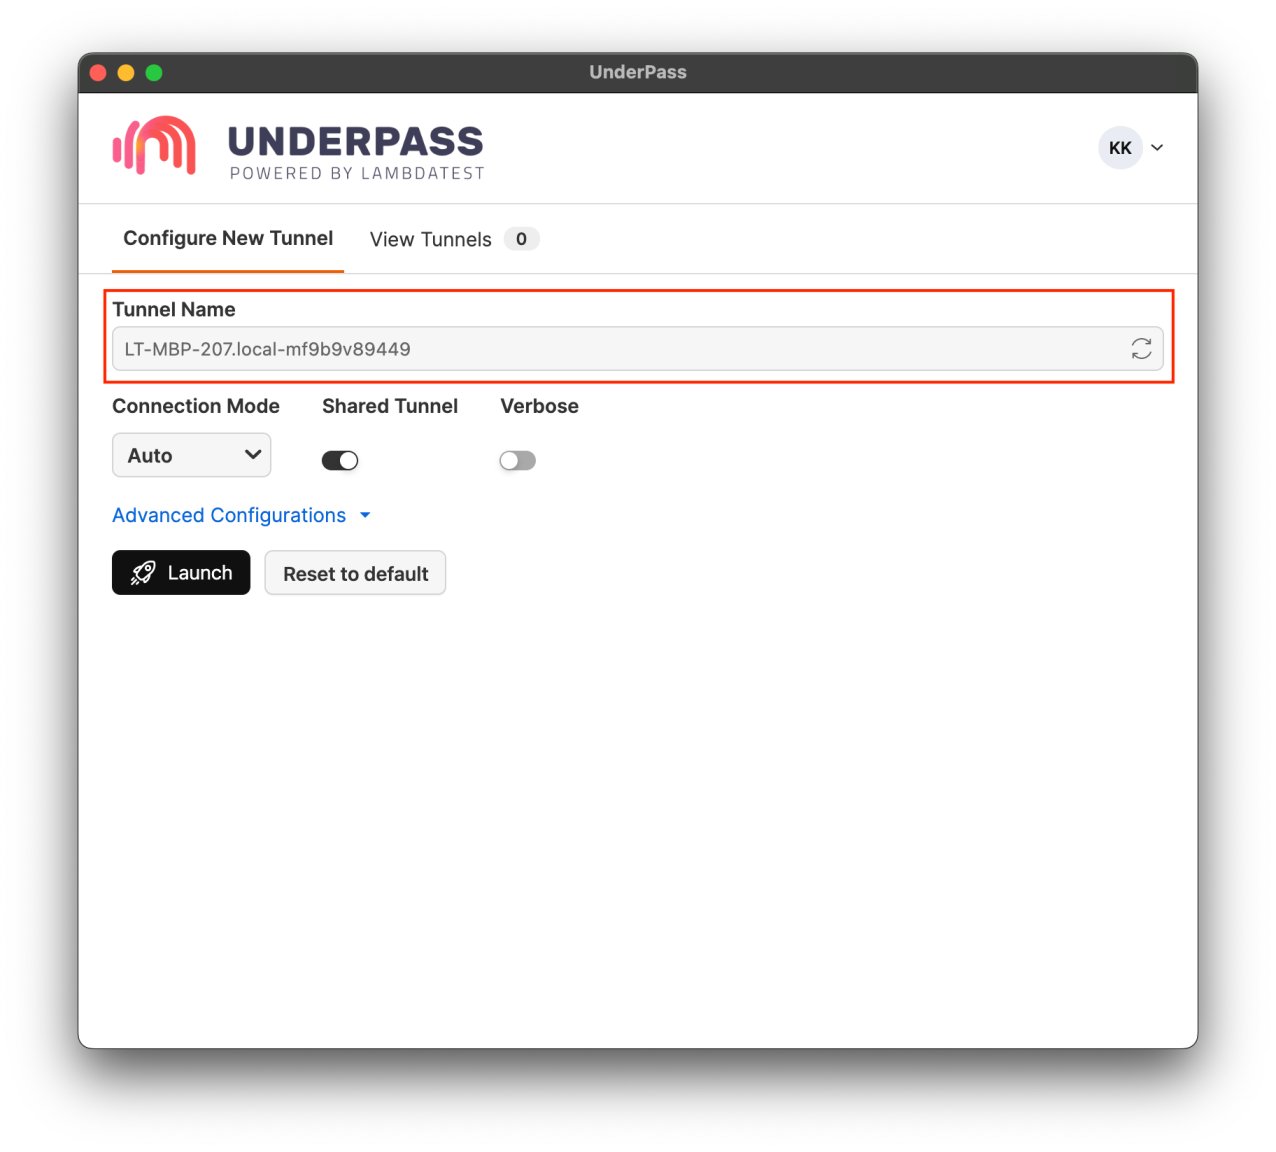
After logging in, you will be presented with the home screen of Underpass. Here, you can change the tunnel name manually or using the arrow button to generate a random name. You can click launch to launch the tunnel.
On Windows, you may get another prompt from your firewall defender to allow LT, which is a binary file for Lambda Tunnel. Earlier, you used to trigger the LT file through your command line or terminal. Now, as you allow LT(Lambda Tunnel) the permissions, the Underpass will take care of the rest of the execution.
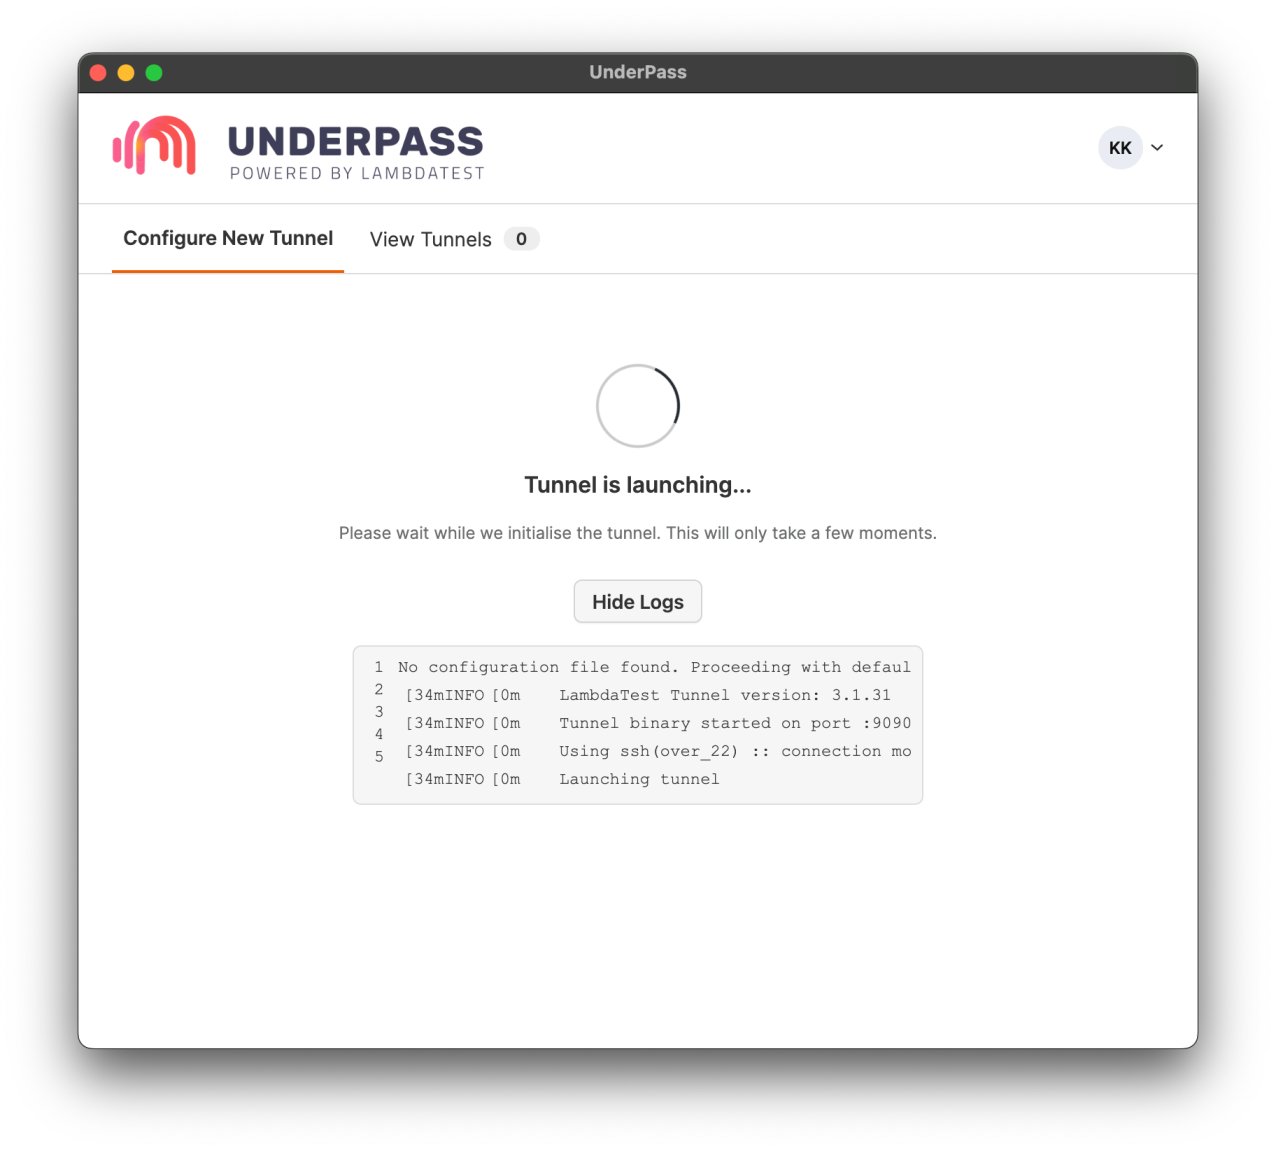
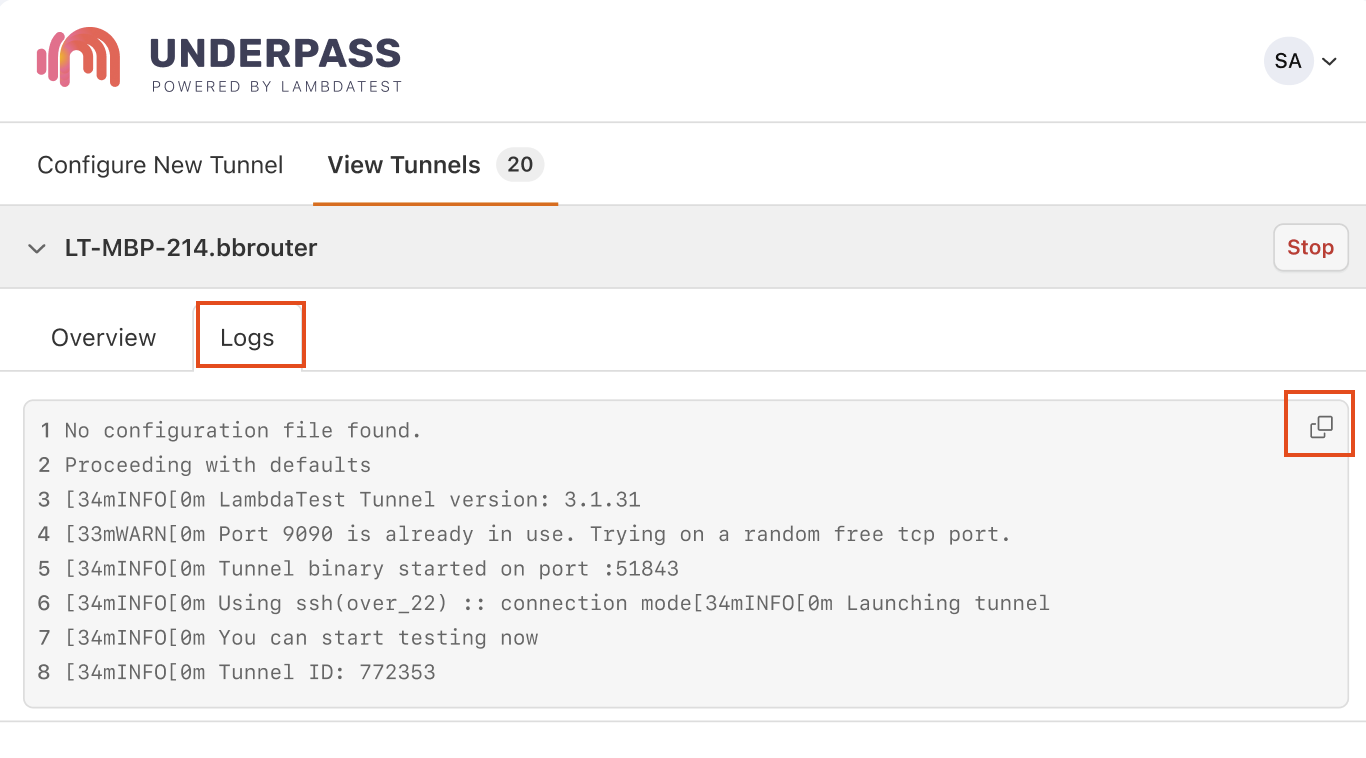
Next, you just have to wait for a couple seconds while the tunnel loads. You can see the logs as well.
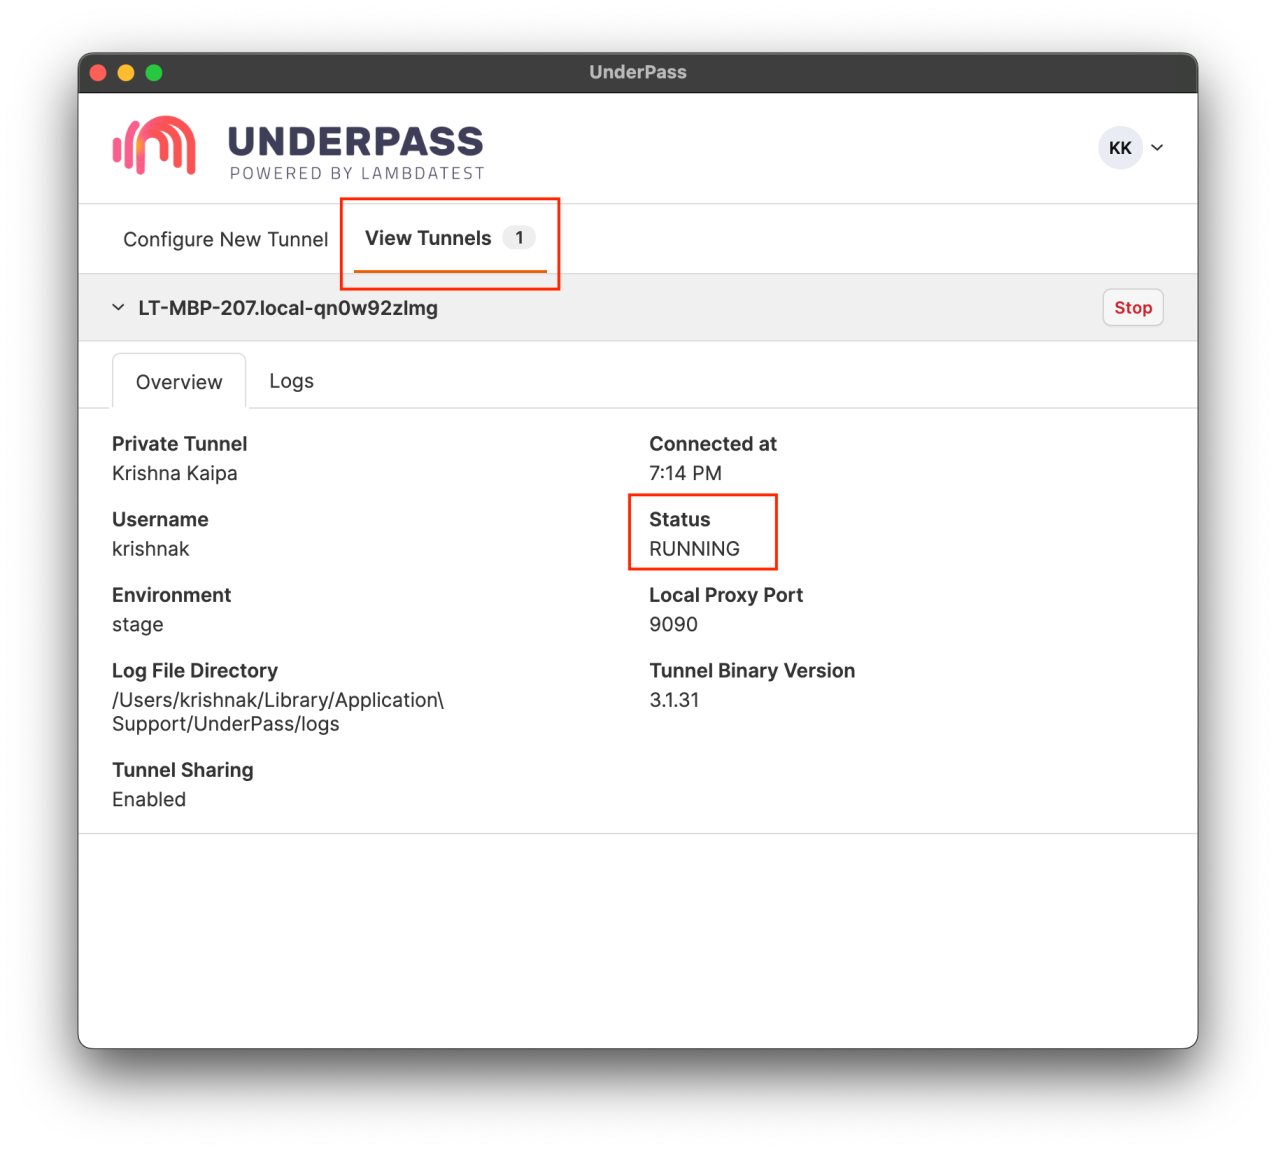
You have successfully established an Secure Shell connection by running the Underpass application. You will find the status as Running.
By clicking over the Logs button, you can find messages populated from through command line.
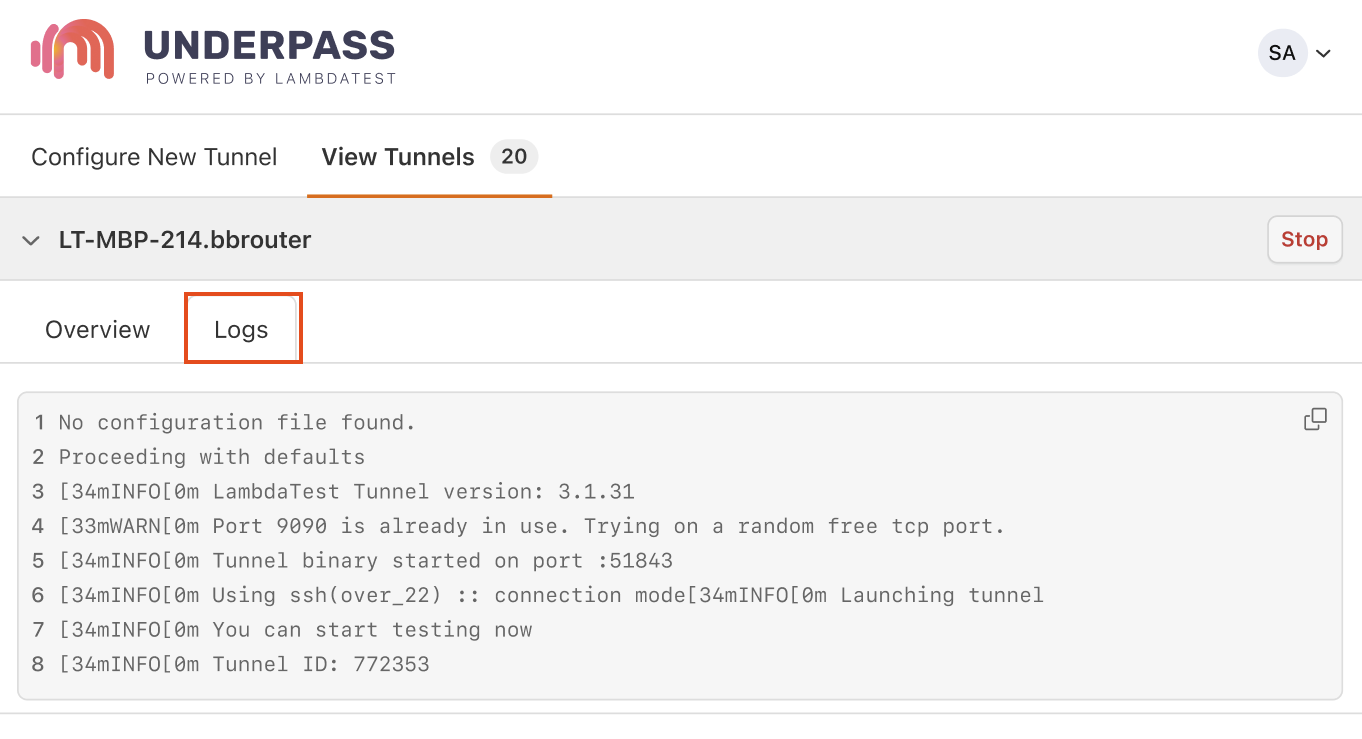
Note: If you don’t specify any advanced configurations while launching the tunnel, you may receive few warnings stating the environment & configuration files aren’t found. Don’t worry though, in such cases you will be automatically routed through default configurations.
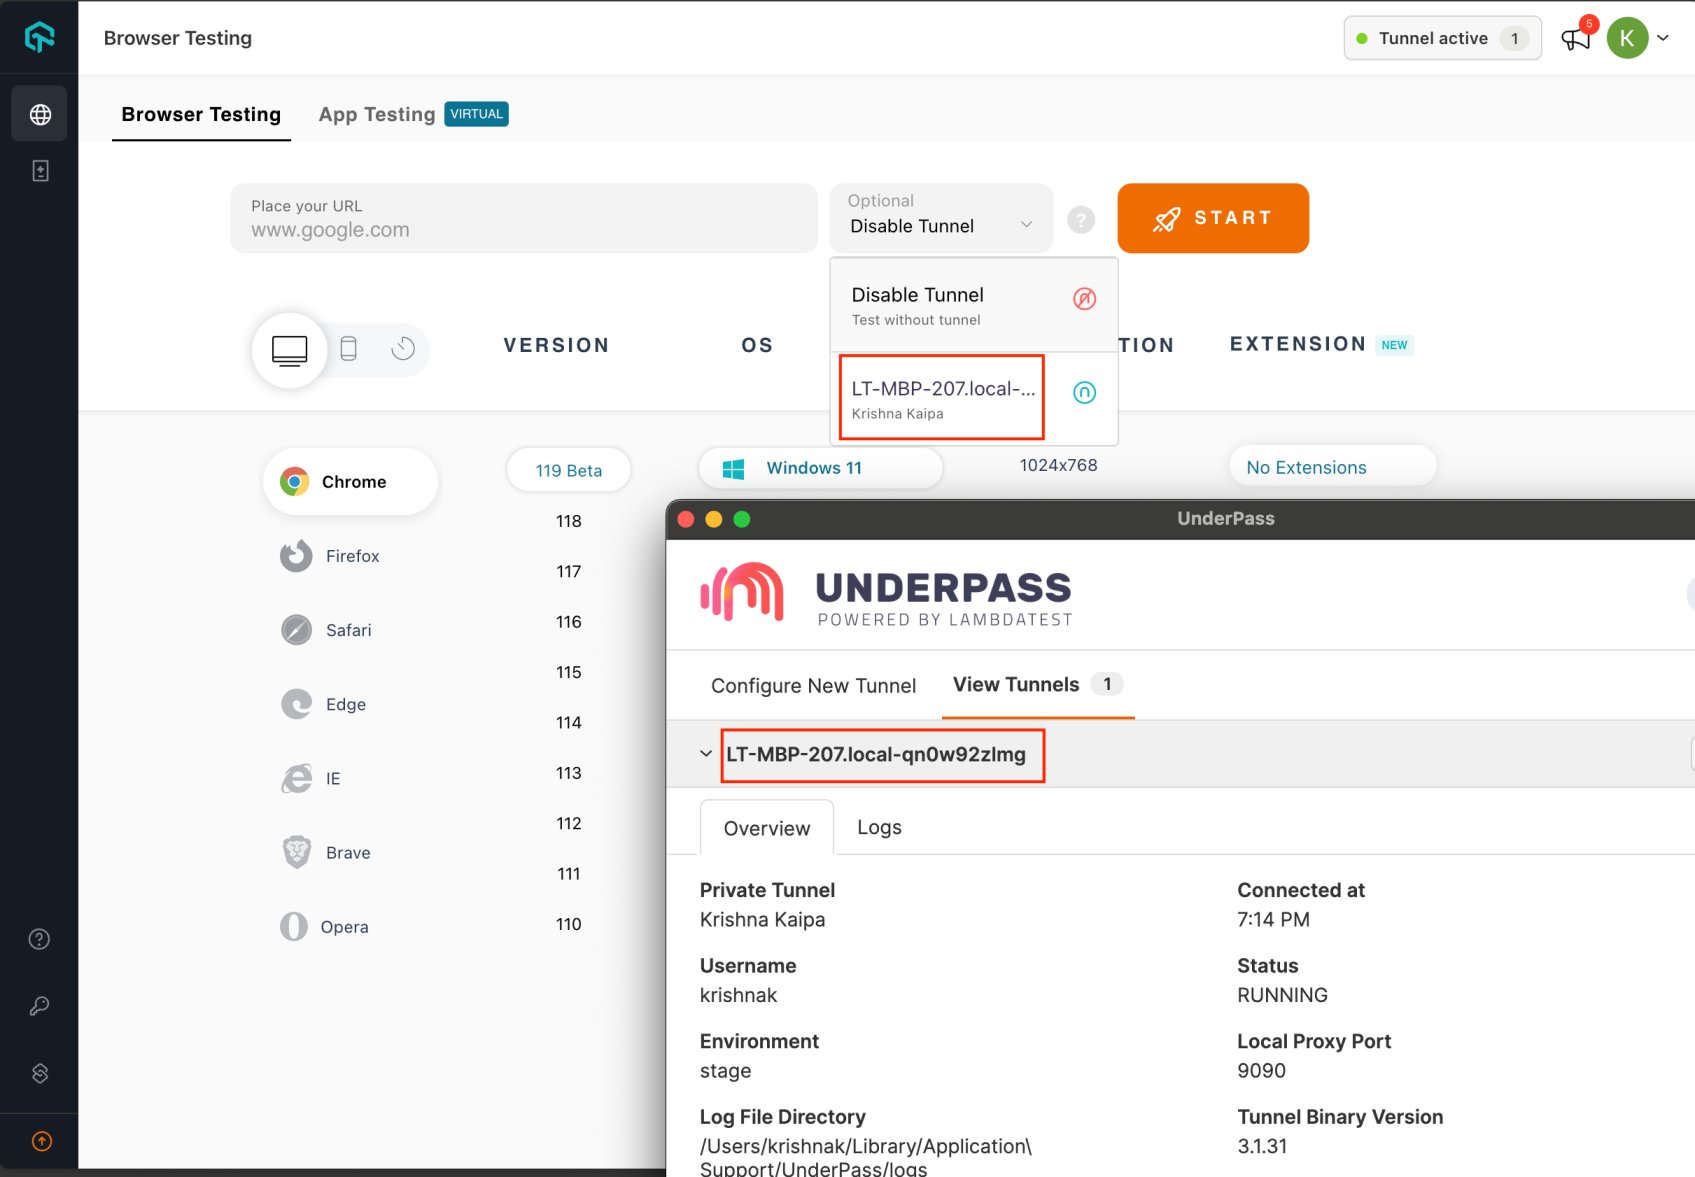
Now, if you go back to LambdaTest web-application, you will find an active tunnel connection being reflected with the same name as your Underpass tunnel application.
How to add Advanced Configurations?
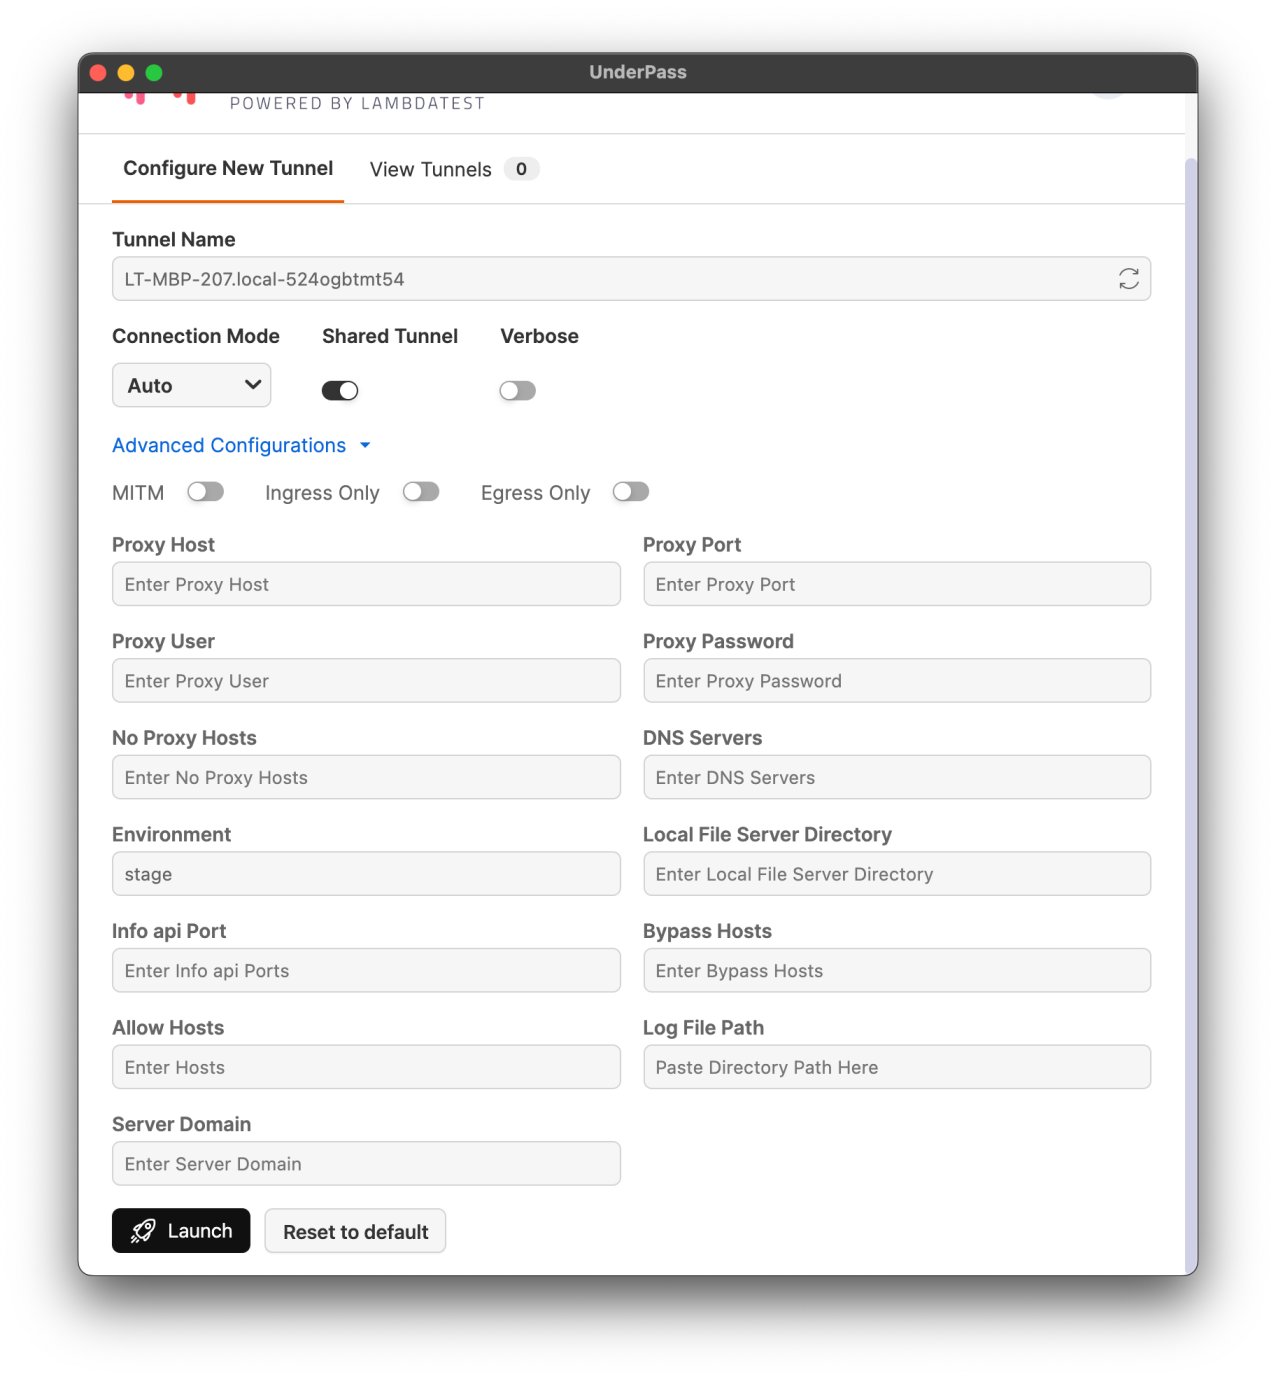
You can also specify advanced configurations such as proxy details, environment label, info API port, local server port and more before you launch the Underpass tunnel application.
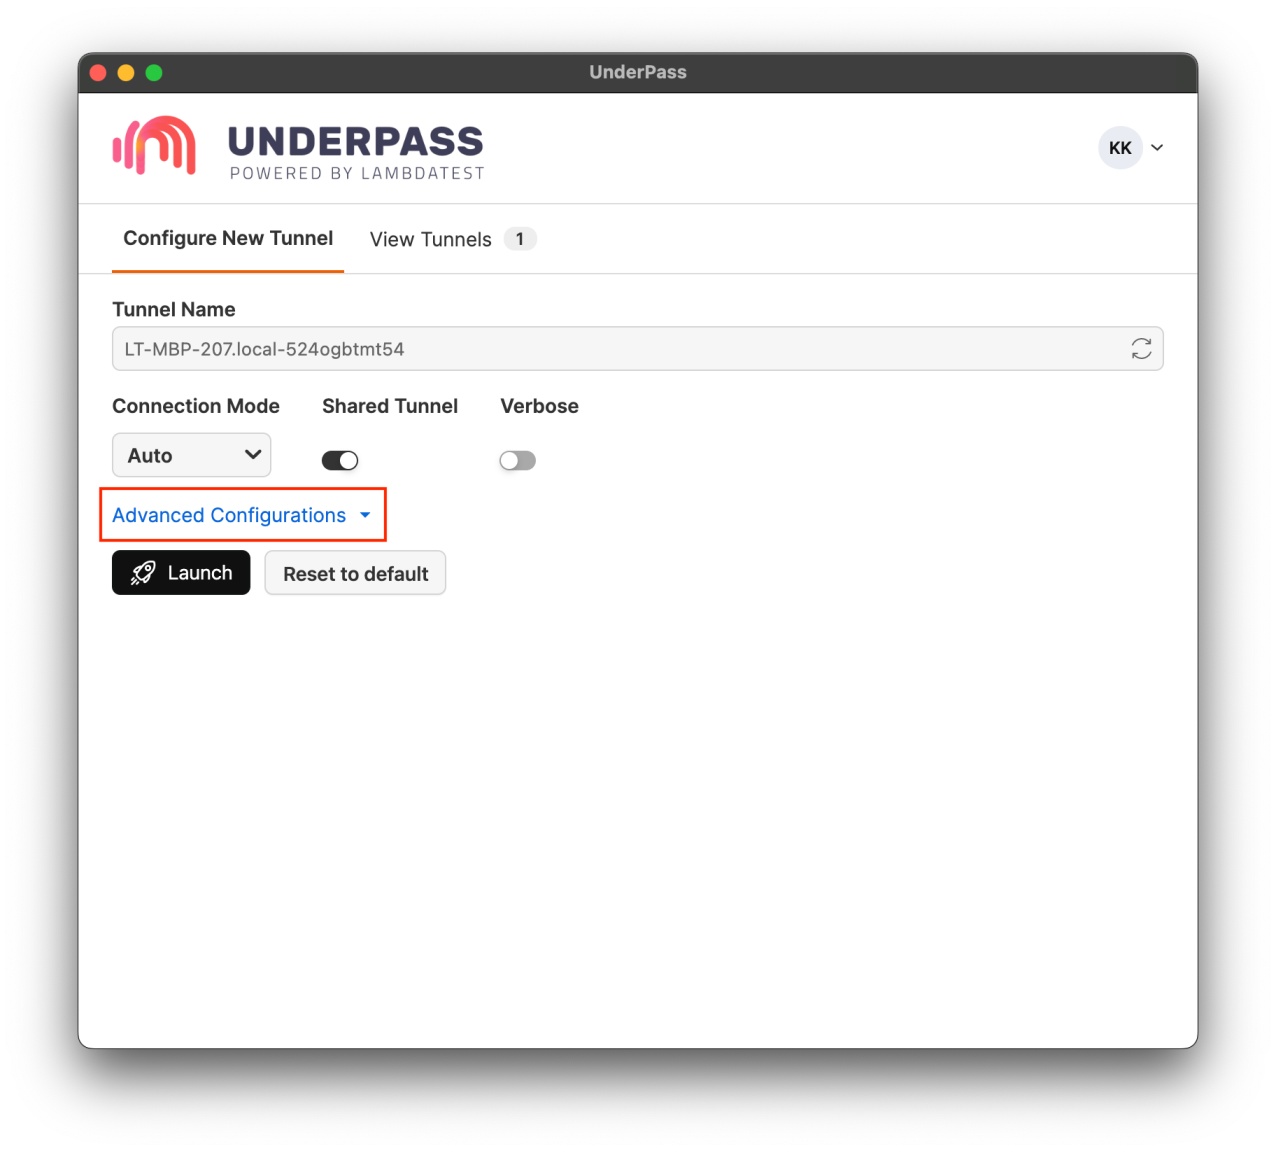
As you click on Show Advanced Configurations, you get the below screen.
Local Testing By MITM(Man-In-The-Middle)
The MITM(Man-in-the-middle) toggle enables you to test websites using self-signed certificates on your local system or internal network. It happens very often that you may try to test a website on localhost which may not have valid SSL certificates before the website is made live. In such cases, you may receive the below error.
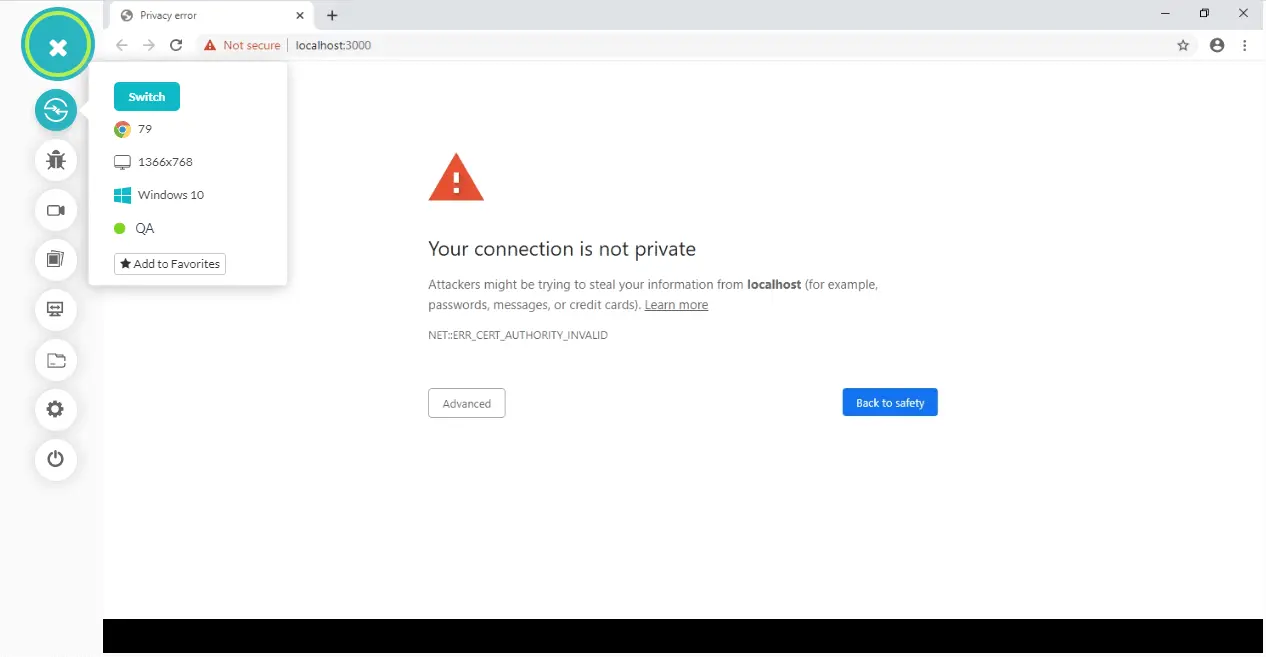
You can test such websites by leveraging the MITM toggle under advanced configurations of the Underpass tunnel application. Here is a screenshot of the same website that was throwing an error earlier but can now be tested by enabling the MITM toggle.

Accessing A Local Directory
With Underpass application, you can easily access a local folder or directory in your computer. All you need to do is paste the address of folder in the field “LOCAL DIRECTORY” under the advanced configurations.
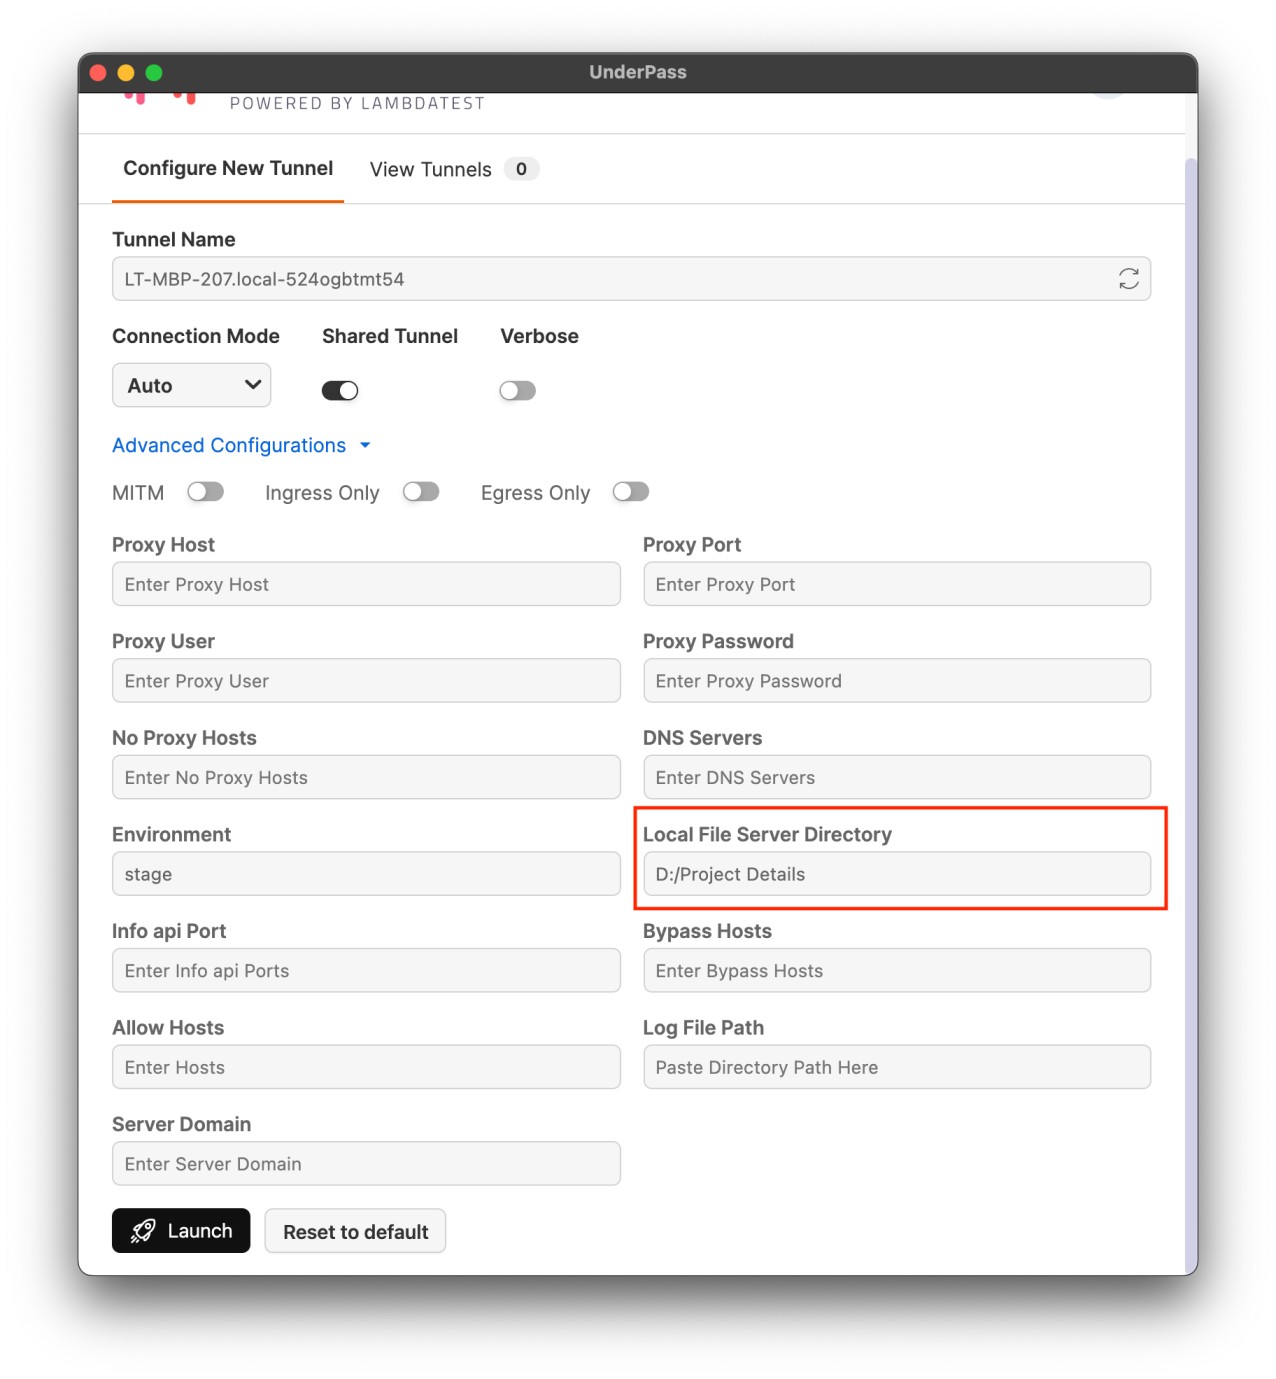
Now, when you launch the tunnel and run a Real time test over LambdaTest, you will find the files located under the local folder whose path was specified by you under the advanced configurations.
Note: You need to specify local-folder.lambdatest.com as the testing URL in the real time testing.

Monitoring Tunnel Logs For Troubleshooting
Through Underpass tunnel application, we’ve tried our best to provide you a bug-free experience. However, in any rare scenario, if you come across any issues around LambdaTest Underpass, you can share the tunnel logs with our 24/7 support, and we will help you out at once.
To view the tunnel logs instantly, click on Logs after selecting a tunnel in the View Tunnels tab. You can now copy the logs using the copy button on the right hand side.
You can find the tunnel logs stored in the following location:
- On macOS:
~/Library/Application Support/Underpass/logs - On Windows:
C:\Users\%USERNAME%\AppData\Local\Underpass\logs - On Linux:
~/.config/Underpass/logs
That was all for LambdaTest Underpass tunnel application, in case you have any questions, feel free to share them with us through our 24/7 chat support or drop us an email to support@lambdatest.com. Happy testing! 🙂