- Automation
- Home
- /
- Learning Hub
- /
- How to Locate Elements Using CSS Selectors in Selenium
- -
- May 27 2023
How to Locate Elements Using CSS Selectors in Selenium
This tutorial covers different types of CSS Selectors in Selenium along with their syntax to help you find the specific web elements based on their attributes, HTML TagNames, ClassNames, etc.
OVERVIEW
Selenium WebDriver is a very known and popular framework that helps software testers and developers to automate browser interactions for web applications. It supports automation for widely used browsers like Chrome, Firefox, Internet Explorer, Edge, Safari, etc., and allows users to write automated tests in multiple programming languages like Java, JavaScript, Python, C#, etc.
Using Selenium, one can easily simulate the exact user actions like navigating websites, filling out forms, clicking buttons, and interacting with pop-ups and browser alerts. It also allows users to manage cookies and work with iframes, windows, and tabs.
This enables the users to catch bugs and issues easily that can be addressed with early feedback, thus testing the web application efficiently and releasing quality applications into the market.
With the release of Selenium WebDriver 4, there has been a path-breaking change in the internal working of the framework. Previously it used to work on the JSON Wire protocol; however, with the Selenium 4 release, it now works using the W3C protocol.
While working with Selenium WebDriver, we need to know about different locator strategies as it is the base to interact with the respective elements on the web page. Locating web elements, performing actions on them, and finally performing assertions are the core three steps in web automation.
In this tutorial on CSS Selectors in Selenium, we will briefly check out eight different locator strategies used in Selenium WebDriver. Majorly, we will check out the CSS Selectors in Selenium depth with examples of locating them from the Inspect Element window in the browser.
So, let’s get started!
Quick Recap: Benefits of Selenium WebDriver
There are several benefits of using Selenium WebDriver for web testing. Selenium WebDriver, an open-source automation tool, offers a range of advantages for web application testing. In this quick recap, we will explore the key benefits it brings to the table.
From cross browser compatibility and language support to robustness and reliability, Selenium WebDriver empowers testers to automate web browsers efficiently. Its extensive community support, integration capabilities with testing frameworks and CI/CD pipelines, and broad platform compatibility further solidify its position as a preferred choice for web automation.
By understanding the benefits of Selenium WebDriver, testers can harness its potential to streamline their testing efforts and deliver high-quality web applications.
- Open Source
- Cross browser testing
- Integration with other tools and frameworks
- Support for multiple programming languages
- Large community support
- Automated regression tests
Selenium is an open-source automation testing framework available for free. It can be customized and used at the convenience of the user.
It is common for organizations to adopt Selenium WebDriver as a foundational framework and build customized automation frameworks to meet their specific requirements.
Cross browser testing helps ensure the web application works as expected on different browsers- OS combinations. Using Selenium WebDriver, cross browser testing can be performed on widely used browsers and OS combinations such as Chrome on Windows, Safari on macOS, Firefox on macOS or Windows, etc.
Selenium offers easy integration with other popular tools and frameworks like TestNG, JUnit, and Cucumber.
This helps to leverage the features and functionalities of the third-party other tools and frameworks with Selenium that help test the web application effortlessly.
As discussed earlier, Selenium WebDriver has support for Java, JavaScript, Python, C#, etc. You can use Selenium WebDriver per your language of choice, thus offering ease to implement as per their skill sets.
With the Selenium WebDriver project having 26.7K Stars and 7.6K Forks on GitHub, huge community support is provided to Selenium WebDriver that shares blogs, tips and tricks, and best practices.
The official Selenium documentation website has good references and examples on how to use Selenium WebDriver. So, if you get stuck anywhere while using Selenium WebDriver, they can find the solution easily over the Internet.
Regression testing refers to retesting the functionality after a bug fix has been made in the application. It checks for the side effects in the code. Running these regression tests manually is a time-consuming and tedious task.
Hence Selenium WebDriver is mostly to automate the regression tests for websites. This saves the testing teams precious time and helps them to focus on the complex test scenarios that need more attention to detail.
Note : Run Selenium automated tests across 3000+ real browsers & OS combinations. Try LambdaTest Now!
Automating Web Applications using Selenium WebDriver
We can automate any web application in the following three simple steps using Selenium WebDriver.
Before we get into the demo of locating the web elements using the locator strategies, LambdaTest’s Selenium Playground website is the application under test. LambdaTest is a digital experience testing platform that enables developers and QA engineers to perform manual and automated testing of websites and web apps on an online browser farm of 3000+ real browser environments.
You can also Subscribe to the LambdaTest YouTube Channel to get live updates with the latest tutorials around Selenium testing, Cypress testing, CI/CD, and more.
In this section, we will use Selenium Playground by LambdaTest to demo all the locator strategies.
LambdaTest’s Selenium Playground is a demo website with multiple demo screens, such as an Input form page, multiple dropdown pages, screens with checkboxes, radio buttons, date picker, etc., that can be used for practicing web automation using Selenium WebDriver.
Step 1
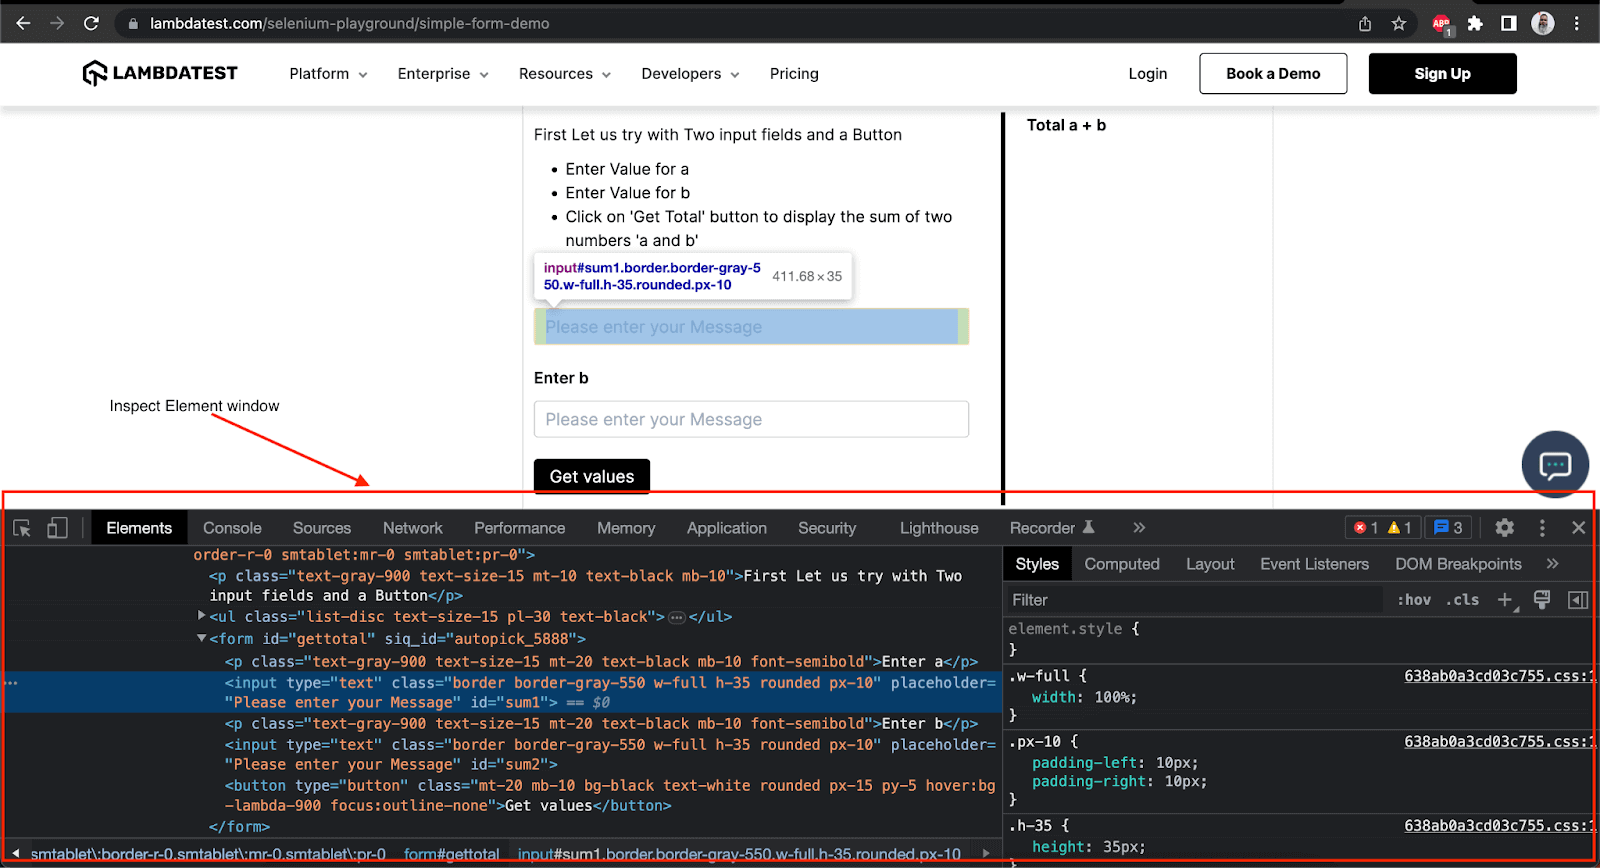
Navigate to the website on the browser and locate the page elements using the Browser’s “Inspect Element” window. Let’s take an example of LambdaTest’s Selenium Playground Website’s Simple Form Page and locate the “Enter Message” field.
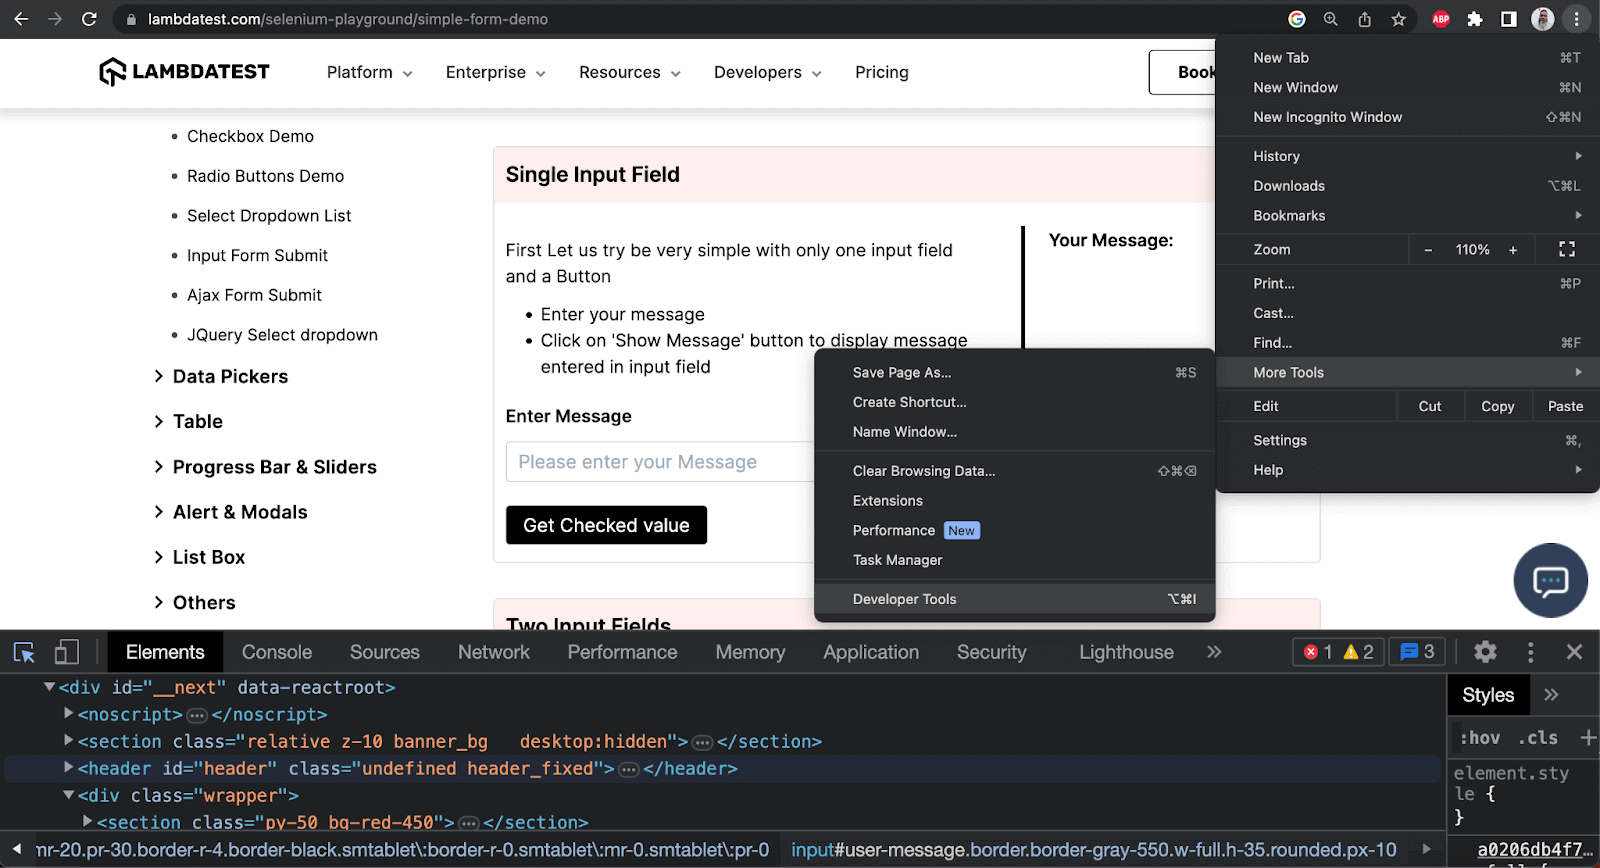
Locating elements using Chrome’s Developer Tools menu
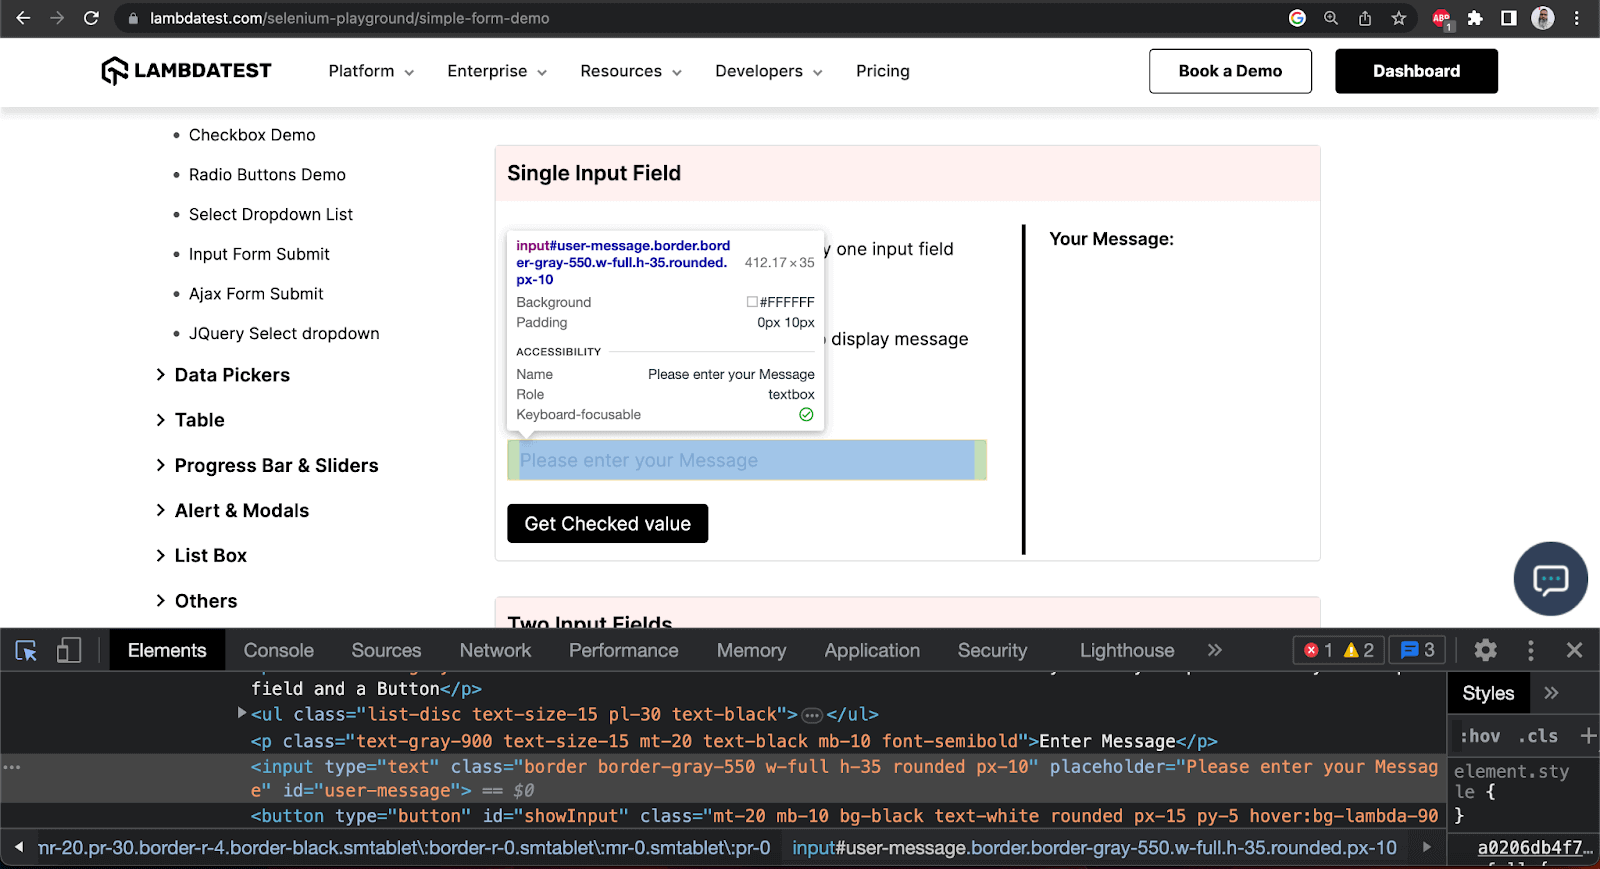
The “Enter Message” field can be located using the id locator - “user-message” as seen in the “Inspect Element” window in the “Elements” tab in the screenshot above.
Step 2
Once you locate the element, using the findElement and findElements methods in Selenium, we should supply the locators we found in Step 1.
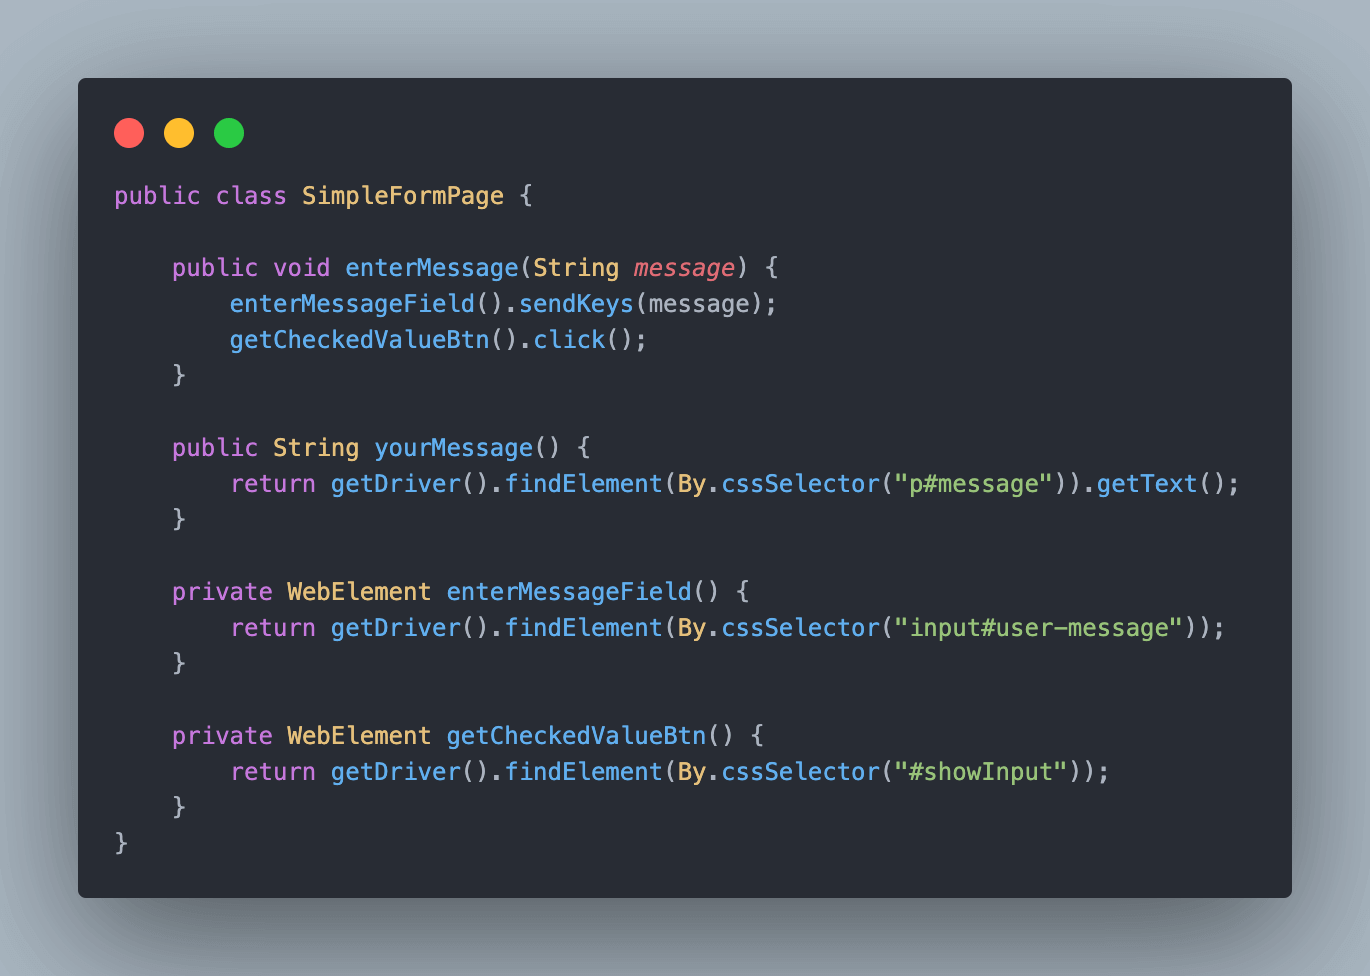
Page Object class - SimpleFormPage
Step 3
Write web automation tests and perform assertions.
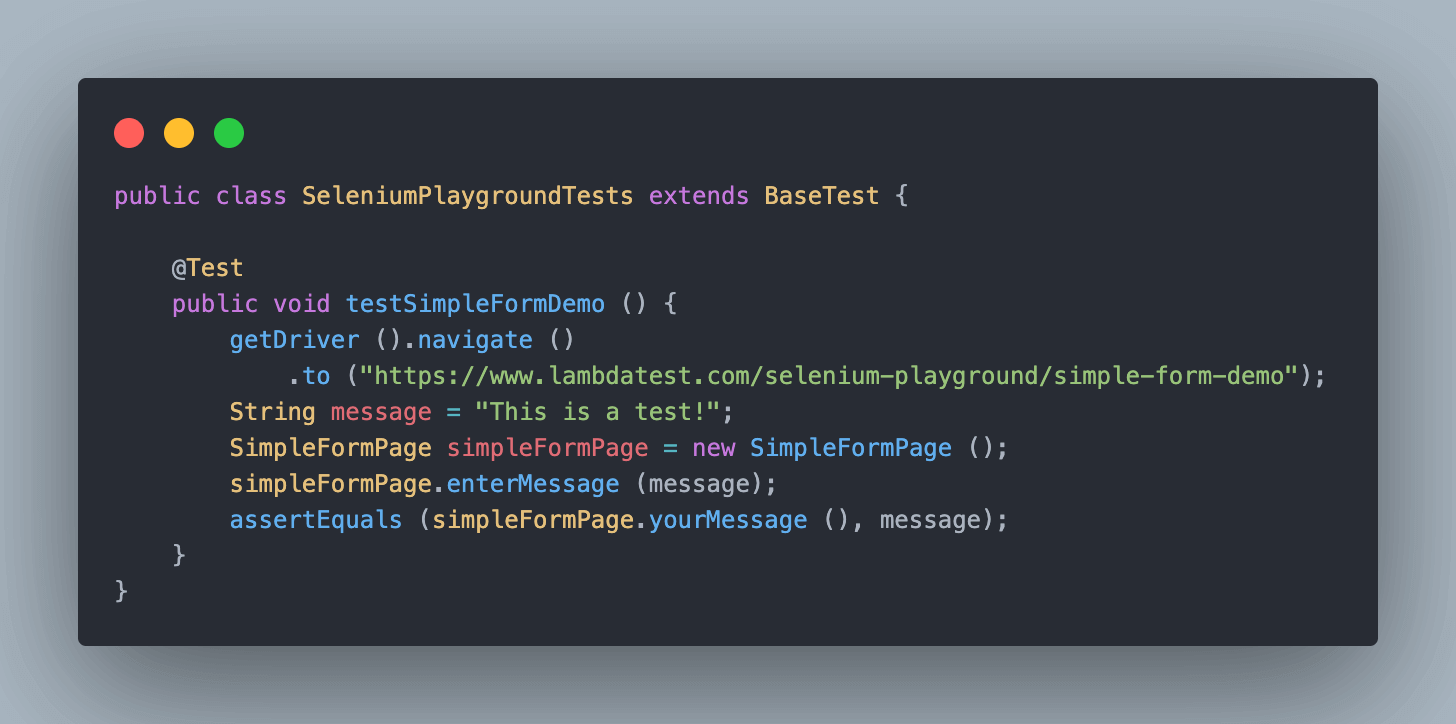
SeleniumPlaygroundTests Class

Test Execution
Let’s execute this test now using the testng.xml file by right-clicking on the file and selecting the option 'Run ../testng.xml'.
Here is the screenshot from IntelliJ IDE after the test execution.
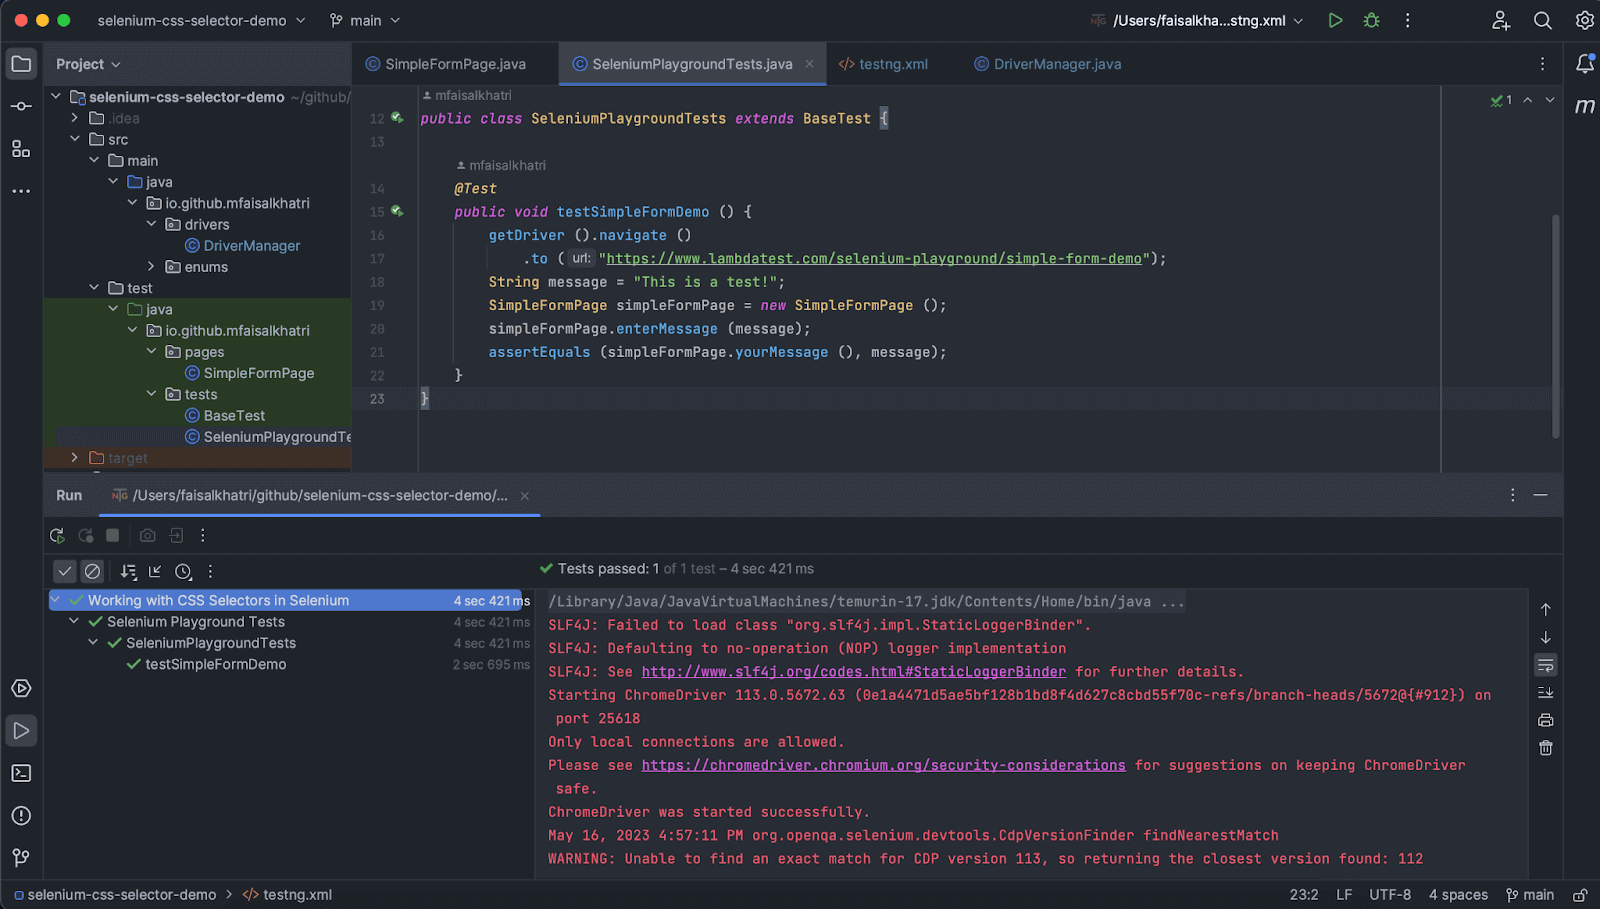
If you look closely at the three steps mentioned above before the test execution, you will notice that the most important part of automation is to locate the elements of the web page.
Also, explore our comprehensive guide on test execution engines, gaining insights into their functionalities to elevate your testing workflow with automation.
Locators in Selenium WebDriver
In Selenium WebDriver, locators are used to identify and locate web elements on web pages. A web element can be a link, button, dropdown box, text box, checkbox, etc.
A web element can be identified by inspecting the HTML source code of the web page using the “Inspect Tools” menu in the browser. These selectors help Selenium WebDriver to interact with these elements and simulate user actions.
There are eight different types of locator strategies that can be used with Selenium WebDriver using Java. The following table will give you a fair summary of all the locators:
| Locator | Description | Syntax (Java) |
|---|---|---|
| ID | The web element is identified using the ID attribute. | driver.findElement(By.id(“id-locator”)); |
| Name | Name attribute is used to locate the web element. | driver.findElement(By.name(“name-value”)); |
| TagName | HTML TagName of the web element is used to locate the web element. | driver.findElement(By.tagName(“html-tag-name”)); |
| ClassName | CSS ClassName is used to locate the web element. | driver.findElement(By.className(“css-classname”)); |
| Link Text | Visible text of the hyperlink is used to locate the web element. | driver.findElement(By.linkText(“visible-linktext”)); |
| Partial Link Text | Partial text of the hyperlink is used to locate the web element. | driver.findElement(By.partialLinkText(“partial-link-text”)); |
| CSS Selector | CSS Selector is used for locating the web element. | driver.findElement(By.cssSelector(“css-selector”)); |
| XPath | XPath is used to locate the web element. | driver.findElement(By.xpath(“xpath-expression”)); |
ID locators are unique and faster than any other selector for locating a web element on the page. So, ideally, when working with locators, we should use ID first, then Name Selectors, CSS Selectors, and XPaths.
While performing web automation testing with Selenium WebDriver, in the case of complex web objects where locating web elements is difficult, CSS Selectors is a powerful tool for identifying, locating, and interacting with web elements on the web page.
Let’s deep dive and learn more about CSS Selectors in Selenium.
What are CSS Selectors?
CSS stands for Cascading Style Sheets. By using CSS Selectors in Selenium, we can identify and locate web elements based on their id, class name, name, or other attributes like type, value, etc. CSS is faster and simpler than XPath and allows for a clearer and more crisp method to locate web elements.
They are supported in all modern browsers and are a great way to quickly and precisely locate elements within a web page.
CSS Selectors in Selenium can be used by chaining them together. For example, you can either locate the web element using the id attribute or the element using HTML TagName with the id attribute.
This offers a lot of flexibility and allows you to write precise test scripts. It also helps in accurately identifying and interacting with the required web elements on the web page.
In Selenium WebDriver, CSS Selectors can be used to locate web elements using the By.cssSelector() method. This method accepts a CSS Selector string as its argument, which defines the selection criteria for the element(s) to be located.
CSS Selector Strategies
Following are the different types of CSS Selector strategies that can be used to locate web elements.
ID
Locate the web element using the ID attribute.
Syntax

Sample Usage

ID with TagName
Locate the web element using ID with HTML TagName.
Syntax

Sample Usage

ClassName
Locate the web element using the HTML ClassName.
Syntax

Sample Usage

Name
Locate the web element using the Name attribute.
Syntax

Sample Usage

Combination of ID and Type attributes
Locate the web element using a combination of ID and Type attributes.
Syntax

Sample Usage

Combination of HTML TagName and ClassName
Locate the web element using a combination of HTML TagName and ClassName.
Syntax

Sample Usage

SubString - Matching a Prefix (Starts With)
Locate the web element using the substring that starts with a certain value.
Syntax

Sample Usage

Substring - Matching a Suffix(Ends with)
Locate the web element using the substring that ends with a certain value.
Syntax

Sample Usage

Substring - Matching a Substring (Contains)
Locate the web element by matching a substring.
Syntax

Sample Usage

Substring - Matching a word (Contains)
Locate the web element by matching an exact word.
Syntax

Sample Usage

TagName with “:first-of-type”
Locate the first tag web element from the list.
Syntax

Sample Usage

TagName with “:last-of-type”
Locate the last web element from the list.
Syntax

Sample Usage

TagName with “:nth-of-type(n)”
Locate the child web element from the list using the index number.
Syntax

Sample Usage
In the following example, it will locate the 4th element in the list.

TagName with “:nth-child(n)”
Locates the nth child element of the parent.
Syntax

Sample Usage
In the following example, it will locate the 3rd element in the list.

TagName with “:first-child”
Locates the first child element of the parent.
Syntax

Sample Usage

TagName with “:last-child”
Locates the last child element of the parent.
Syntax

Sample Usage

How to Copy CSS Selectors using Developer Tools?
Browsers like Chrome, Firefox, and Microsoft Edge allow us to directly copy the CSS Selectors of a web element using the Inspect Element window.
Using the following steps, we can easily copy the CSS Selector of a web element from the web page.
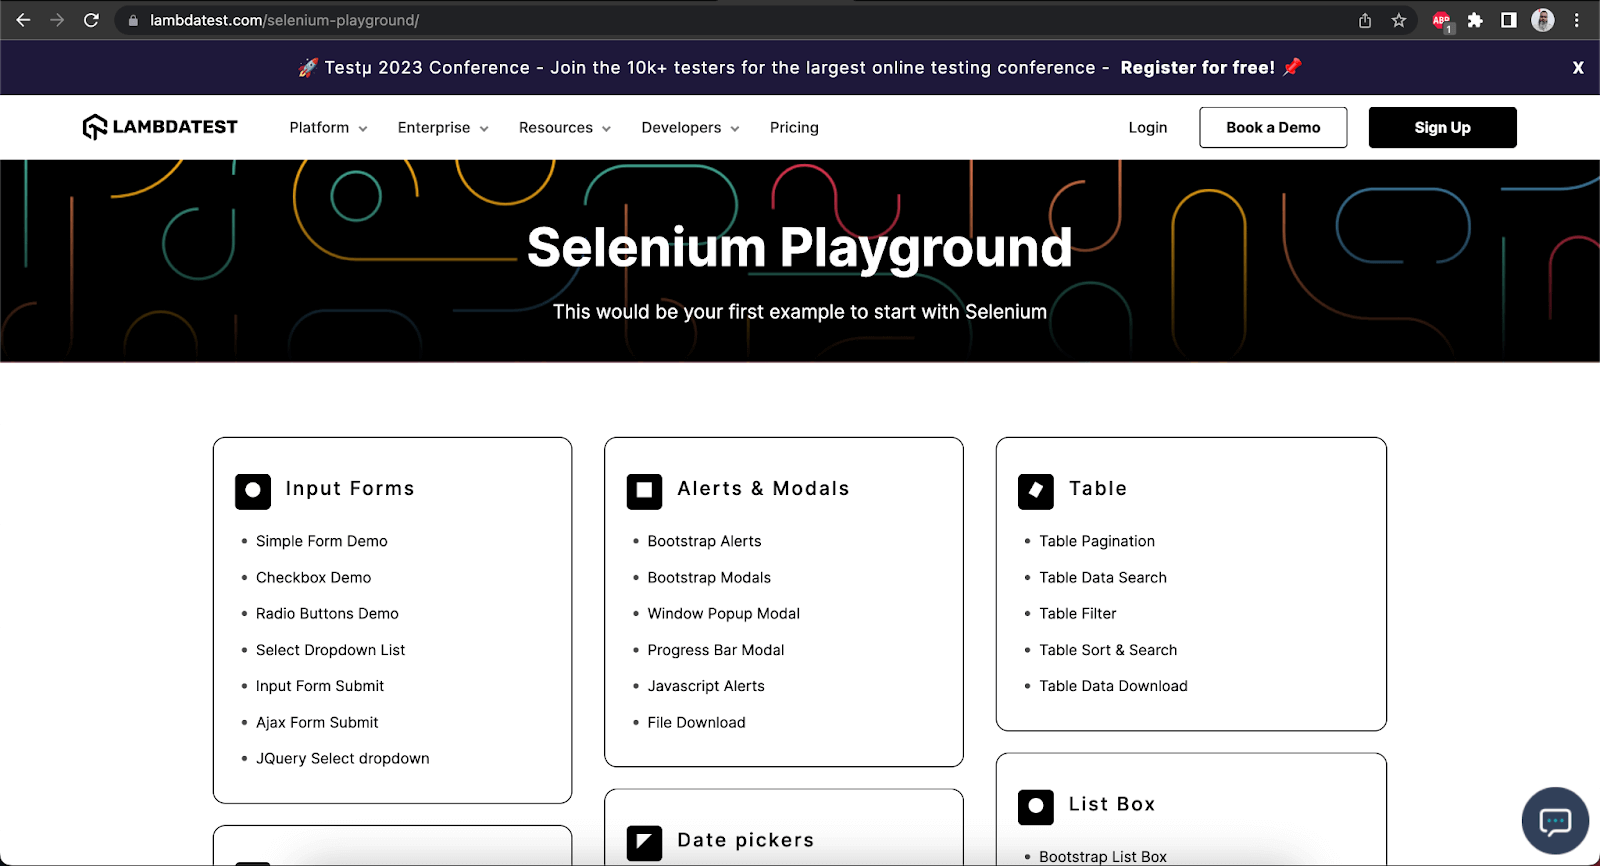
Step 1
Open the Chrome browser and navigate to the LambdaTest’s Selenium Playground.
Step 2
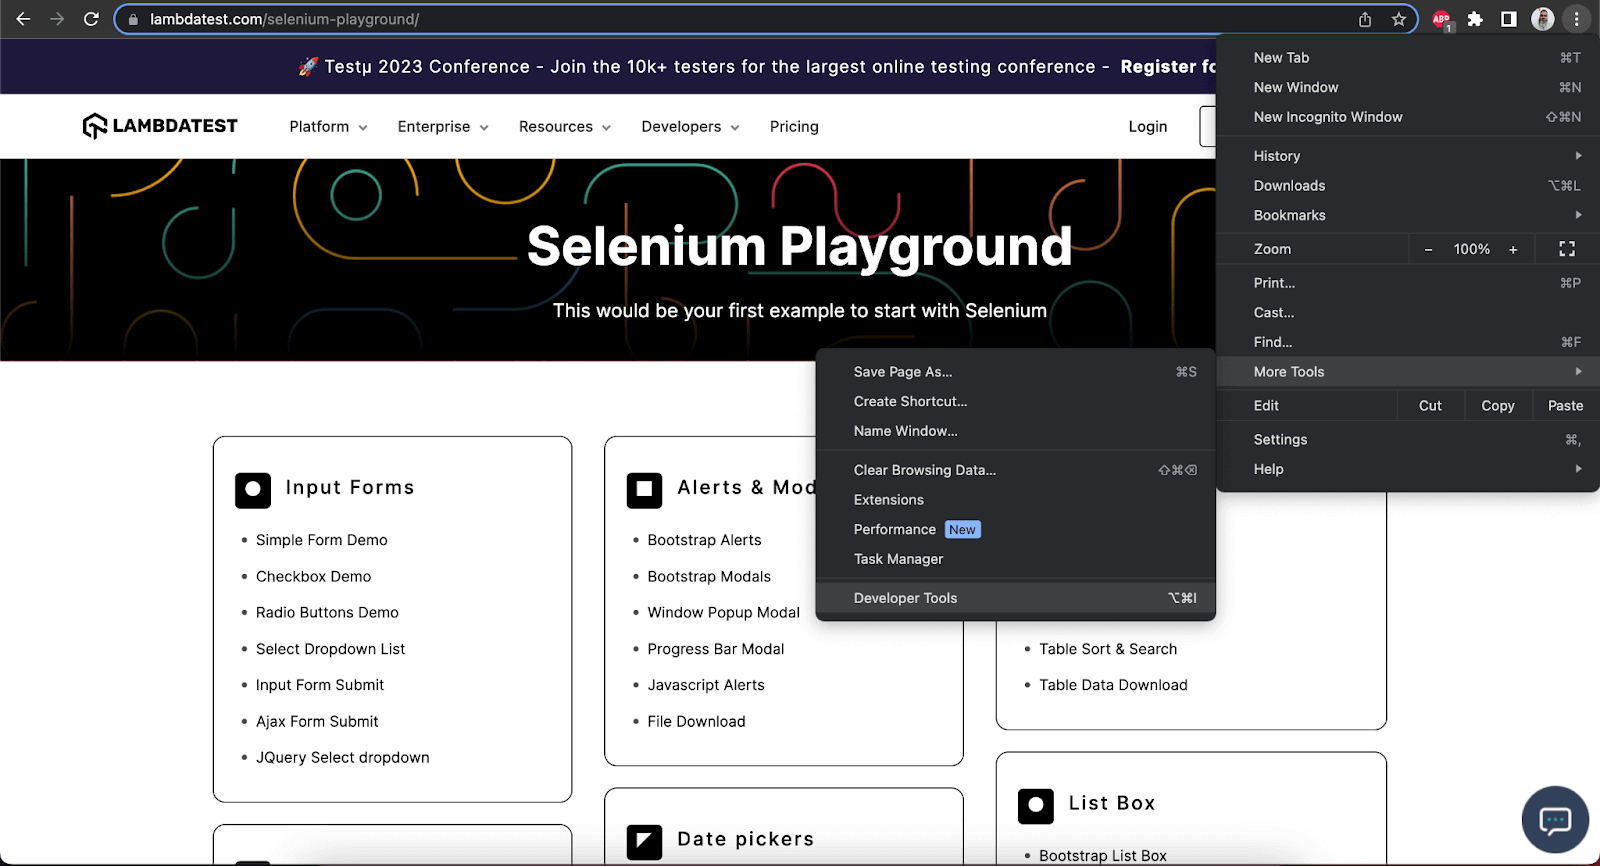
Click on the three dots on the right-hand top of the browser, expand the “More Tools” option, and click on the “Developer Tools” menu. The shortcut key for opening this menu is “F12”.
The “Developer Tools” menu should open and be displayed on the screen, as depicted below.
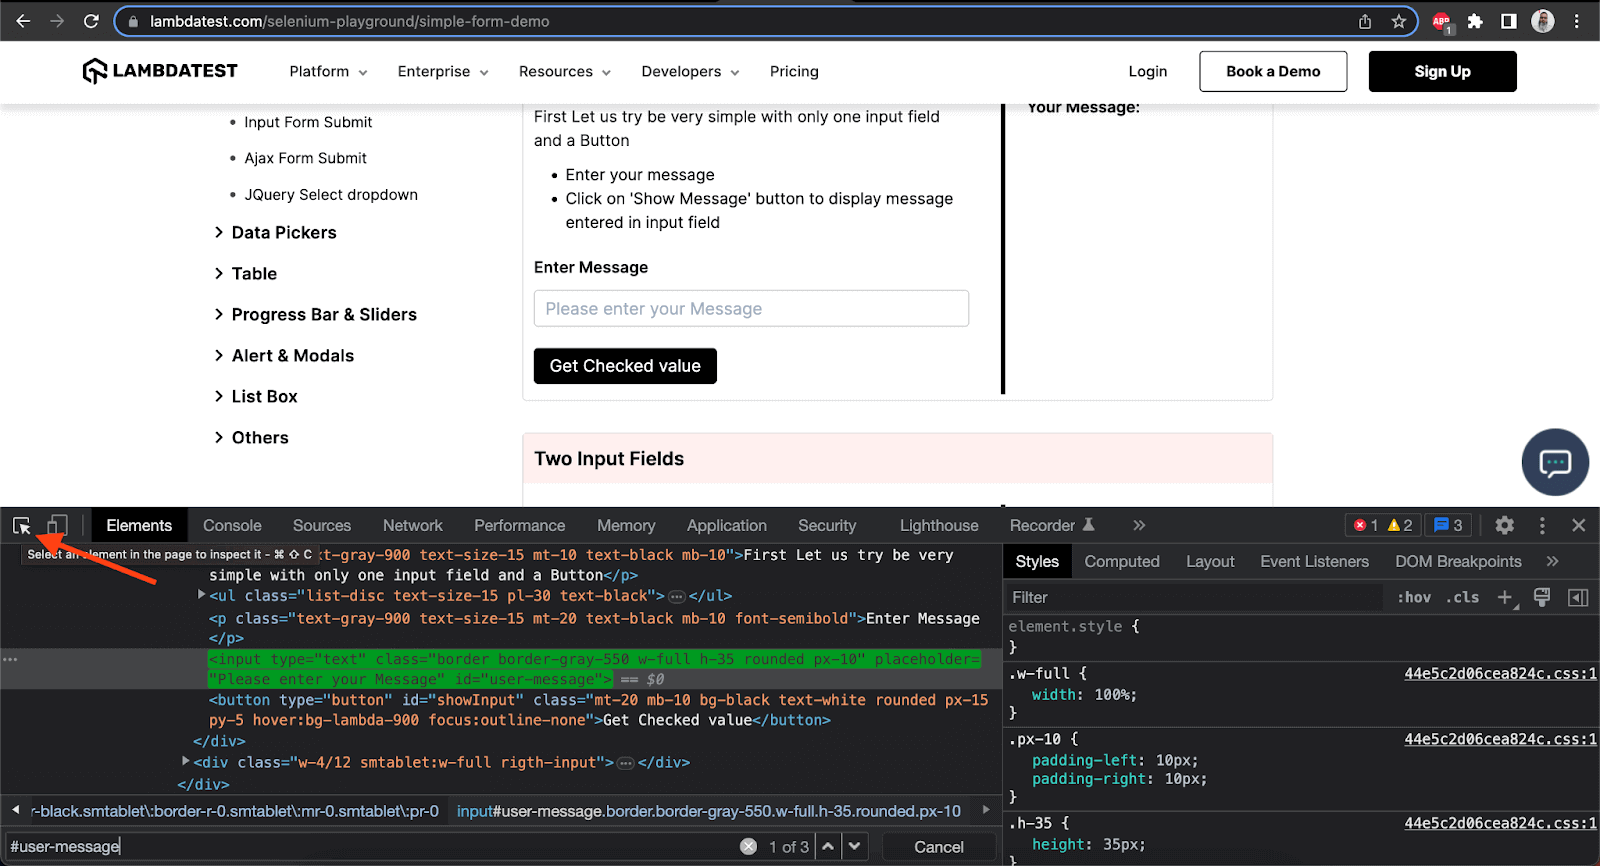
We should be able to locate the web element using the “Elements” tab.
Let's locate and copy the CSS Selector in Selenium for the “Enter Message” field on the Simple Form Demo.
Step 3
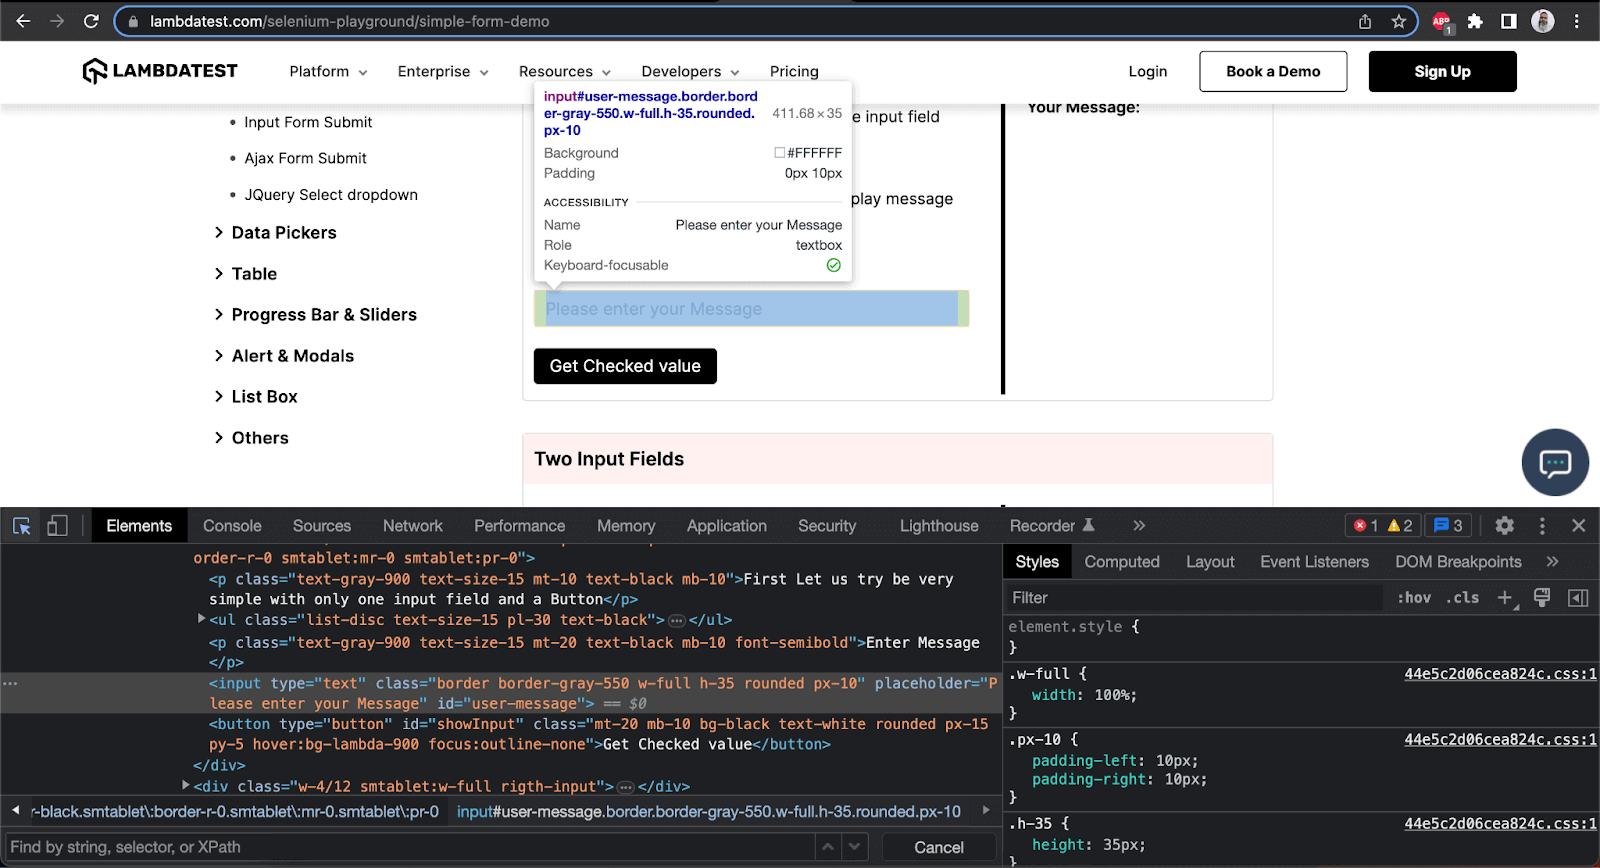
Select the “Select Element” button on the top left of the “Developer Tools” window.

Click on the web element to locate the web page. Here, let’s select the “Enter Message” field.
Step 4
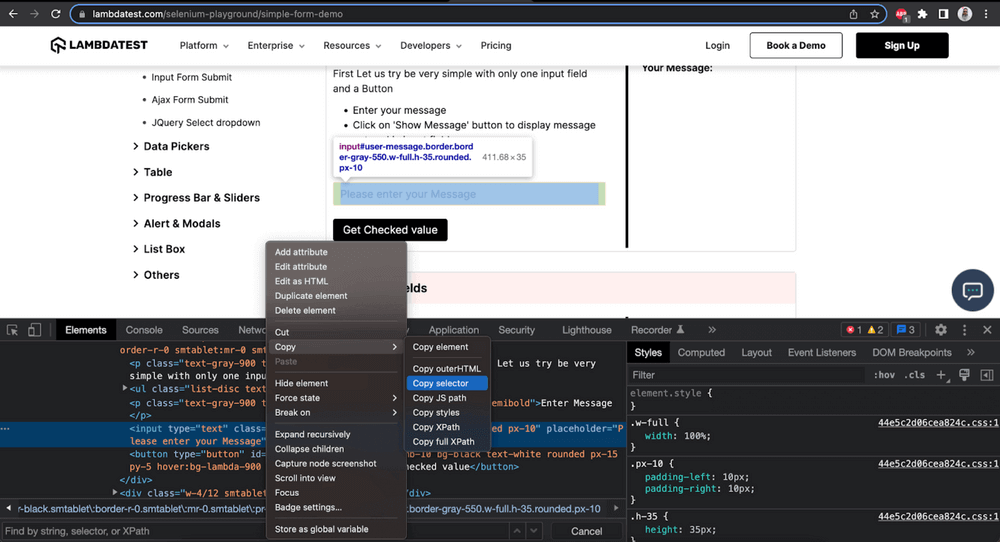
Right-click on the DOM element and select “Copy >> Copy selector.”
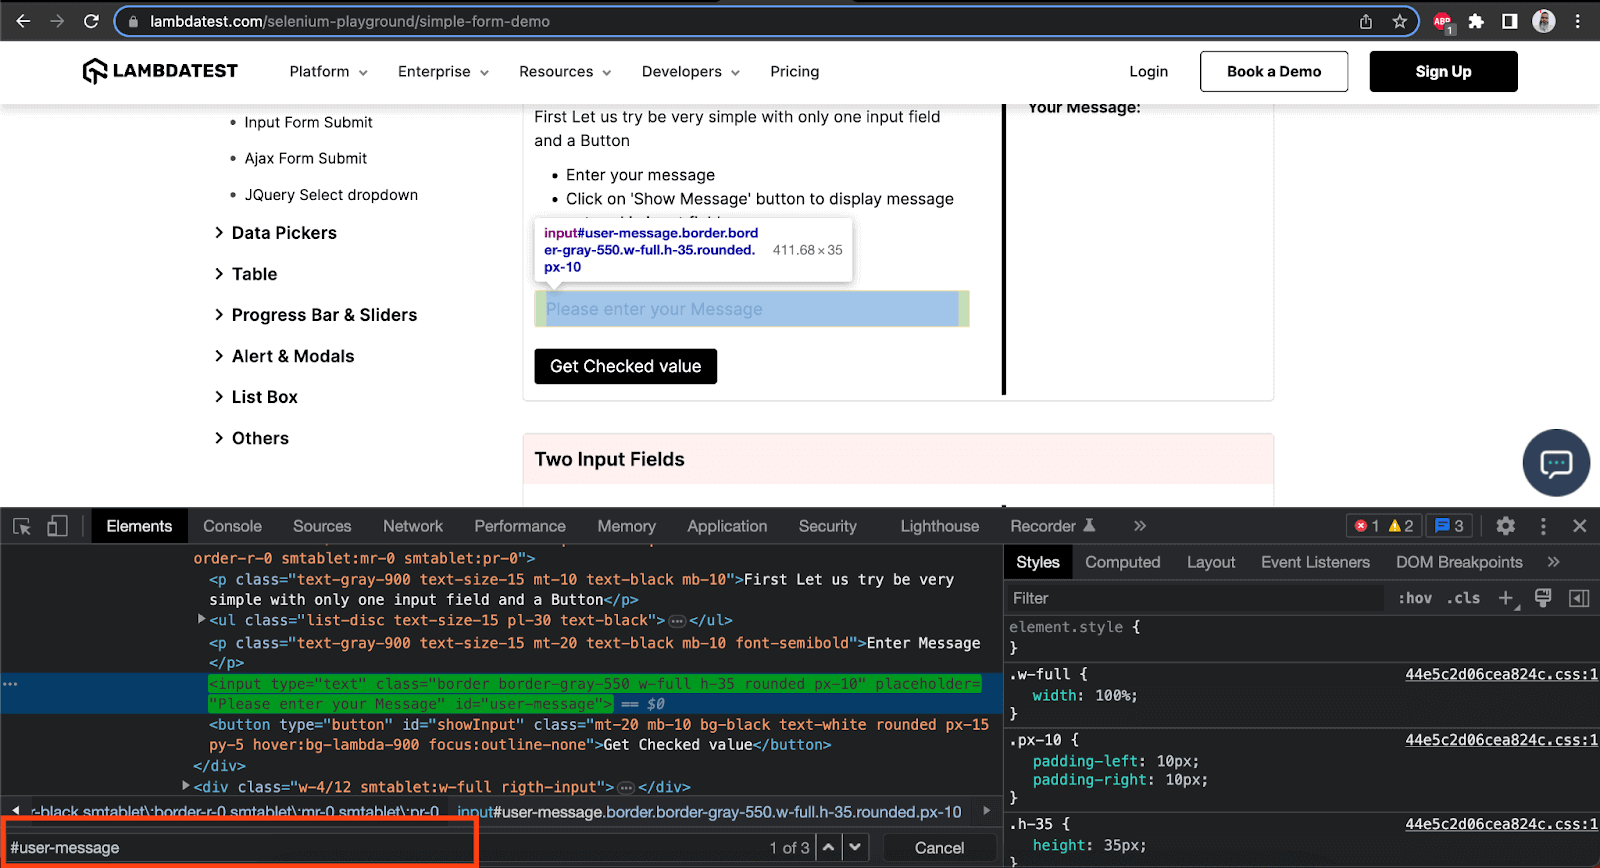
Press “Ctrl/Cmd + F” to open the finder in the “Inspect Element” window and paste the value we just copied by pressing “Ctrl/Cmd + V”. It should paste “#user-message", which is the ID of the “Enter Message” field.
Demonstration: Locating Web Elements using CSS Selectors in Selenium
Web elements can be located using the following locator strategies in CSS Selector in Selenium.
ID Locator in Selenium
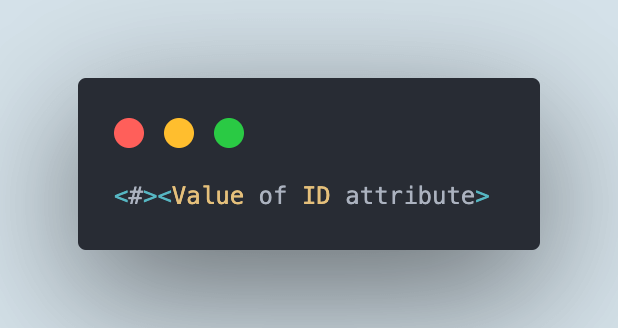
In CSS, an ID attribute is a unique identifier for locating a web element on the page. It is used using a “#” symbol followed by the ID.
Syntax
The following screenshot is of the Simple Form Demo from the LamdaTest’s Selenium Playground website.
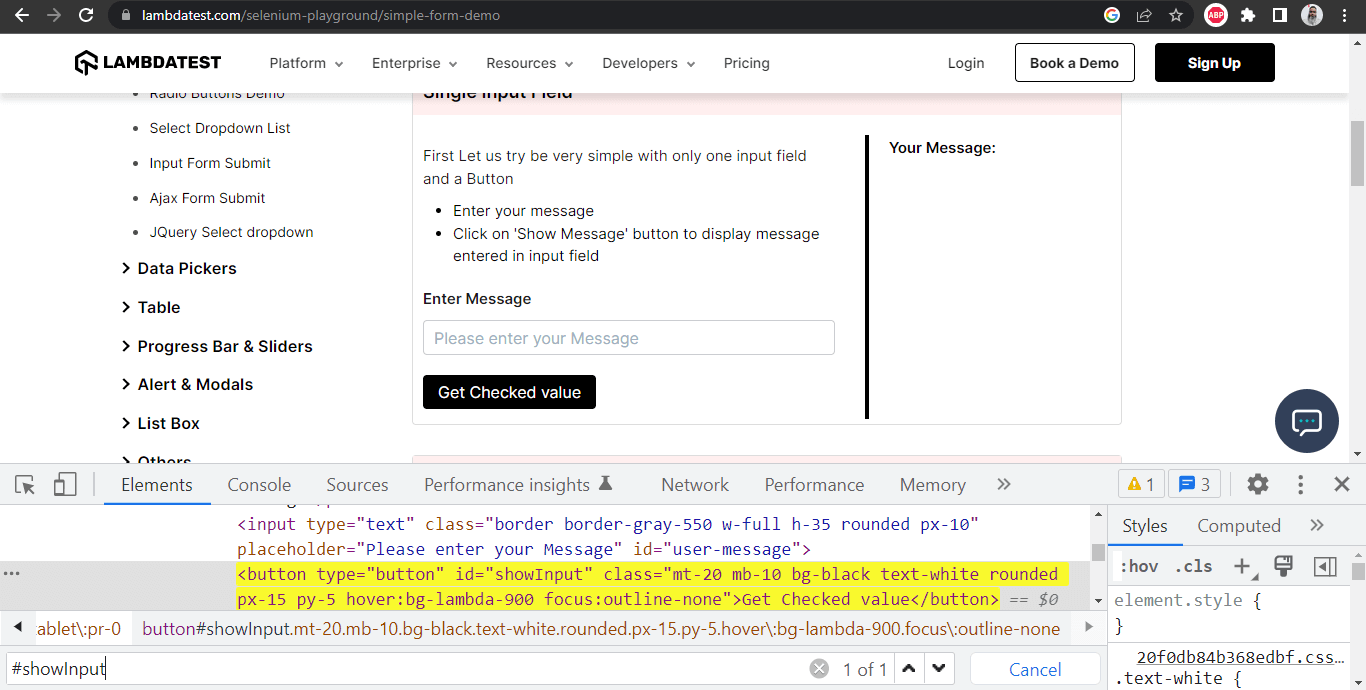
On this page, the “Get Checked Value” button is located using the “ID” locator. Here, we are using the “#showInput” CSS Selector in Selenium for locating the field.
ID with HTML TagName
A combination of ID and HTML TagName can be used as a CSS Selector in Selenium to locate the elements on the web page. It is used using the HTML TagName followed by the # symbol with the ID attribute.
Syntax
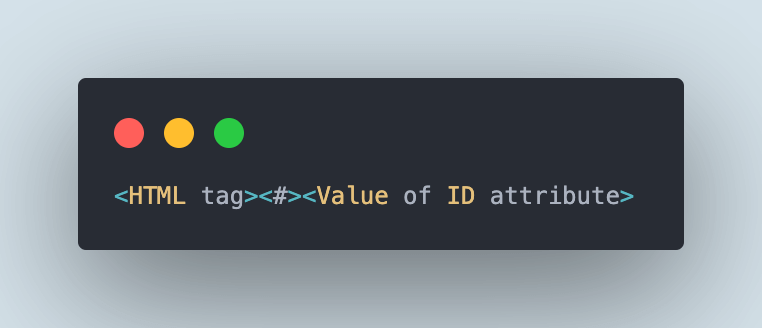
Let's take the Simple Form Demo page and locate the “Enter Message” field using an ID with TagName.
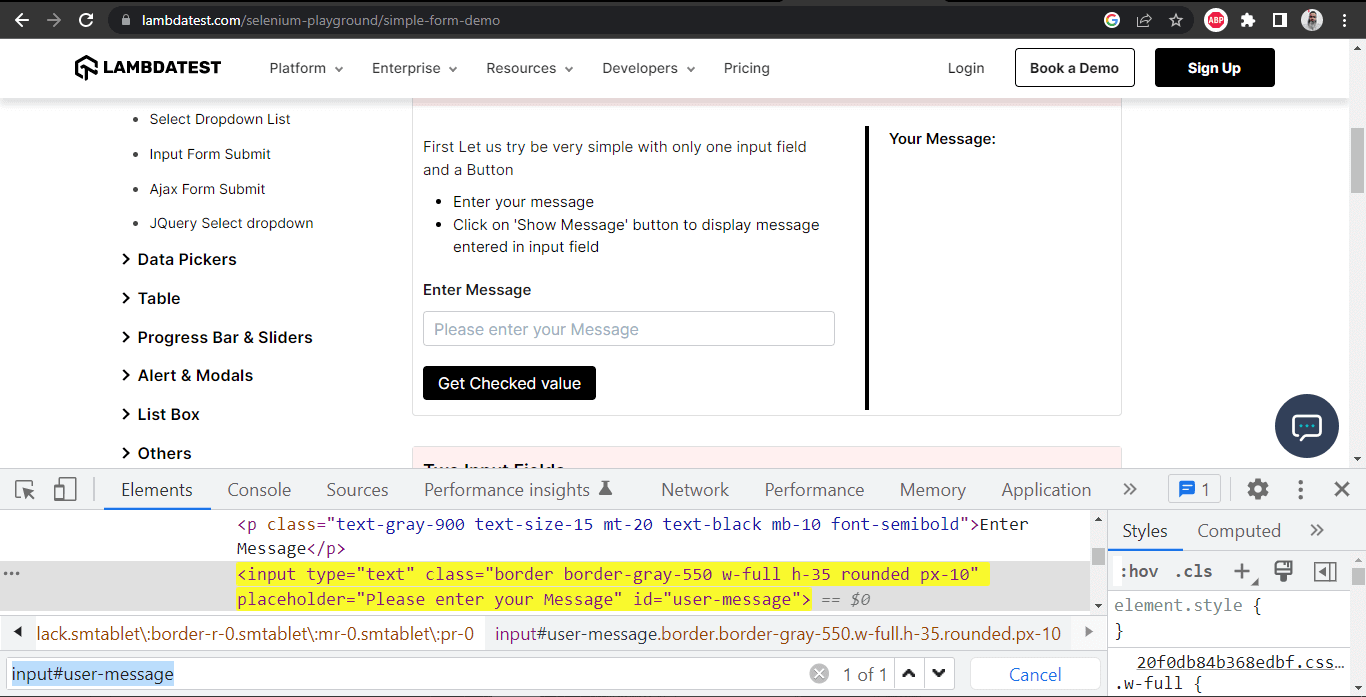
As we can see in the DOM of the page, input is the HTML TagName, and id is the user-message, so the CSS Selector for this field will be “input#user-message”.
ClassName
In CSS, a Class Selector can be created using the <.> dot character and then writing the Class Name. It will locate all the web elements with the respective Class Name provided as a selector.
Syntax
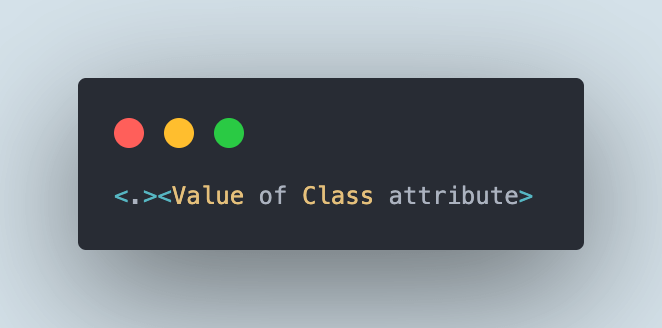
Let’s navigate to the Table Navigation page on LamdaTest’s Selenium Playground and locate the “Select Number Of Rows” field using the Class Name.
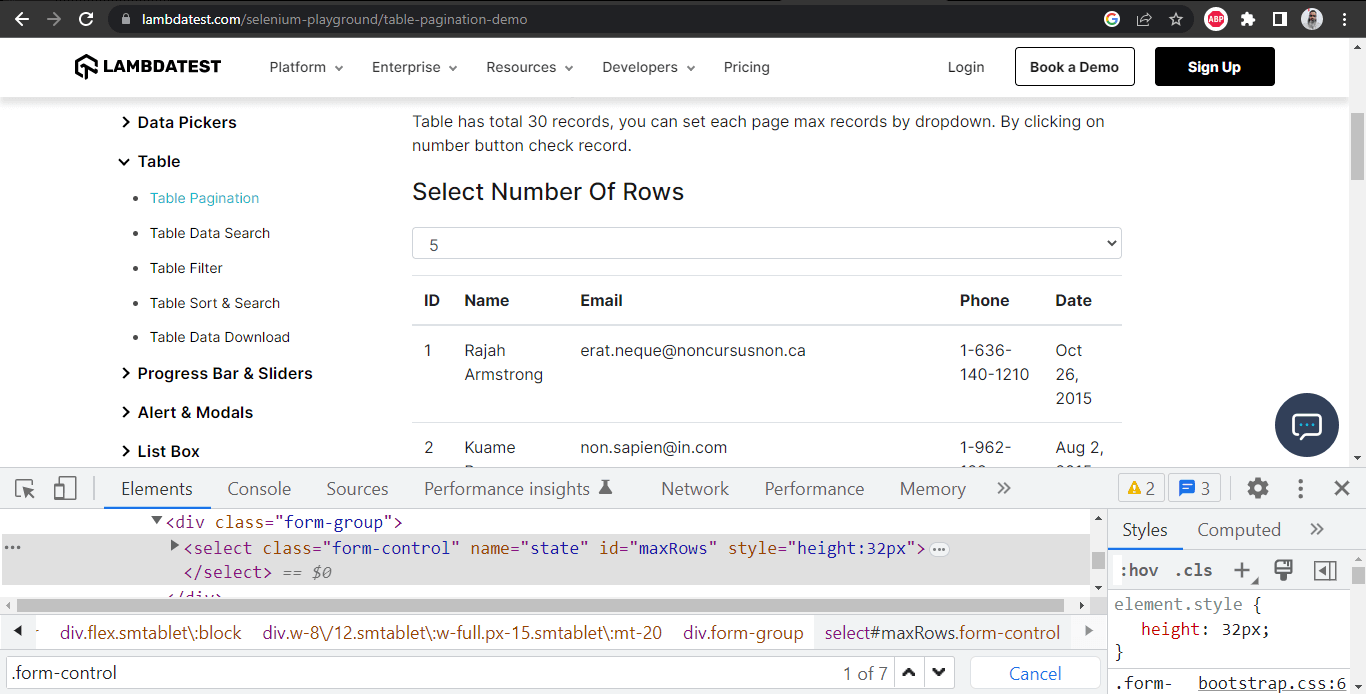
In the “Elements” tab within the “Developer Tools” window, we can see that the Class Name is “form-control”. So we can use the CSS Selector in Selenium as “.form-control”.
The point to note here is that a total of seven results appear for the Class Name “.form-control”. However, when we run the tests using Selenium WebDriver, it will locate the first element with the selector “.form-control”, the dropdown field for “Select Number Of Rows”.
ClassName with HTML TagName
Using CSS Selector in Selenium, a combination of ClassName and HTML TagName can also be used as a selector in CSS to locate the web elements.
Syntax
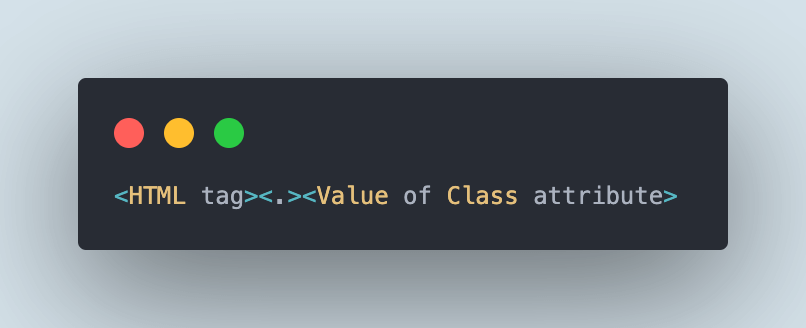
In the previous example of locating a web element using ClassName, we saw that there were multiple results found. Hence, to narrow the search and speed up the search of the element, we can use HTML TagName along with ClassName.
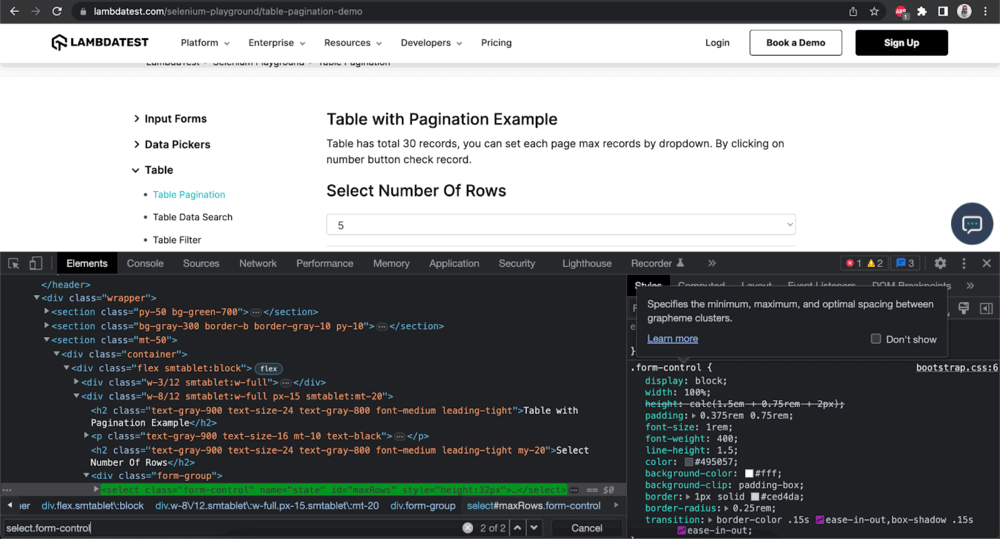
The CSS Selector in Selenium will be “select.form-control” where “select” is the HTML TagName and “form-control” is the ClassName.
Attributes
CSS Attributes can be or that will match the value based on the given attribute.
Syntax
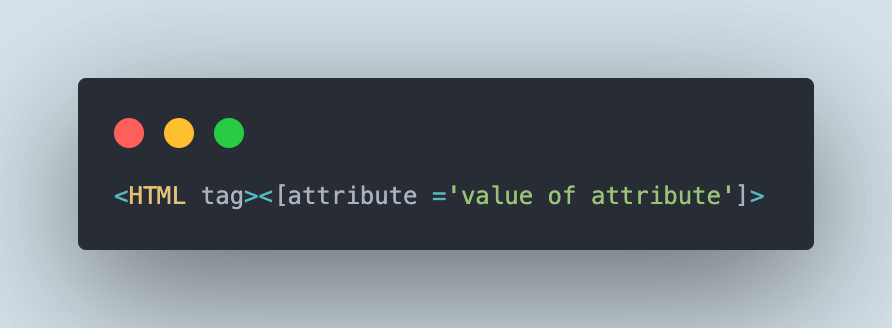
Let’s take an example of the Input Form page and locate the “Name” field.
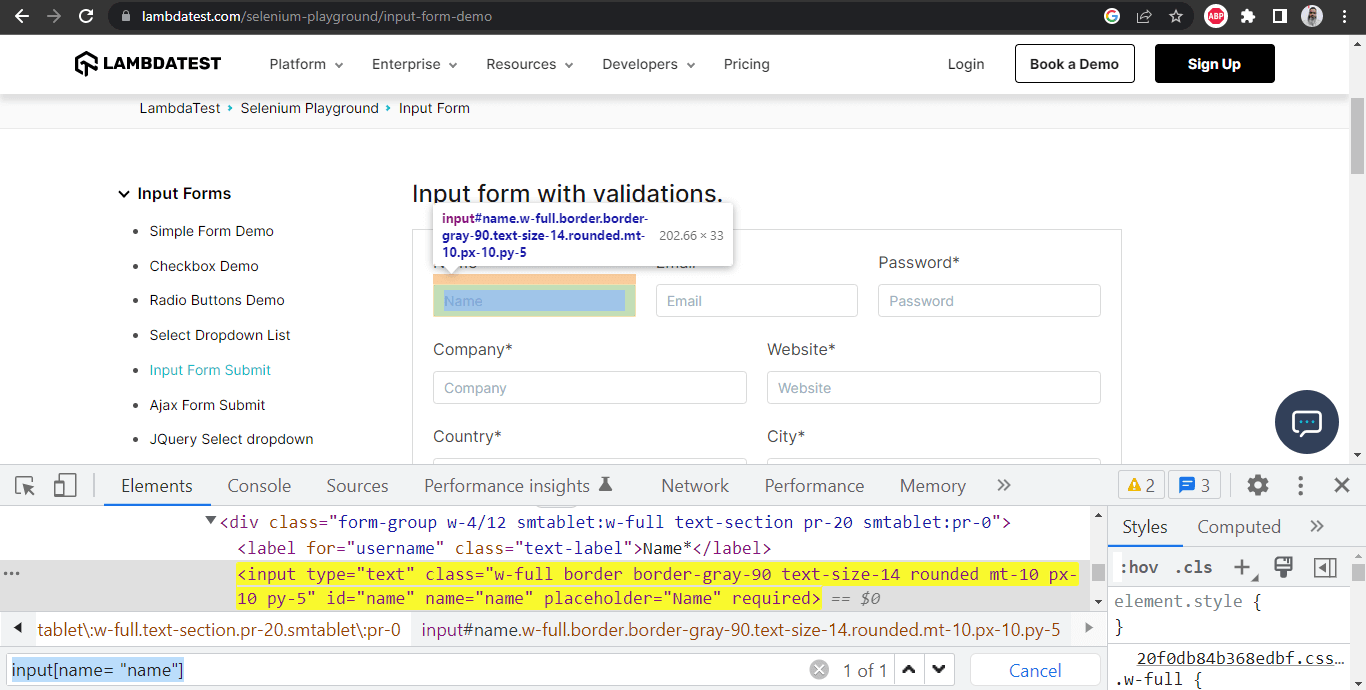
We can check in the DOM and find that the HTML TagName used for the “Name” field is “input”. Using the name attribute we can locate the field easily. The CSS Selector “input[name= "name"]” can be used for locating the name field.
Combination of type and name attributes
A combination of type and name attributes can be used as a CSS Selector in Selenium for locating a web element on the web page.
Let’s consider the Radio Button Demo page with multiple radio buttons with different attributes. Now, if we just try to locate the radio button with its type attribute that is “radio” we will get multiple results from the DOM.
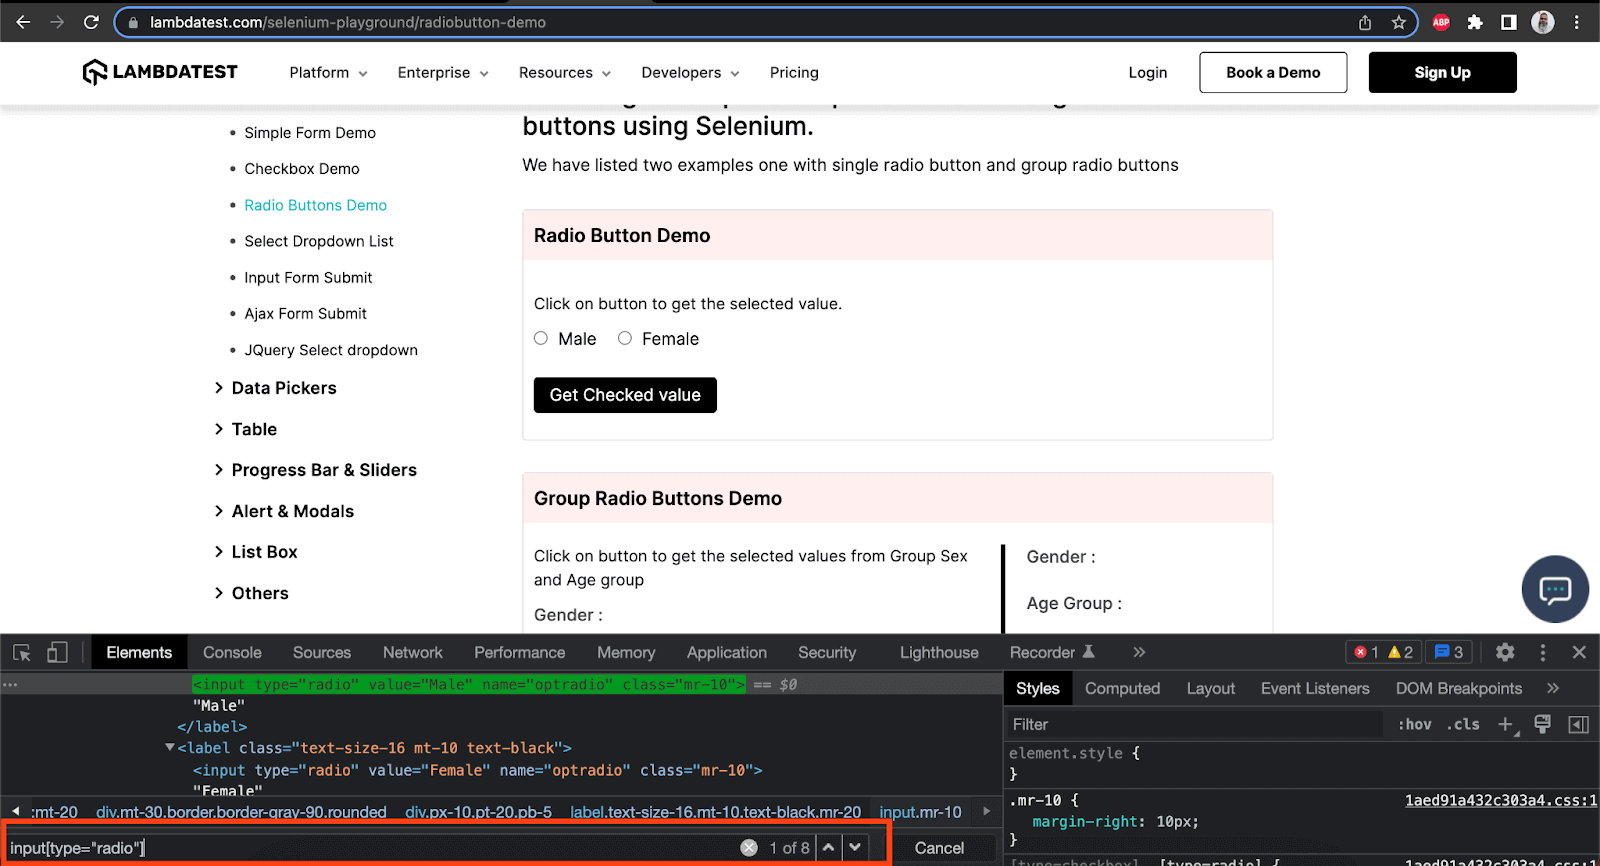
By using the CSS Selector in Selenium with only the type attribute - “input[type=”radio”]”, we get 8 search results. What if we need to work only with the first two radio buttons, i.e. “Male” and “Female”.
In such a case, using an additional attribute like name and type attribute can help us narrow the search and find the radio buttons quickly.
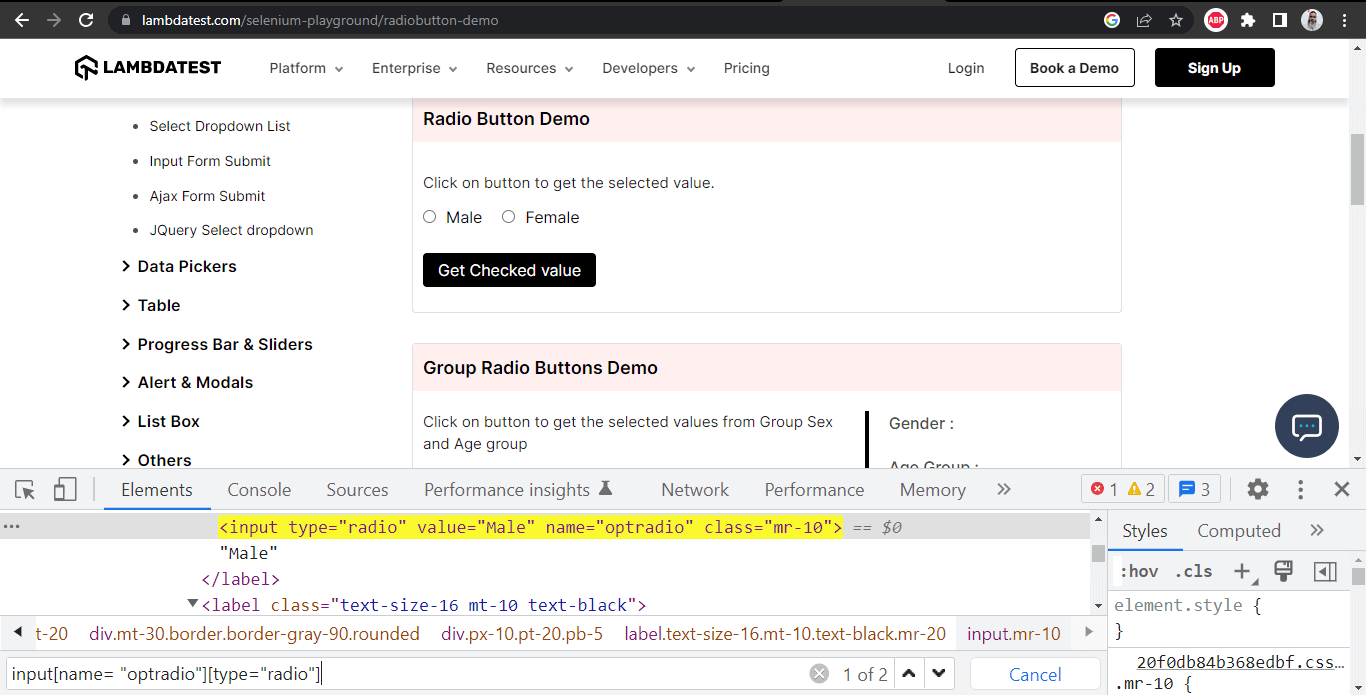
The CSS Selector in Selenium “input[name= "optradio"][type="radio"]” can be used here to locate the first two radio buttons, namely, “Male” and “Female”
Combination of type, name, and value attributes
A combination of value, type, and name attributes can also be used to locate the web element on a web page.
Let’s take an example of the Radio Button Demo page. Here, there are two radio buttons available, namely, “Male” and “Female”.
If we check the DOM of the web page, we can find that both radio buttons have the same value for the name attribute, that is, “optradio”. If we use this CSS Selector in Selenium, it will select the “Male” radio button. What if we want to select the “Female” radio button?
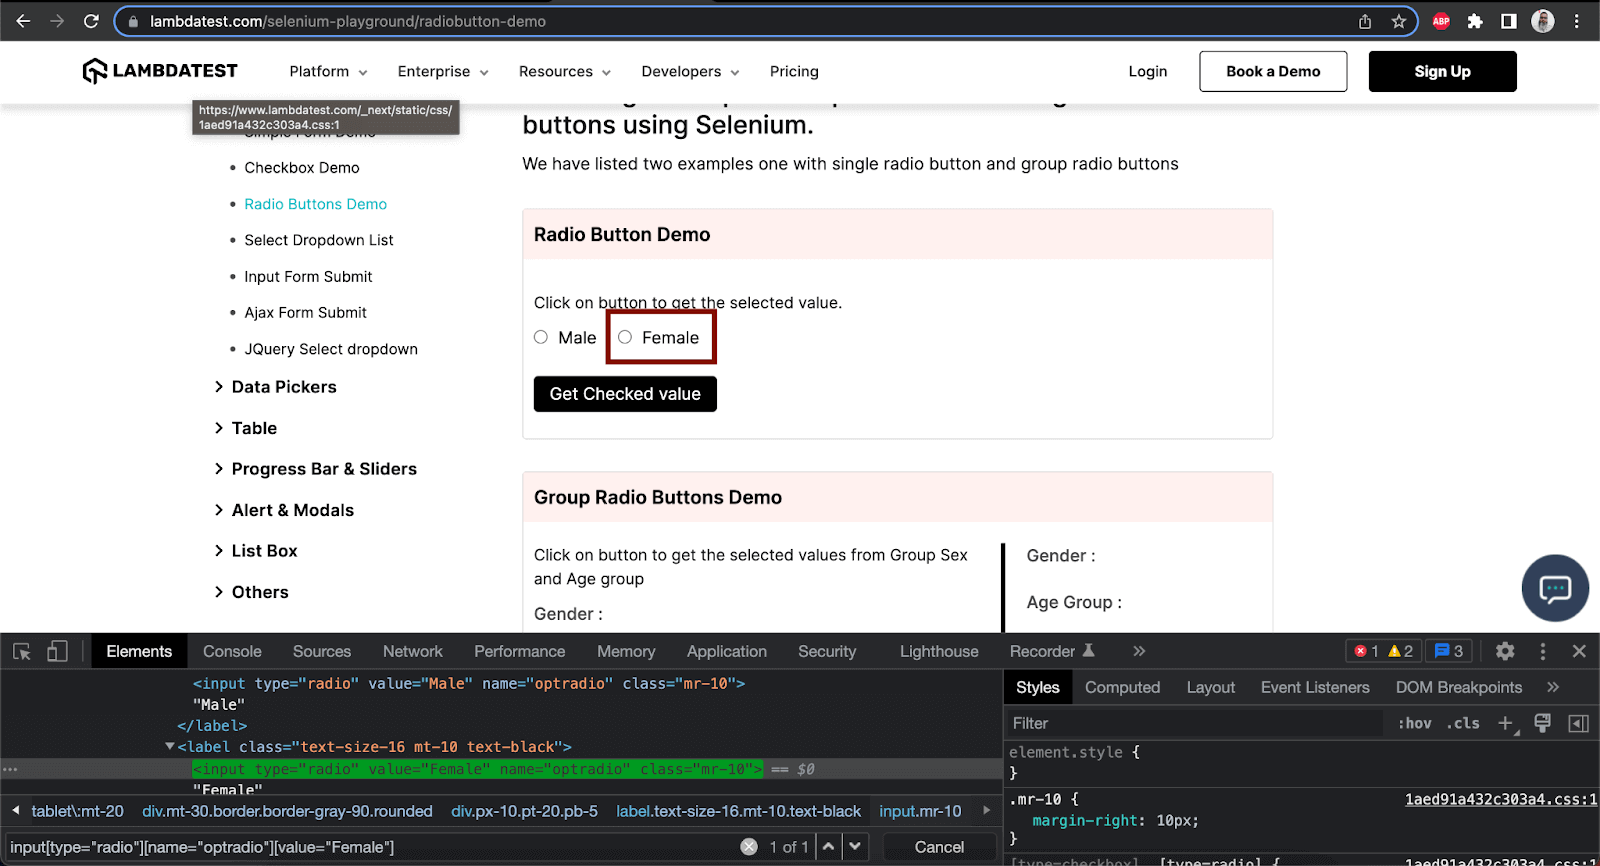
We can use the value attribute along with the type and name attributes. So, the CSS Selector that will be used in this case will be “input[name="optradio"][type="radio"][value=”Female”]”
SubString
Partial Strings can be used to locate a web element using CSS Selectors in Selenium. Matching partial Strings can be done in the following four ways:
- Matching a Prefix (Starts With)
- Match a Suffix(Ends With)
- Matching a Substring(Contains)
- Matching a word(Contains)
Let’s check out how to use partial strings as selectors to locate a web element.
Match a Prefix
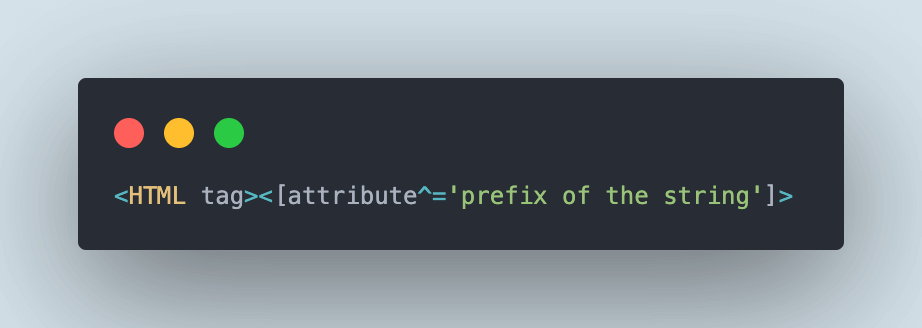
A CSS Selector can be created using the HTML TagName with an attribute using a matching prefix. The “^” character is used to match the string using a prefix.
Syntax
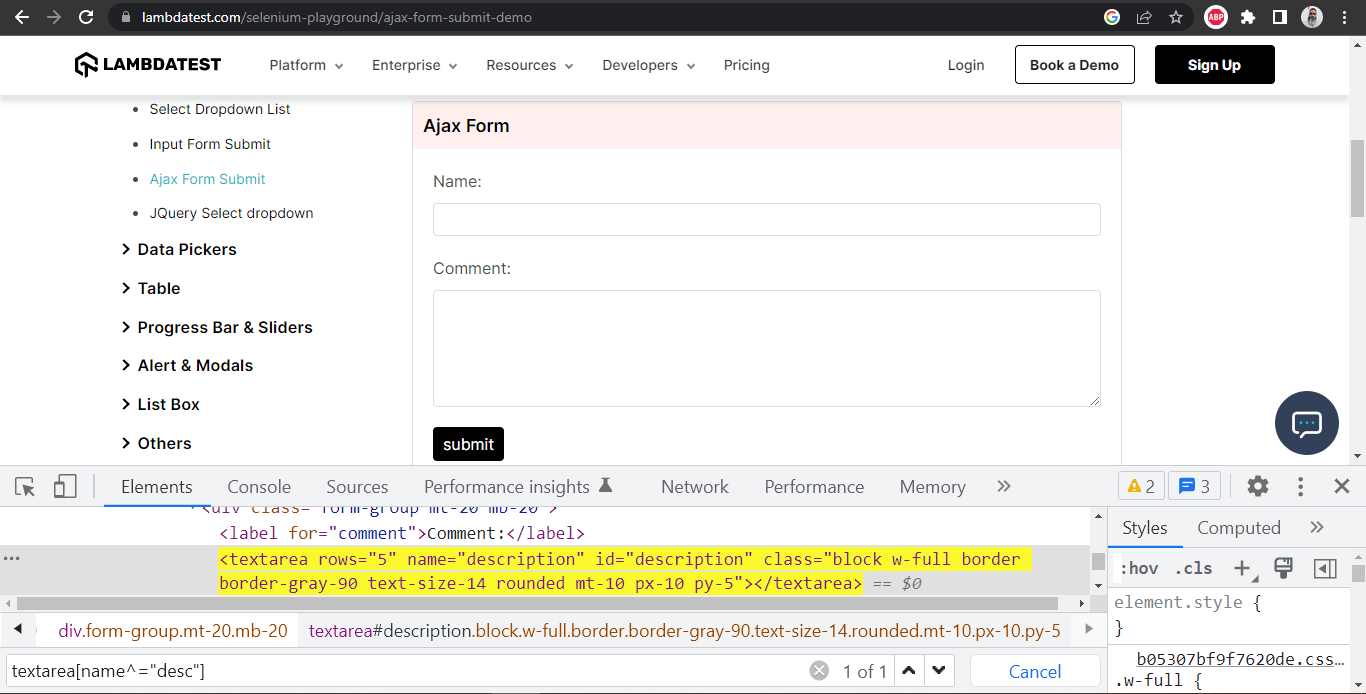
On the Ajax Form Submit page, let’s locate the “Comment” field. As per the DOM, the name attribute of the field has the value “description” and the HTML TagName is textarea.
We can make use of HTML TagName and name attribute and write the CSS Selector in Selenium as “textarea[name^="desc"]” and locate the “Comment” field.
Match a Suffix
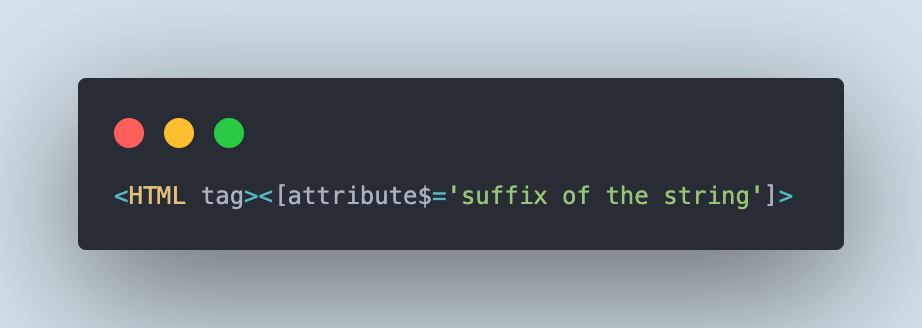
A CSS Selector can be created using the HTML TagName with an attribute using a matching suffix. The “$” character is used to match the string using a suffix.
Syntax
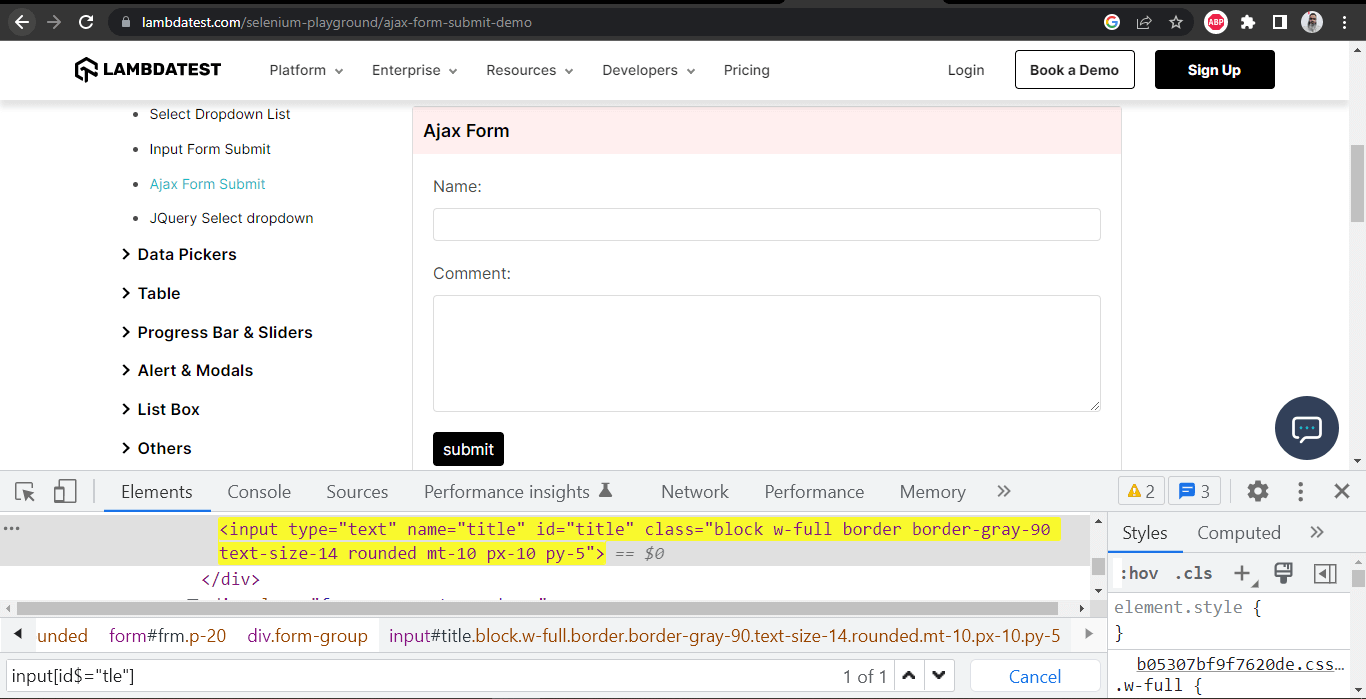
In the same Ajax Form Submit page, let’s locate the Name field by matching a suffix. In the DOM, we can check that the id for the “Name” field is “title” and the HTML TagName is “input”.
By combining both of these attributes we can create the Selector “input[id$=”tle”]”. Here. “tle” refers to the suffix for the word “title”.
Match a Substring
A CSS Selector can be created using the HTML TagName with an attribute using a matching substring. The “*” character is used to match the string using a substring.
Syntax
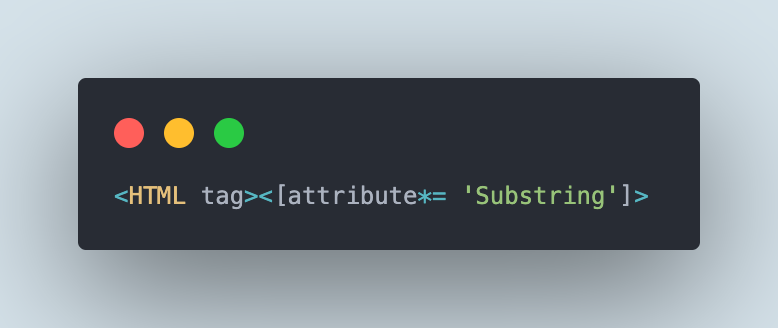
In the following example, let’s try to find all the web elements that have the role of “combobox” and this time, we will be using the substring to locate the web elements.
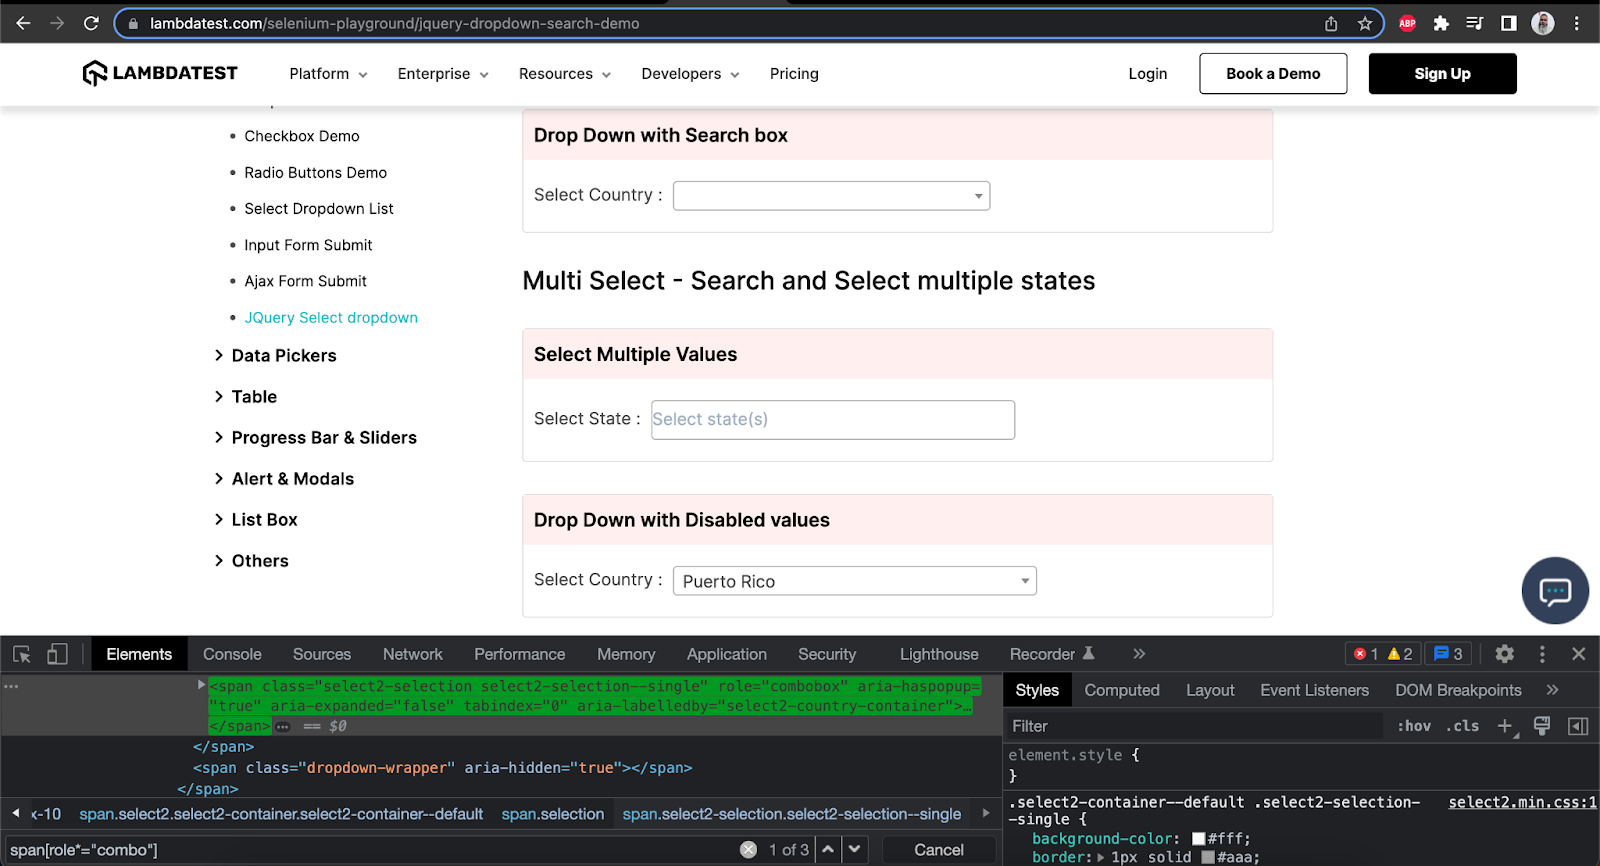
In the DOM, all the dropdown fields have the HTML TagName as “span”. Using the HTML TagName with role attribute, we can write the CSS Selector in Selenium as “span[role*="combo"]”.
Match a word
A CSS Selector can be created using the HTML TagName with an attribute using a matching word. The “~” character is used to match the word.
Syntax
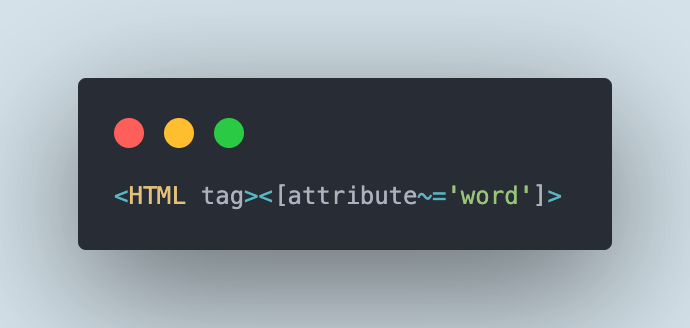
In the following example, on the Ajax Form Submit page, let's try to get the list of all the options available in the “Select Country” dropdown field.
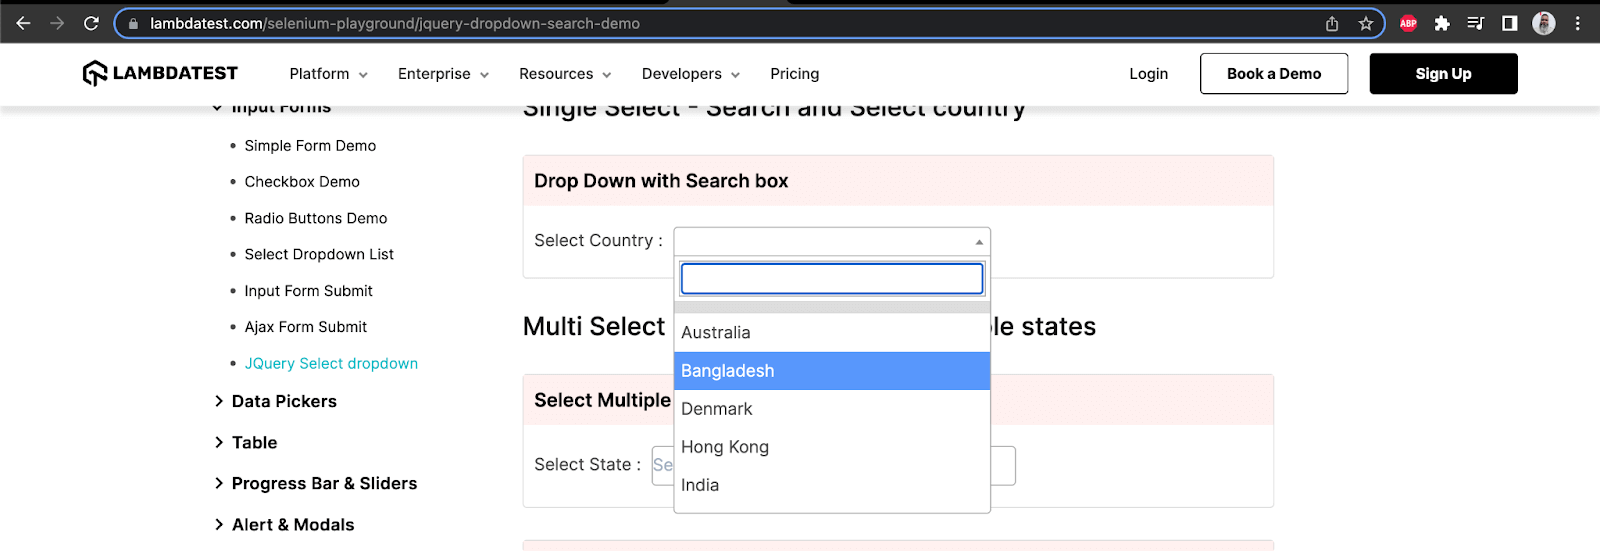
In the DOM, all the options have the class name “select2-results__option”, we can use the combination of ClassName along with HTML TagName that is “li” and write the CSS Selector in Selenium as “li[class~="select2-results__option"]” to get a list of all the options.
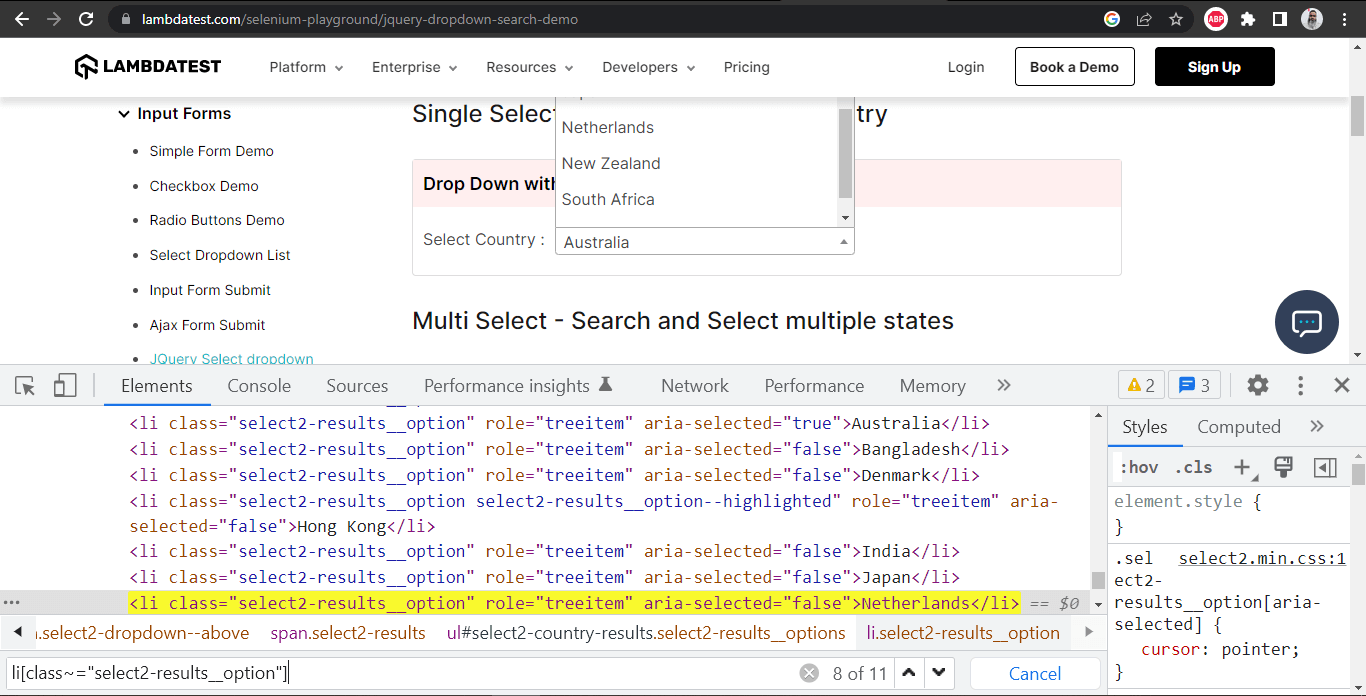
There are a total of 11 country names displayed in the dropdown, and we can see that the CSS Selector “li[class~="select2-results__option"]” fetches a total of 11 search results.
Selecting the first child
<HTML TagName> :first-of-type
While working with a dropdown list, we might come across a scenario where we must select the first element directly from the list. Here, this CSS locator strategy is handy for selecting the first child using HTML TagName using the “first-of-type” option.
Syntax
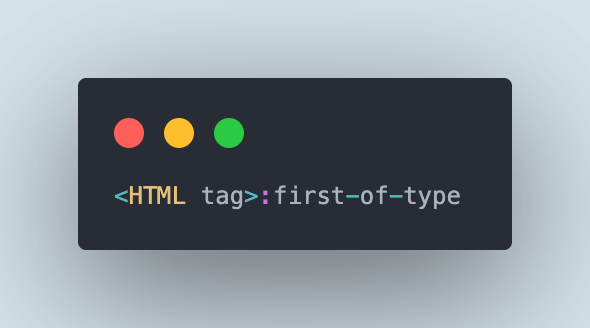
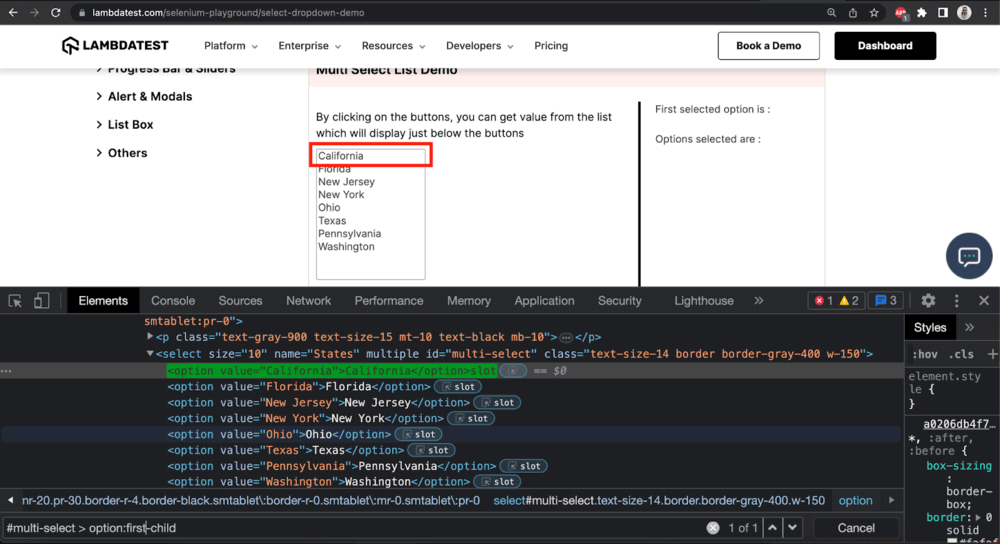
For example, on the Select Dropdown List page, if we want to select the first option that is California in the “Multi Select” dropdown box, we can make use of the CSS Selector “#multi-select > option:first-of-type”.
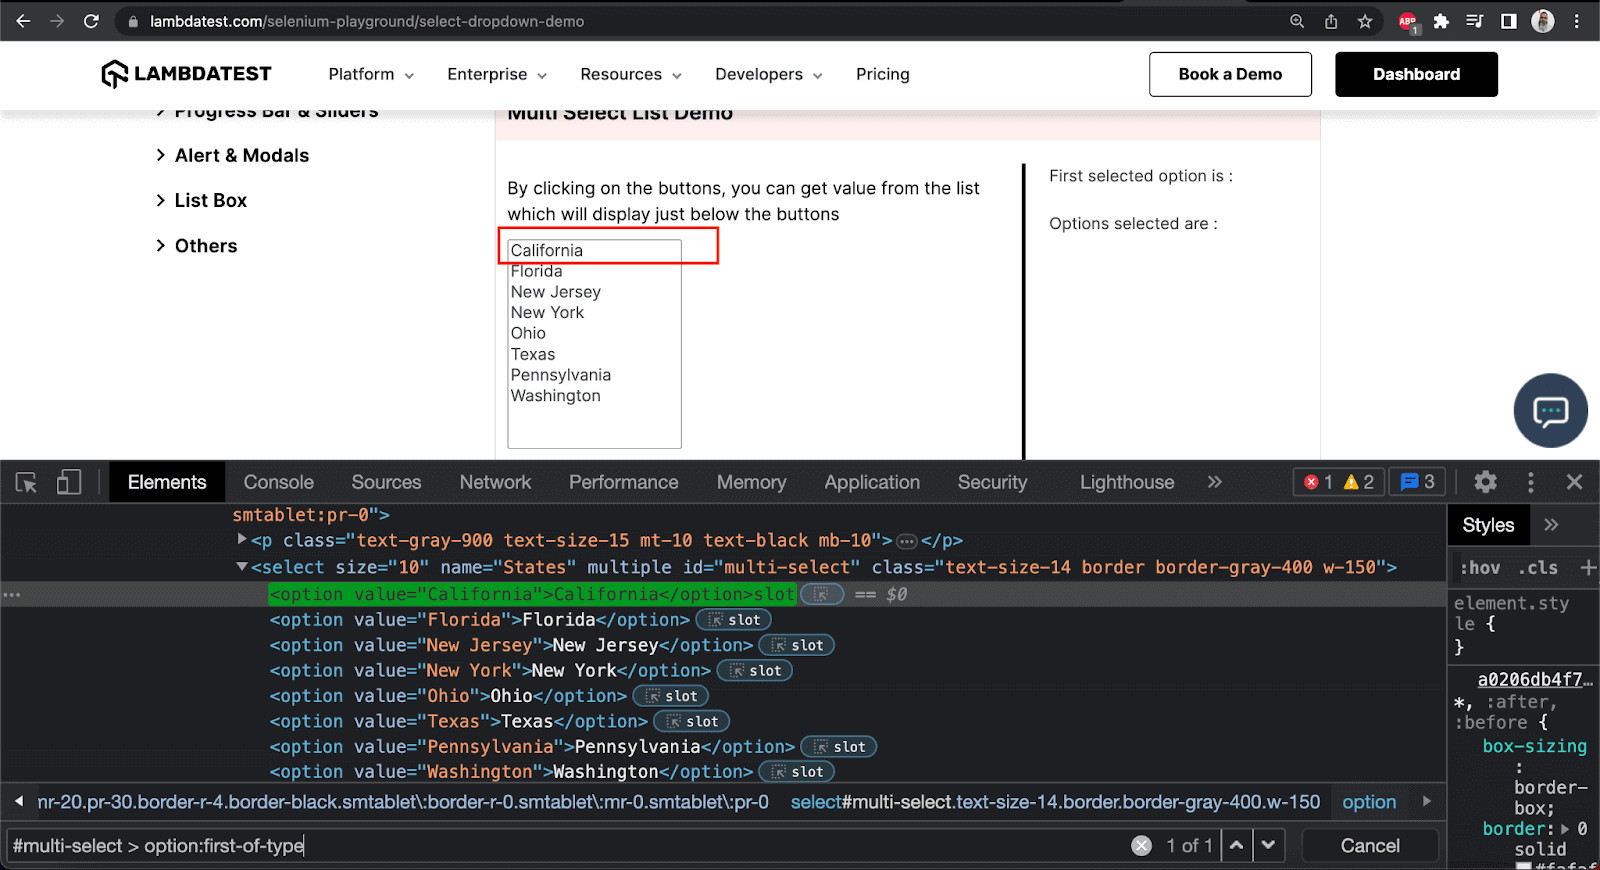
Here, #multi-select will locate the dropdown box and option:first-of-type will locate the first option - California.
<HTML TagName>: first-child
Similarly, we can also use the locator strategy HTML TagName along with the “first-child” option, it is also an option to select the first child from the list.
Syntax
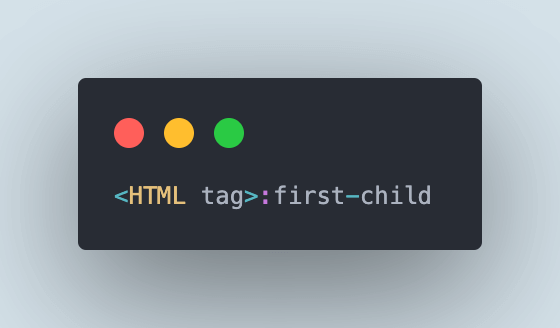
Similarly, we can also use the CSS Selector in Selenium “#multi-select > option:first-child” for locating the first child element in the dropdown list.
Selecting the last child
<HTML TagName>:last-of-type
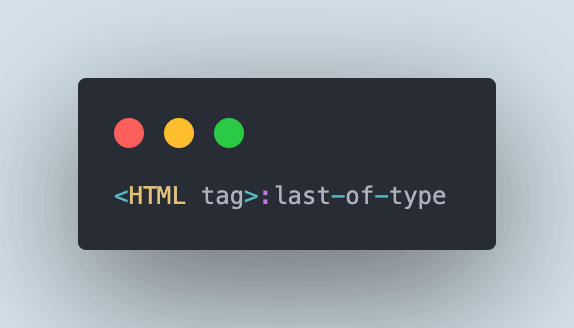
While working with a list, we can use the CSS Selector HTML TagName with the “last-of-type” option; it will directly select the last option from the list.
Syntax
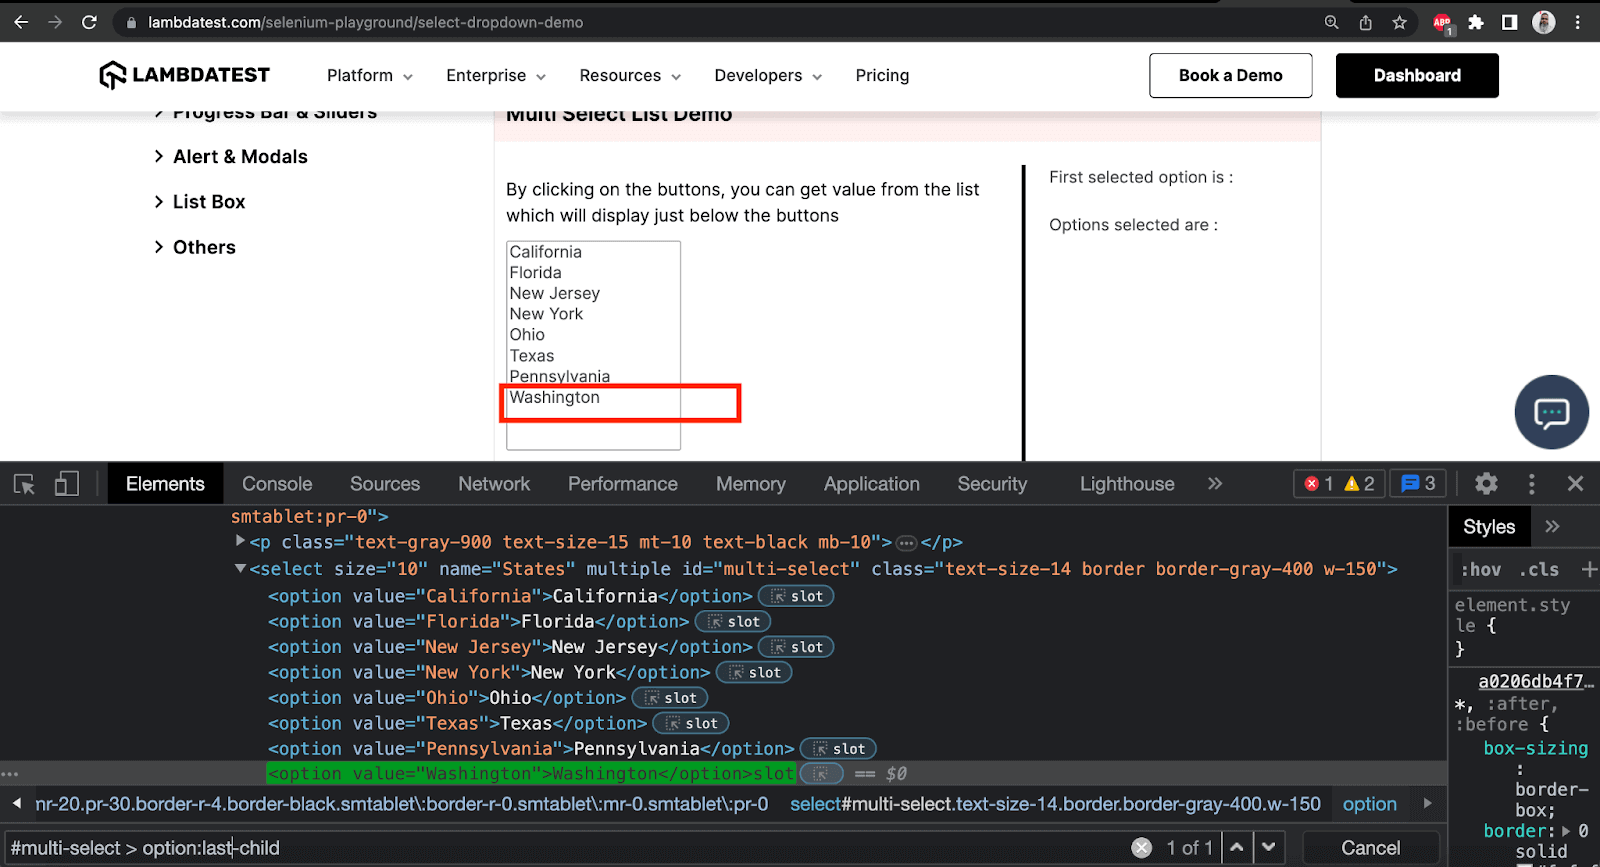
For example, on the Select Dropdown List page, if we want to select the last option, that is Washington, in the “Multi Select” dropdown box.
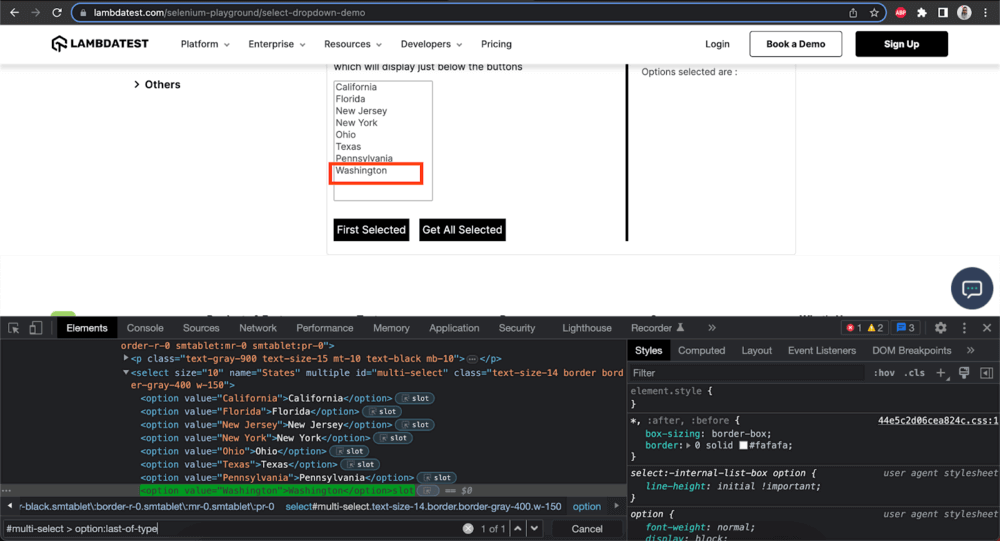
We can use the CSS Selector “#multi-select > option:last-of-type”.
Here, #multi-select will locate the dropdown box and option:last-of-type will locate the last option - Washington.
<HTML TagName>: last-child
Similarly, the “last-child” option, along with the HTML TagName, can also be used to select the child element from the list.
Syntax
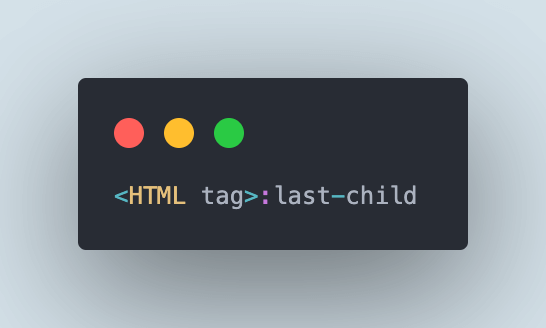
Here, in this example, we can use CSS Selector “#multi-select > option:last-child” to locate the last element from the list, that is Washington.
:nth-child(n)
The “nth-child” matches every element that is the nth child of its parent.
Syntax
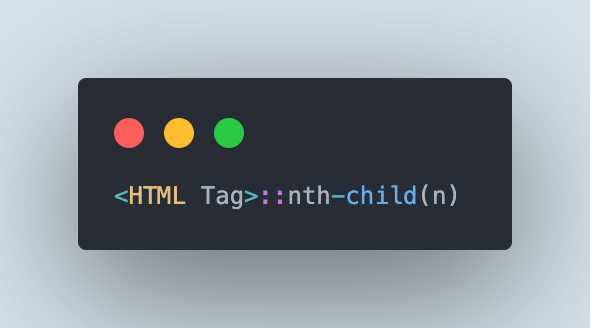
For example, in a list that has 15 elements, if we want to select the 3rd or 5th, or 10th element directly, we can make use of the nth-child(n) locator strategy.
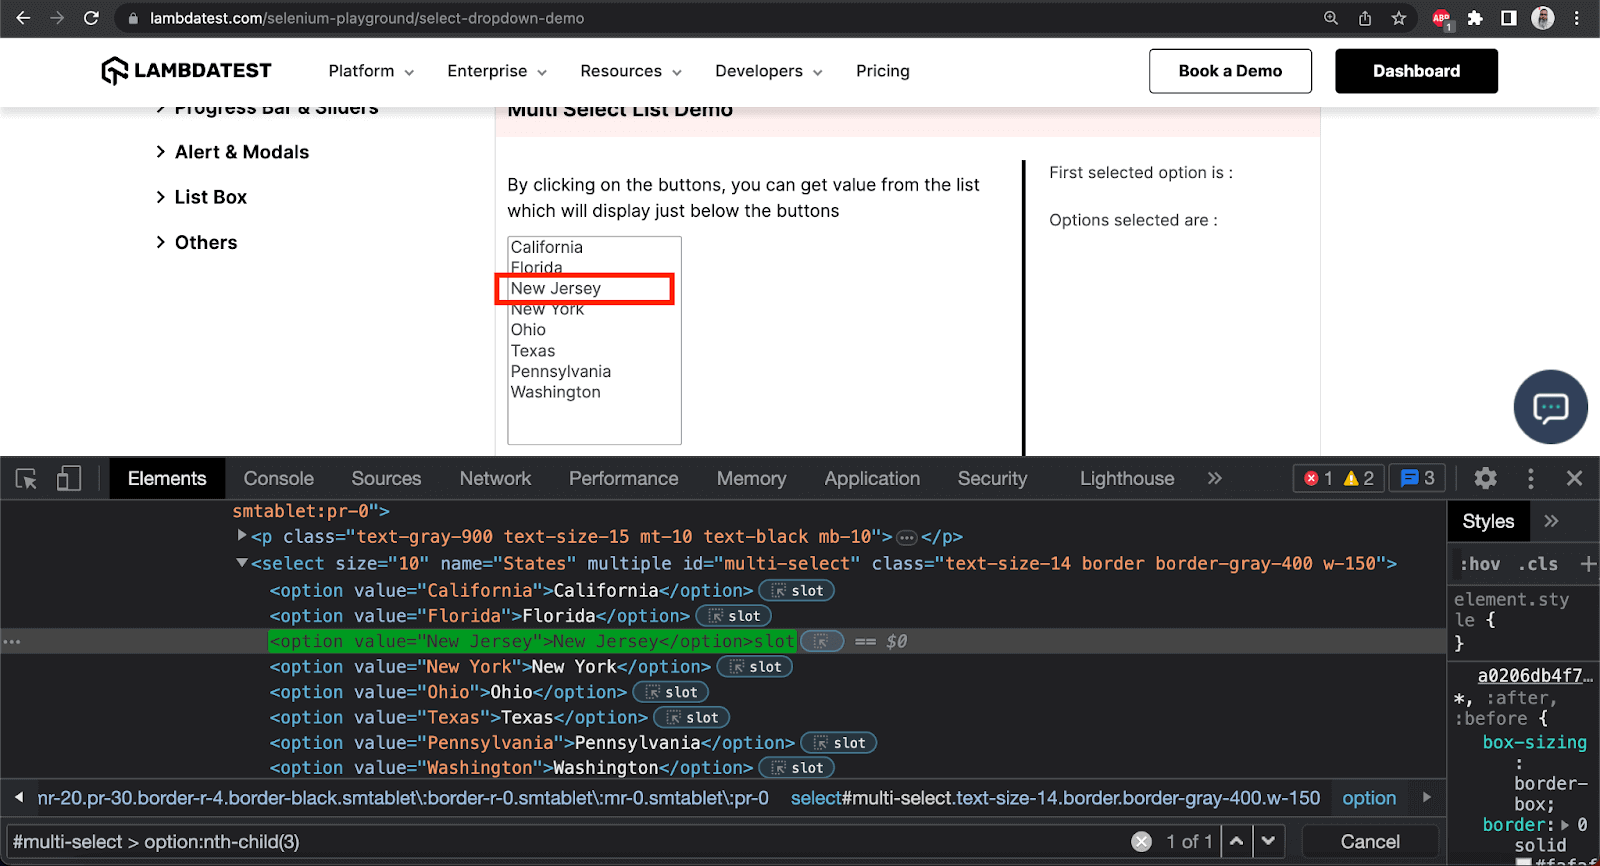
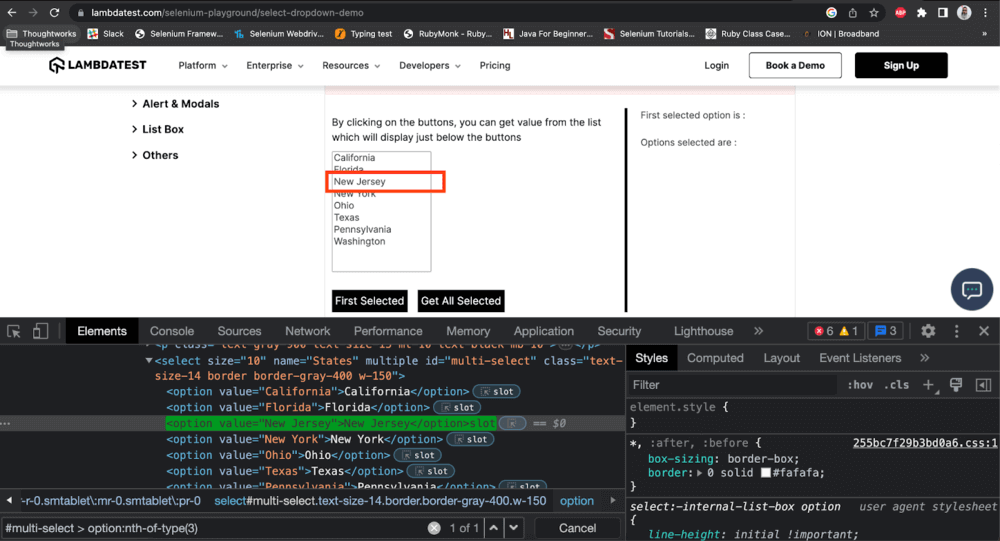
On the Select Dropdown List page, if we want to select the 3rd option, which is “New Jersey”, from the “Multi Select” dropdown. We can use the CSS Selector “#multi-select > option:nth-child(3)”.
:nth-of-type(n)
The nth-of-type(n) locator strategy can be used for locating the nth element from the list. It is the same as the “:nth-child(n)” option.
Syntax
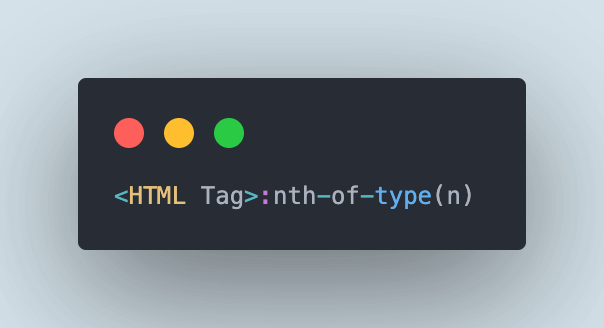
In the same example of the Select Dropdown List page, we can make use of the CSS Selector “#multi-select > option:nth-child(3)” to select the option “New Jersey” from the Multi Dropdown list.
Conclusion
To conclude, mastering CSS Selectors in Selenium opens up huge possibilities for web automation testing. By understanding the different types of CSS Selectors in Selenium and their syntax, we can easily find the specific web elements based on their attributes, HTML TagNames, ClassNames, etc.
CSS Selectors Selenium provides a powerful and efficient way to find and interact with the elements on the web page and allows us to write robust, stable, and maintainable multi-dropdown scripts.
Happy Testing!!
About The Author
Faisal is a Software Testing Professional having 14+ years of experience in automation as well as manual testing. He is a QA, freelancer, blogger, and open-source contributor. He loves learning new tools and technologies and sharing his experience by writing blogs. You can follow him in Twitter.
On this page
- Overview
- Quick Recap: Benefits of Selenium WebDriver
- Automating Web Applications using Selenium WebDriver
- Locators in Selenium WebDriver
- What are CSS Selectors?
- CSS Selector Strategies
- How to Copy CSS Selectors using Developer Tools?
- Demonstration: Locating Web Elements using CSS Selectors in Selenium
- Frequently Asked Questions (FAQs)
Frequently asked questions
- General
Author's Profile
Reviewer's Profile

Himanshu Sheth
Himanshu Sheth is a seasoned technologist and blogger with more than 15+ years of diverse working experience. He currently works as the 'Lead Developer Evangelist' and 'Director, Technical Content Marketing' at LambdaTest. He is very active with the startup community in Bengaluru (and down South) and loves interacting with passionate founders on his personal blog (which he has been maintaining since last 15+ years).
Did you find this page helpful?
More Hubs
Try LambdaTest Now !!
Get 100 minutes of automation test minutes FREE!!

 Christmas Deal is on: Save 25% off on select annual plans for 1st year.
